

If you can’t run the import yourself (for example, your machines run only Windows), request a managed import instead.
Requirements for the import host
- A Unix machine with
bashandcron - Docker Engine 20.10 or newer, with the Docker Compose plugin 2.17 or newer
- Network access to your Perforce server and to Diversion over HTTPS
- Optional:
curland the AWS CLI. Without them, the script runs them from a container image instead.
Set up the import in the Diversion app
1
Open the Perforce import page
In the Diversion app, click New repository and choose Import from P4. You can also choose Import from Perforce at the bottom of the repository menu in the breadcrumbs.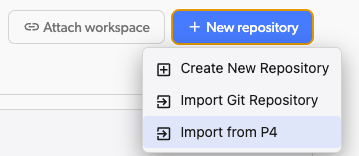
On self-hosted installs, Import from P4 opens a request form instead, and the Diversion team runs the import for you.
2
Download the import script
Click Download p4_import_bootstrap.sh. The script is the same for every import, and you can download it from this page at any time.
3
Name the new repository
The repository name is filled in from the depot name; change it if you like.
The repository must belong to an organization. If you don’t have one yet, you can create it here.
4
Fill in the import settings
See Import settings below for what each field does.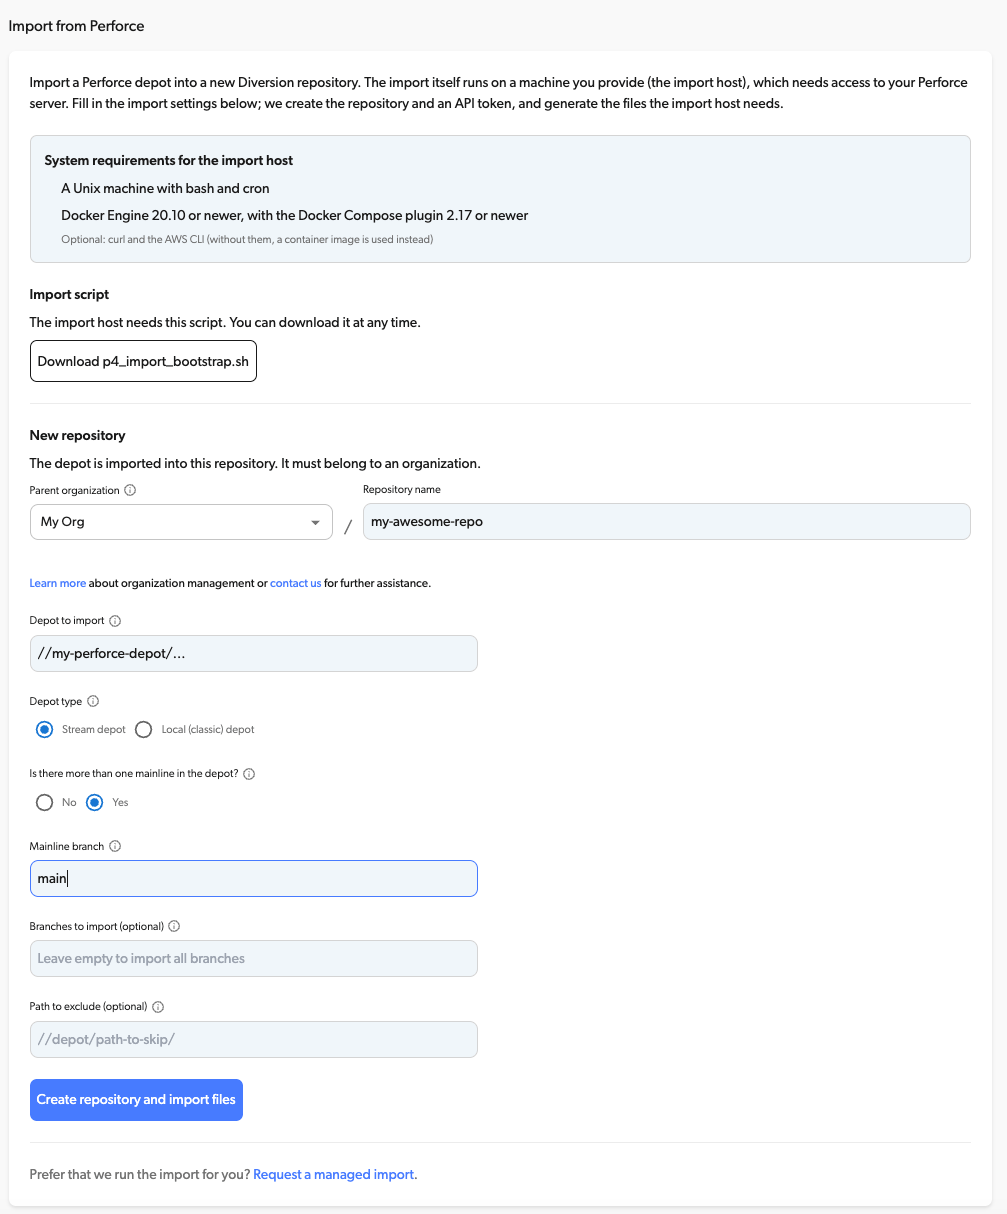
5
Click 'Create repository and import files'
Diversion creates the repository, an API token, and your import configuration.
6
Download local.env
Click Download local.env. The file contains the API token, your repository ID and the setup steps.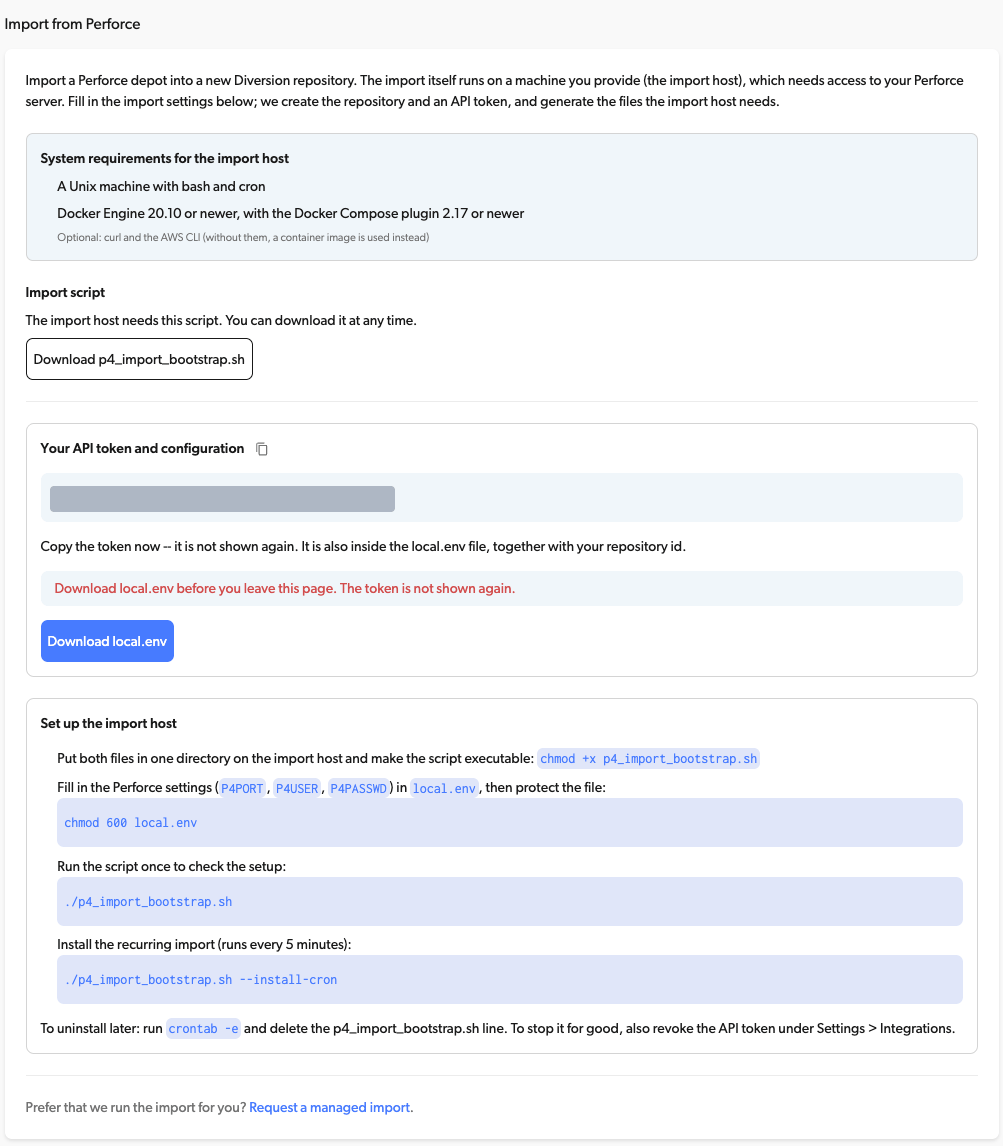
Import settings
Protect local.env
local.env holds an API token with admin access to your Diversion account.
Treat it like a password:
- Keep it only on the import host, readable only by the user that runs the import (
chmod 600 local.env, as in the steps below). - Don’t commit it to version control, share it in chat or email, or copy it to other machines.
Run the import on the import host
Run these steps as the user that will run the import — a user with access to Docker. Don’t usesudo: it would install the schedule in root’s crontab.
1
Put both files in one directory
Copy
p4_import_bootstrap.sh and local.env into the same directory on the import host, for example /opt/dv-p4-import, and cd into it.2
Make the script executable
3
Fill in your Perforce settings
Open Leave
local.env and fill in the Perforce connection at the bottom of the file:API_DOMAIN, API_TOKEN and REPO_ID as generated.4
Protect local.env
5
Run the script once to check the setup
Remote env changed -- recreating: ..., and docker ps shows the import container running.
The first run can take a few minutes while images download.6
Schedule the import
bootstrap.log.
Each run restarts the import if it stopped and applies any change to its configuration.Follow the import’s progress
Open the new repository in Diversion. Until the import finishes, the repository page shows its progress through three stages: Reading history, Preparing history and Uploading files. Commits, branches and files appear once history is ready. Files open as soon as their contents are uploaded. Large depots take a long time to import. The import host must stay on and connected until it finishes.Stop or remove the import
The crontab entry keeps the import running until you remove it.Keep the crontab entry if you need continuous import from Perforce, or export back to it, after the initial import. Contact support to enable continuous import or export.
- Run
crontab -eand delete the line containingp4_import_bootstrap.sh. - Delete
local.envfrom the import host.
Troubleshooting
The script writes errors to its output and, once scheduled, tobootstrap.log in the import directory.
Recover a lost local.env
If you left the Import from Perforce page before downloadinglocal.env, don’t start a new import: the repository and its import settings already exist. Recreate the file instead.
1
Create local.env
On the import host, create
local.env next to p4_import_bootstrap.sh with this content:local.env
2
Fill in REPO_ID
In the Diversion app, click the repository name in the breadcrumbs to open the list of your organization’s repositories. Hover over the row of the new repository and click the Copy repo ID button that appears. Paste the ID as 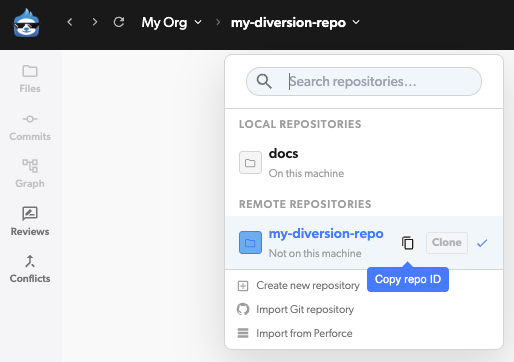
REPO_ID.3
Fill in API_TOKEN
If you copied the token from the import page, paste it as 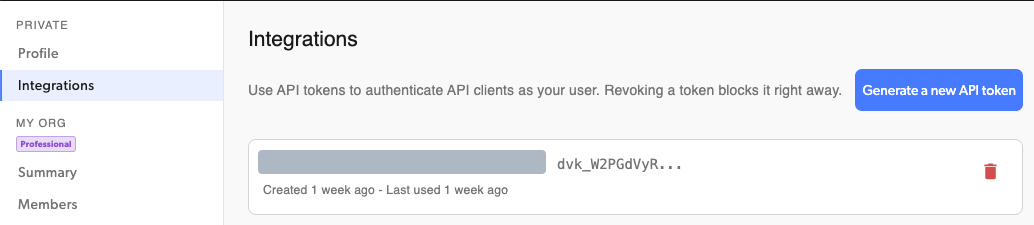
API_TOKEN.If you didn’t, generate a new one:- Click your avatar (top-right) and choose Integrations from the menu.
- Click Generate a new API token, give it a name, and click Generate token. Generate it while signed in as the user who created the repository, so the token has admin access to it.
- Copy the token and paste it as
API_TOKEN. It’s shown only once.
4
Continue the setup
Follow Run the import on the import host from the start.