Overview
Webhooks are HTTP callbacks that are triggered by specific repository events. When an event occurs, Diversion sends a POST request to the configured endpoint URL with event details in the request body.Key Features
- Event-driven notifications: Real-time notifications for repository events
- Secure delivery: HMAC-SHA256 signature verification for request authenticity
- Reliable delivery: Automatic retries with exponential backoff
- Flexible configuration: Subscribe to specific event types per webhook
- Admin-only management: Repository admin access required
Supported Events
Currently, Diversion supports the following webhook events:| Event | Description | Payload |
|---|---|---|
commit_created | Triggered when a new commit is created | Commit details, repository info, author |
review_created | Triggered when a new review is created | Review details, repository info, author, reviewers |
review_merged | Triggered when a review is merged | Review details, merge commit, repository info, author, reviewers |
Managing Webhooks
Webhooks can be managed through the web application. Access requires repository admin permissions.Web Interface
Click your profile avatar → Your organizations → in the settings sidebar, under the Repositories section, select Webhooks, then choose the repository from the dropdown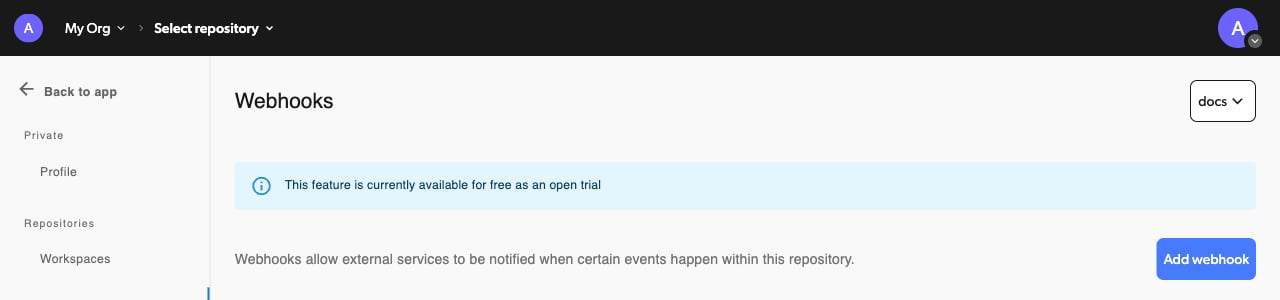
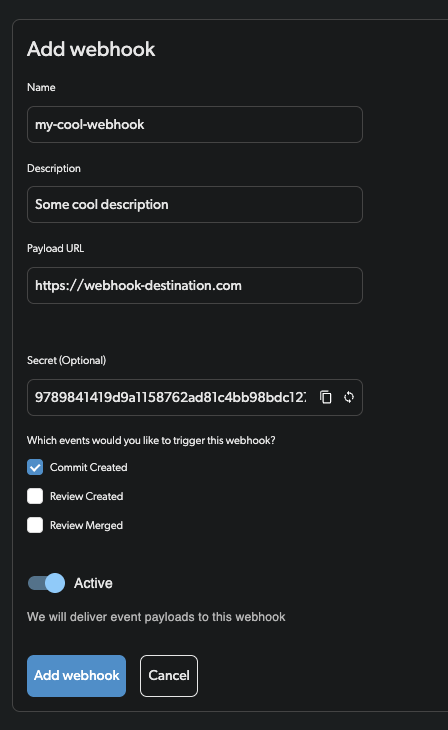
Creating a Webhook
- Click “Create Webhook”
- Fill in the webhook details:
- Name: Descriptive name for the webhook
- Description: Optional description of the webhook’s purpose
- Endpoint URL: HTTPS URL where events will be sent
- Secret: Webhook secret for signature verification (auto-generated if not provided)
- Events: Select which events should trigger the webhook
- Click “Create” to save the webhook
Webhook Secret
The webhook secret is used to generate HMAC-SHA256 signatures for request verification. Secrets must be:- Between 24-75 characters long
- Stored encrypted in the database
- Only visible during webhook creation
whsec_<base64-encoded-random-bytes>
Webhook Payload
All webhook payloads follow a consistent structure:Commit Created Event Payload
Review Created Event Payload
Review Merged Event Payload
Request Signature Verification
All webhook requests include signature headers for verification:webhook-id: Unique message identifierwebhook-timestamp: Request timestamp (Unix epoch in seconds)webhook-signature: HMAC-SHA256 signature (format:v1,base64signature)
Signature Verification Example
Diversion provides a reference implementation for webhook signature verification. Here’s an example in Python:Webhook Delivery
Diversion ensures reliable webhook delivery with the following features:- Automatic retries: Failed deliveries are retried with exponential backoff
- Delivery tracking: Monitor webhook delivery status
- Rate limiting: Prevents overwhelming destination servers
- Circuit breaking: Temporarily disables failing endpoints
Delivery Guarantees
- Webhooks are delivered at least once
- Events may arrive out of order
- Use the
timestampfield for event ordering - Implement idempotent handlers using the
idfield
Testing Webhooks
To test your signature verification implementation:- Create a test webhook with a known secret
- Use the example validation code provided above
- Compare against the reference AWS Lambda implementation
Best Practices
- Use HTTPS endpoints: HTTP endpoints are not supported for security
- Verify signatures: Always verify webhook signatures in production
- Handle retries: Make webhook handlers idempotent
- Respond quickly: Return 2xx status within 30 seconds
- Queue processing: For long-running tasks, queue work and respond immediately
- Monitor failures: Set up alerts for webhook delivery failures
Troubleshooting
Common Issues
-
Webhook not triggering
- Verify the webhook is active
- Check event type subscriptions
- Ensure you have admin access to the repository
-
Signature verification failing
- Confirm you’re using the correct secret
- Verify timestamp is within tolerance (5 minutes)
- Check signature format and parsing
-
Delivery failures
- Ensure endpoint is publicly accessible
- Check for SSL/TLS certificate issues
- Verify endpoint returns 2xx status code
- Review server logs for errors
Debugging Tips
- Use webhook testing tools like webhook.site for initial testing
- Enable debug logging in your webhook handler
- Test with curl using the expected payload format
- Contact support if you need help investigating delivery issues
Security Considerations
- Secret management: Store webhook secrets securely, never in code
- Payload validation: Validate all webhook data before processing
- Rate limiting: Implement rate limiting on webhook endpoints
- Authentication: Use webhook signatures as the only authentication method
- HTTPS only: Always use HTTPS endpoints for webhook delivery
Discord Webhook Integration
At the moment, direct Discord webhook integration is not supported. However, you can still connect Discord using a middleware service such as Zapier or Pipedream, which act as bridges between Discord and our platform.Using Pipedream to Integrate Discord Webhooks
-
Set Up Pipedream
- Create a Pipedream account and a new project
- Name your project and click Create Project
-
Create a Workflow
- Click + New → choose Workflow
- Name your workflow, uncheck “Send error notifications”, and click Create Workflow
-
Add a Trigger
- Click Add Trigger → select New HTTP / Webhook Requests
- Click Save and Continue
-
Add Discord Action
- Click the + symbol below your trigger → search and select Discord.
- Choose Send Message
- Select your Discord account
- Log in to Discord and select your server and channel
- Enter your message (e.g., “New commit!”) and close the action
- Here is a template for a more detailed message that includes the repo name, author, branch, commit id, commit message and a link to the commit:
- You can customize the message further by accessing other available fields from the commit created event payload
-
Test & Deploy
- Click Test to confirm the message appears in Discord
- Click on the trigger → copy the webhook URL
- Use this URL as the Payload URL when configuring your webhook in the Diversion app
- Click Deploy to activate the workflow
- Go to Diversion and paste this URL into Diversion and add the webhook
-
Configure the Webhook in Diversion
- Open the Diversion Desktop App or Web UI
- Click your profile avatar → Your organizations → in the settings sidebar, under the Repositories section, select Webhooks, then choose the repository from the dropdown
- Click Add Webhook
- In the Payload URL field, paste the webhook URL you copied from Pipedream
- Fill in the other webhook details
- Click Add webhook to activate the webhook