When to use shelves
- Switching context: Save work-in-progress before switching to another branch
- Experimenting: Try out changes without committing, easily revert if the experiment doesn’t work
- Working across machines: Shelve changes on one computer and apply them on another. Shelves are stored in the cloud per repository, so they are available from any workspace on the same repo.
Creating a shelf
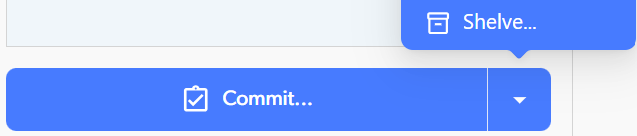
Use the shelf button in your workspace to create a shelf.- Select the files you want to shelve in your workspace
- Click Shelve… to open the naming dialog:
- Name your shelf
- Click Create shelf
Automatic shelves
When switching branches with uncommitted changes, a popup menu will ask what to do with them.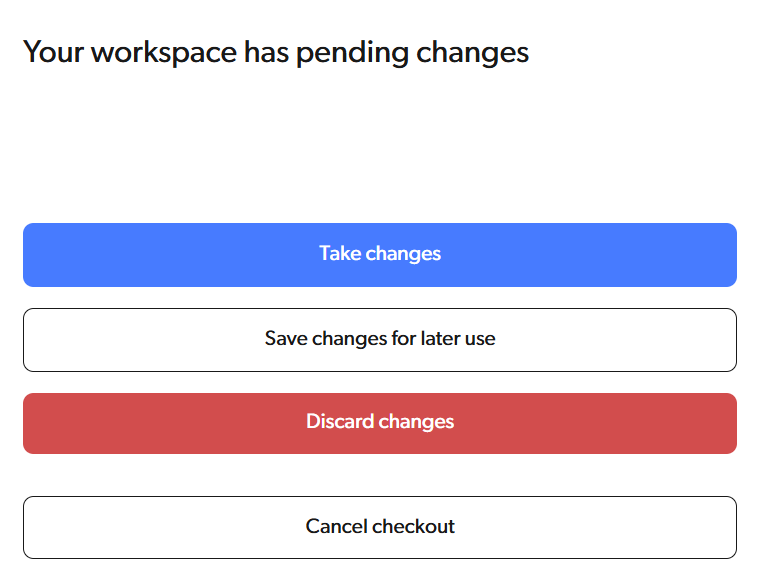
Naming your shelf
When creating a shelf, you can:- Enter a custom name (max 60 characters)
- Click Generate name
 to create a name like
 my_branch (2025-01-13 13:00:00)
Shelf names must be unique within your repository.
Managing shelves
Open the branch selector and switch to the Shelves tab to view and manage your shelves.
Preview
Click on a shelf to preview its contents before applying.Apply
Click Apply to restore the shelved changes to your workspace.Rename
Click Rename to change the shelf name.Delete
Click Delete to permanently remove a shelf. This action cannot be undone.For CLI usage, see the shelf command reference.