- Web UI
- CLI
To import a repo using the Web UI, follow these steps: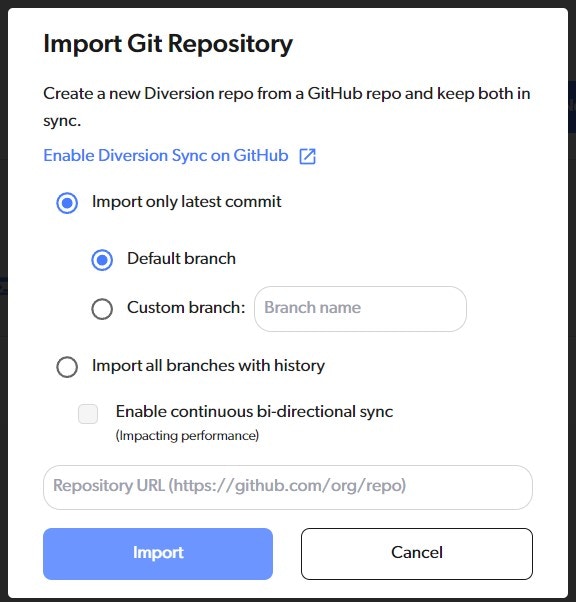
Enable Diversion Sync
Go to the Diversion Sync GitHub App page and follow the instructions to install it.
Open the repo selector and choose 'Import Git repository'
Go to your Dashboard, open the repo selector dropdown (top-left), and choose Import Git repository from its footer (alongside Create new repository and Import from Perforce).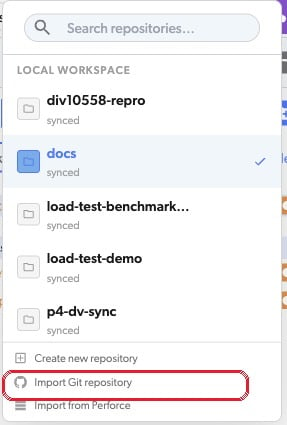
You'll be prompted to choose your import options
Import all branches with history, you’ll have the option to Enable continuous bi-directional sync.Note
If you need bi-directional sync, please contact us at support@diversion.dev.