What are Reviews?
Code reviews in Diversion let you request feedback on your changes before merging them into your main branch. Team members can review your code, leave comments, approve changes, or request modifications.How Reviews Work
A review compares two refs (branches or commits) in your repository:- Base ref: The target where changes will be merged (usually main)
- Compare ref: The branch or commit containing your changes
Creating a Review
There are two ways to create a review in Diversion:Method 1: Create Review from Branch (Most Common)
Use this when you want to compare two branches and get feedback before merging. Step-by-Step Instructions:-
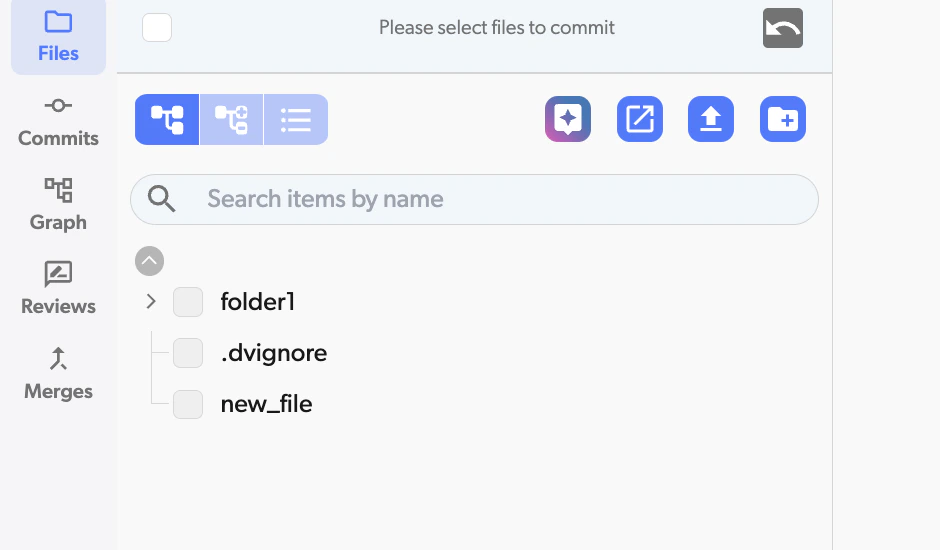
Navigate to Reviews section
- Open your repository in Diversion web app
- Click on the “Reviews” icon in the left navigation rail
-
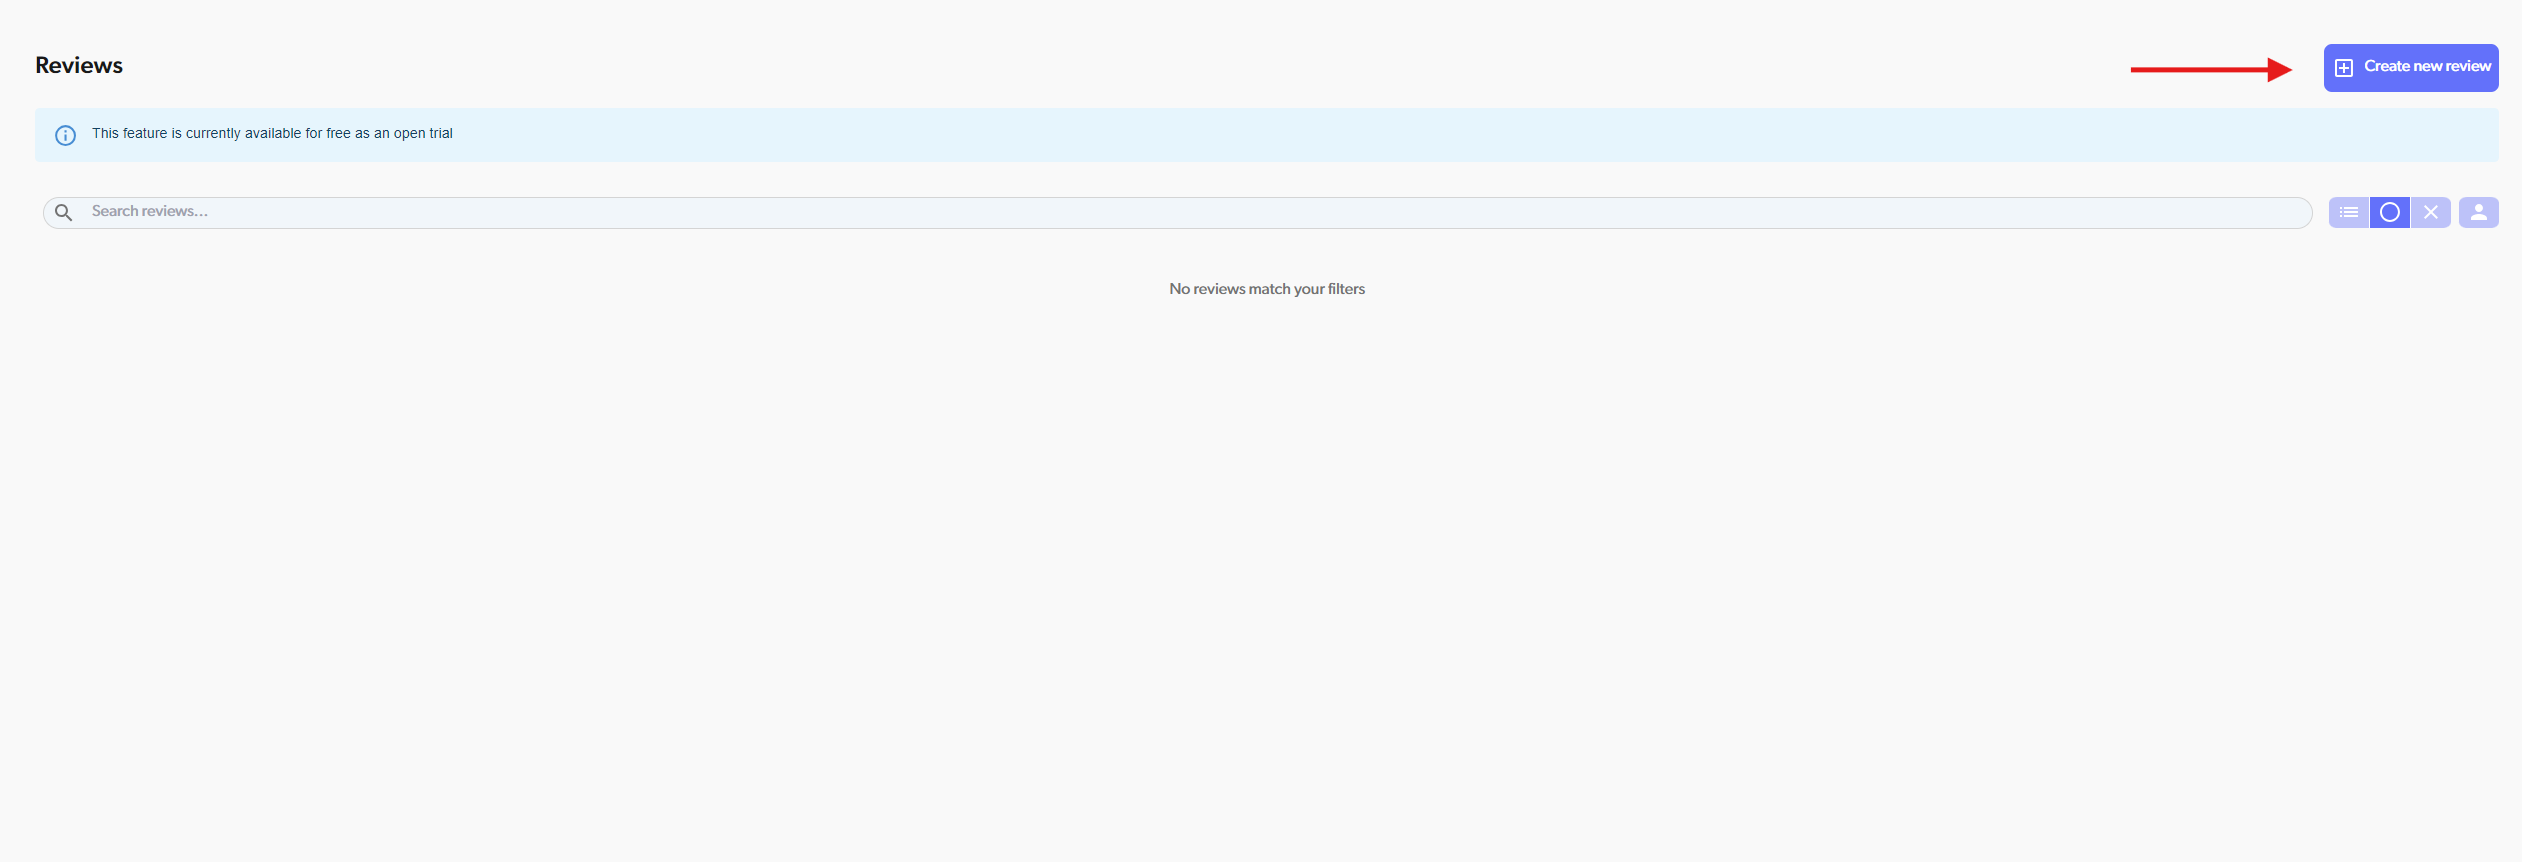
Click “Create new review” button
-
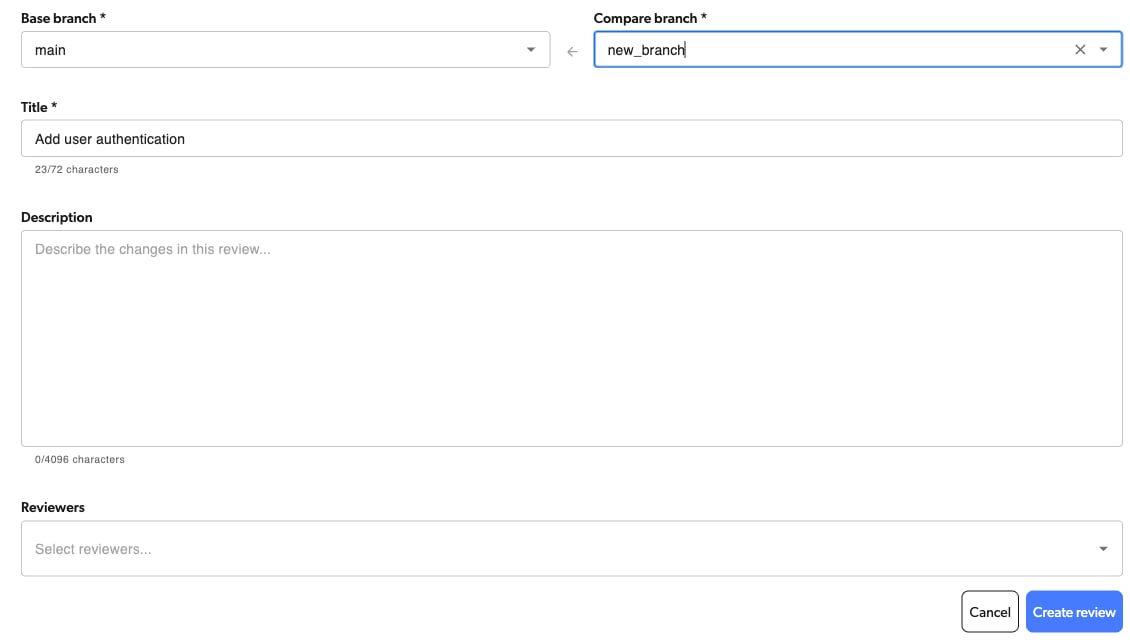
Select branches to compare
- Base branch: Select the branch you want to merge INTO (usually main)
- Click the dropdown under “Base branch”
- Choose your target branch (e.g.,
master,main,develop)
- Compare branch: Select the branch WITH your changes
- Click the dropdown under “Compare branch”, or start typing to search for a branch
- Choose your feature branch (e.g.,
feature/user-dashboard)
- Base branch: Select the branch you want to merge INTO (usually main)
-
Fill in review details
- Title (required): Short description of your changes
- Example: “Add user authentication system”
- Description (optional): Detailed explanation
- Explain WHY you made these changes
- Mention any important context
- Title (required): Short description of your changes
-
Add reviewers (optional)
- Click the “Reviewers” dropdown
- Select one or more teammates who should review your changes
- You can skip this and add reviewers later
-
Click “Create review”
- The review will be created immediately
- Assigned reviewers will receive email notifications
- You’ll be taken to the review page
Method 2: Create Review from Merge Dialog
Use this when you’re ready to merge but need approval first Step-by-Step Instructions:-
Navigate to the branch you want to merge
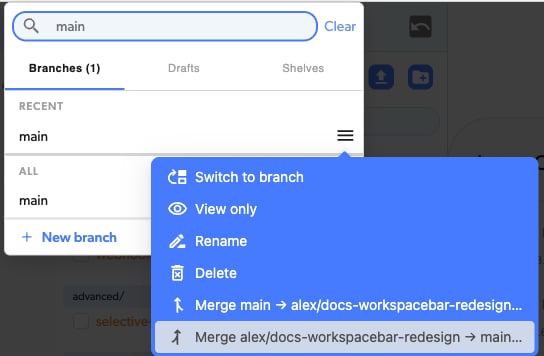
- Go to the “Branches” section in Diversion web app
- Find your feature branch (the one WITH your changes) in the Branches list
- Click on that branch and choose the merge direction
- Notes: You cannot merge the branch you’re currently on. You must click on a different branch to see merge options
-
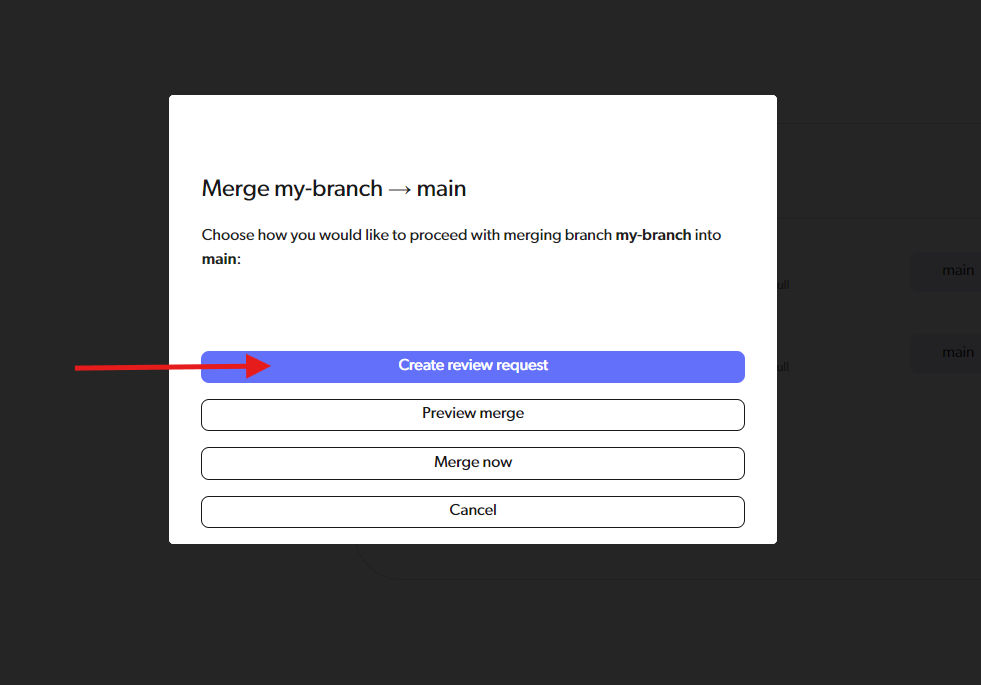
Choose “Create review request”
- A dialog appears asking how you want to proceed
- You’ll see several options, including:
- “Create review request”: Request review before merging
- “Preview merge”: See merge diff without creating review
- (The dialog also offers “Merge now” and “Cancel”.)
- Click “Create review request”
- If a review already exists for these branches, click “Go to review requests”

-
Fill in review details
- If a review already exists for these branches, it will take you there
- Otherwise, you’ll see the review creation form
- The base and compare branches are already filled in
- Add title, description, and reviewers
- Click “Create review”
What You Need for All Methods
Every review requires:- Base branch: Where you want to merge your changes (e.g.,
master) - Compare branch: The branch with your changes
- Title: A clear, concise description (required)
- Description: More detailed explanation (optional but recommended)
- Reviewers: Teammates who should review (optional, can add later)
Reviewing Someone’s Changes
When You’re Asked to Review
You’ll get an email notification when someone requests your review. Step-by-Step Instructions:-
Open the review
- Click the link in your email notification, OR
- Go to Diversion web app → “Reviews” section
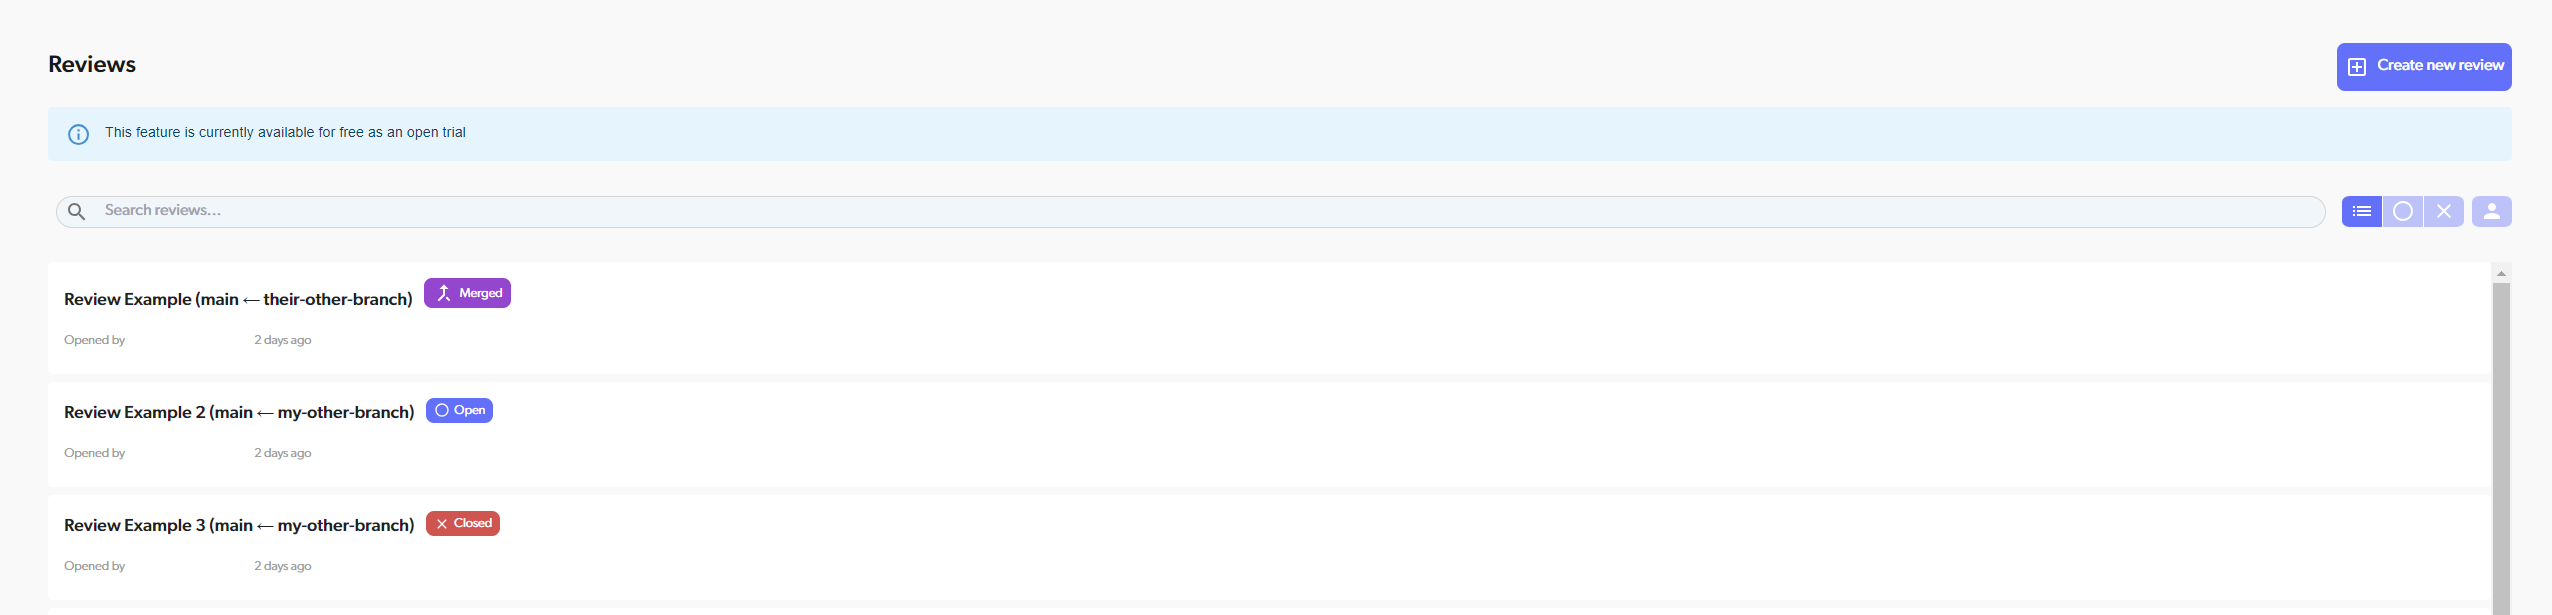
- Find the review in the list (you’ll see your name as a reviewer)
- You can filter reviews by status (Open, Closed) and by whether they’re your reviews
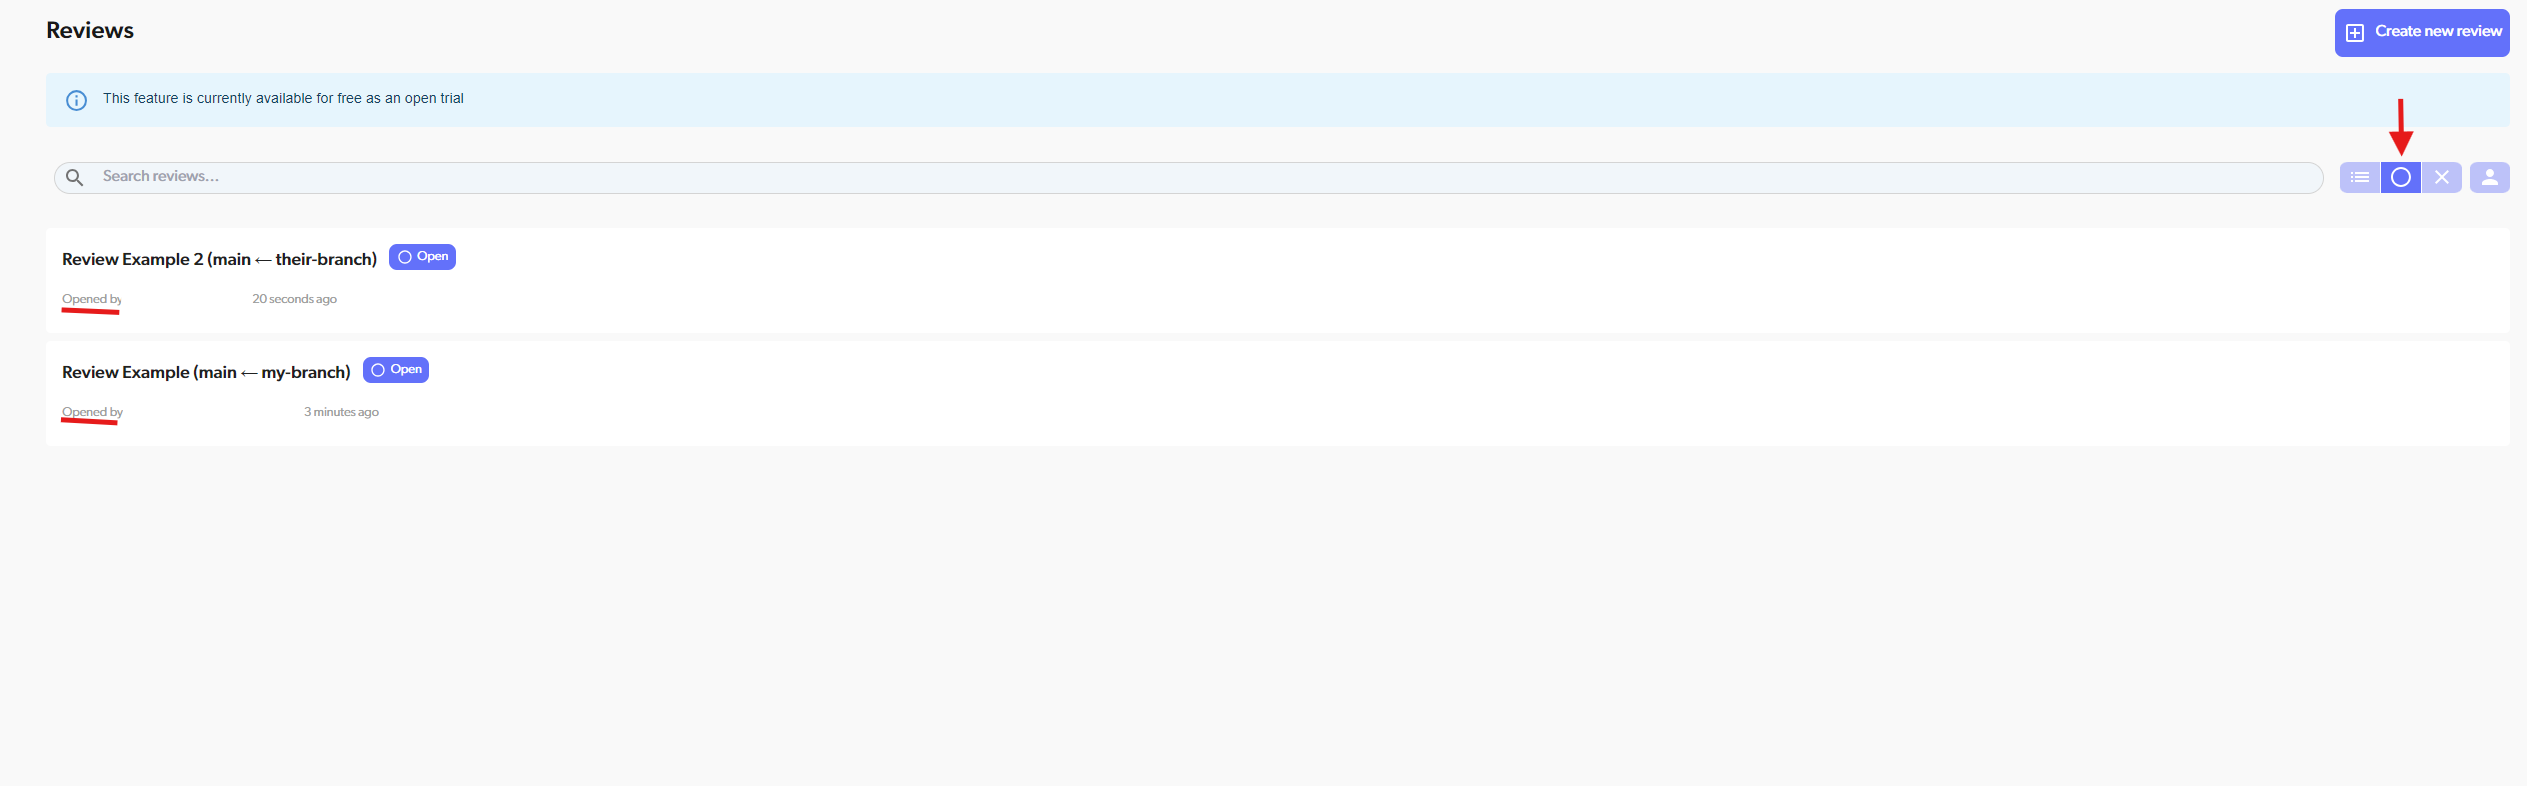
- Click on the review to open
-
Look at the review details
- At the top, you’ll see:
- Review title and description
- Who created the review
- Which branches/commits are being compared
- Current status and other reviewers
- At the top, you’ll see:
-
Review the changes
- You’ll see two tabs:
- “Conversation”: Shows all comments and discussion
- “Files Changed”: Shows the code diff
- Click “Files Changed” to see what code changed
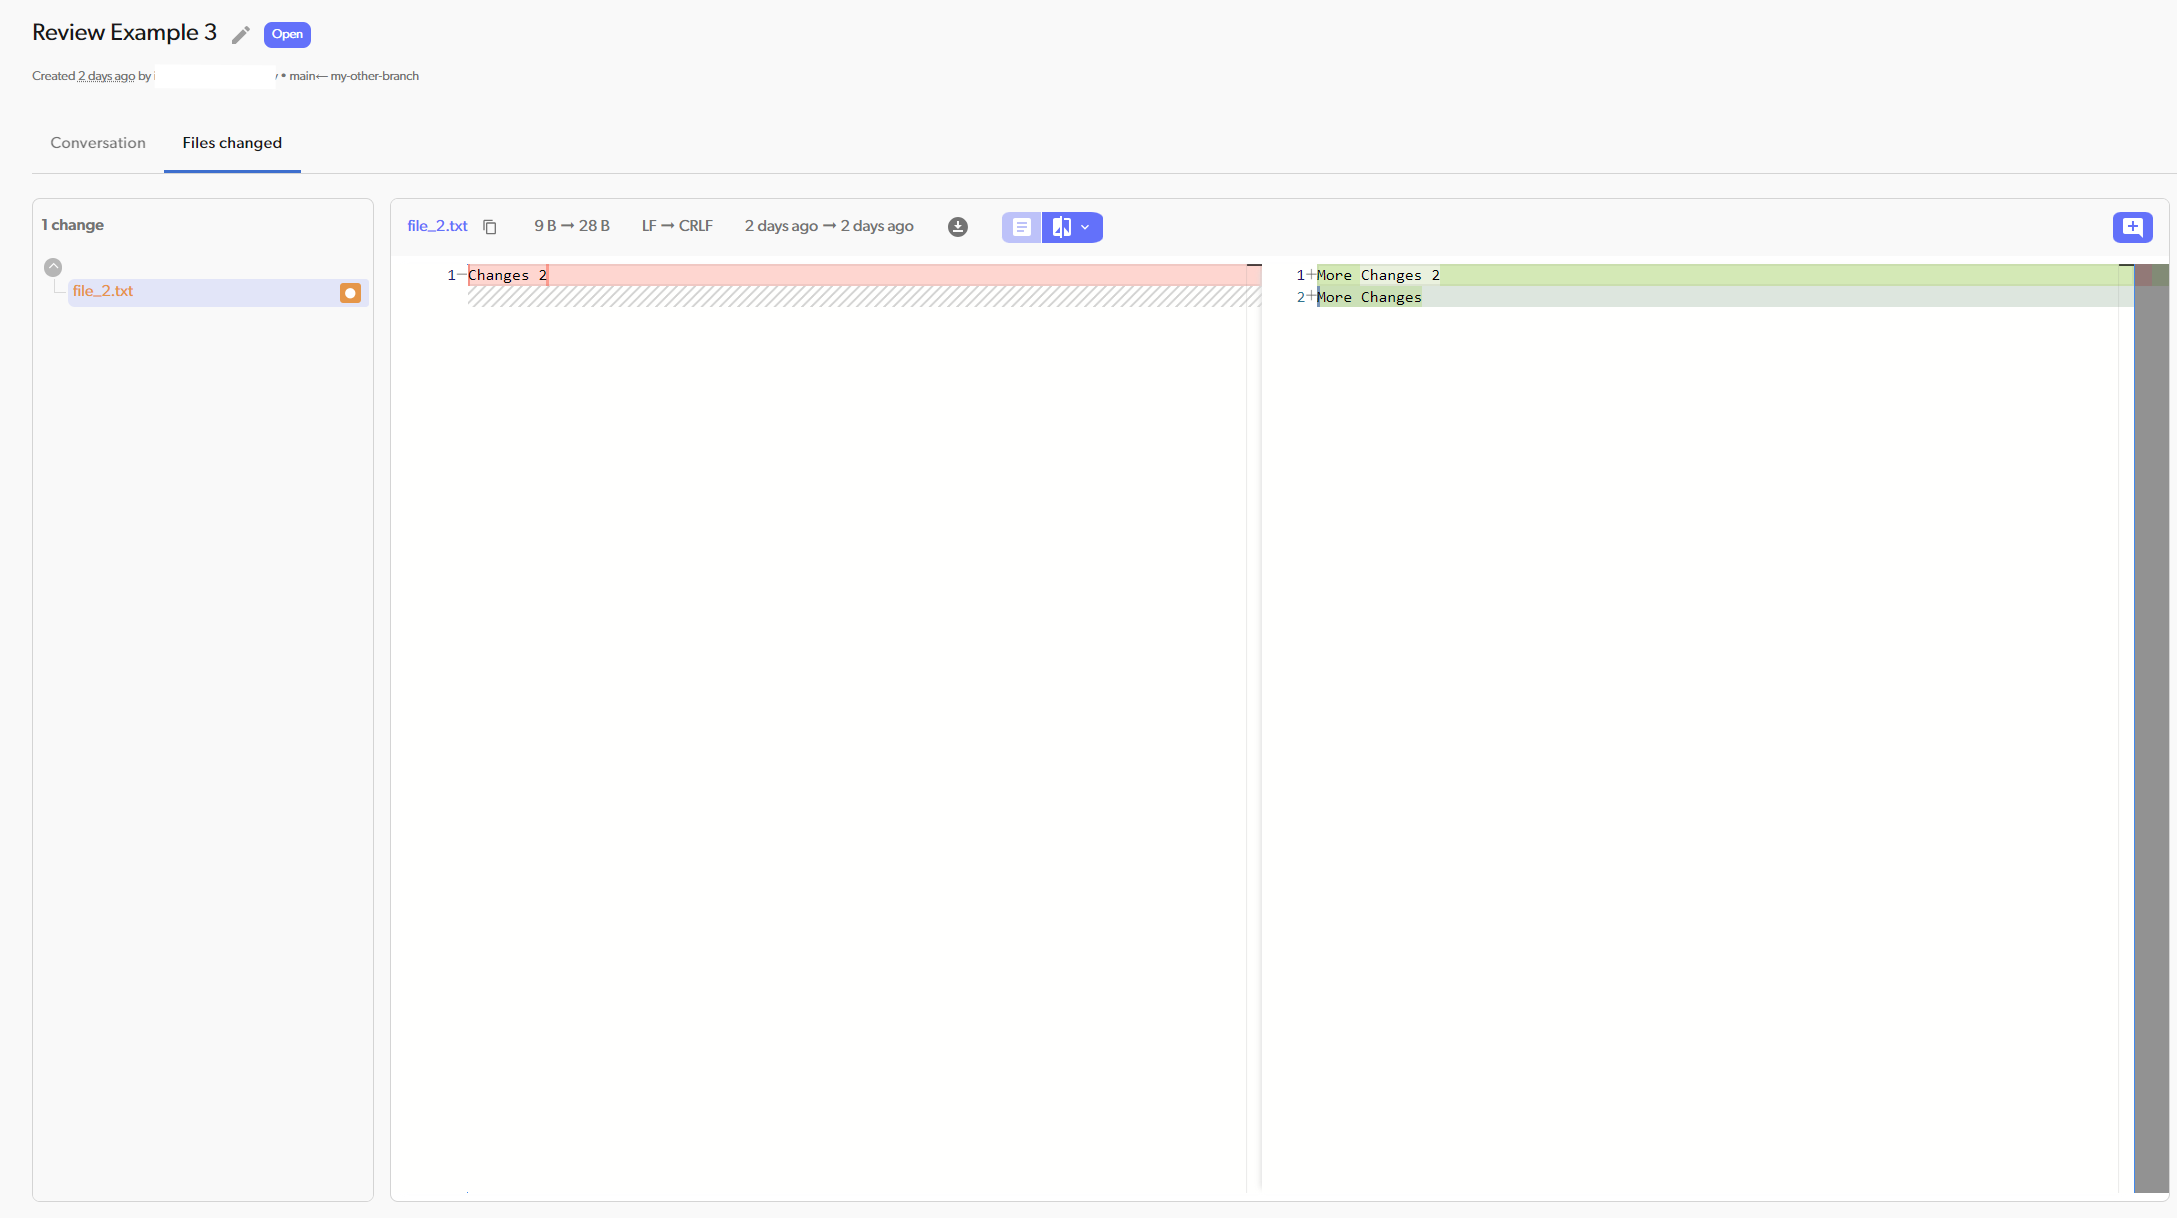
- You’ll see two tabs:
-
Leave comments (explained below)
- Add general comments about the overall changes
- Add inline comments on specific lines of code
-
Make your decision
- Go to the “Files Changed” tab
- Click “Review changes”
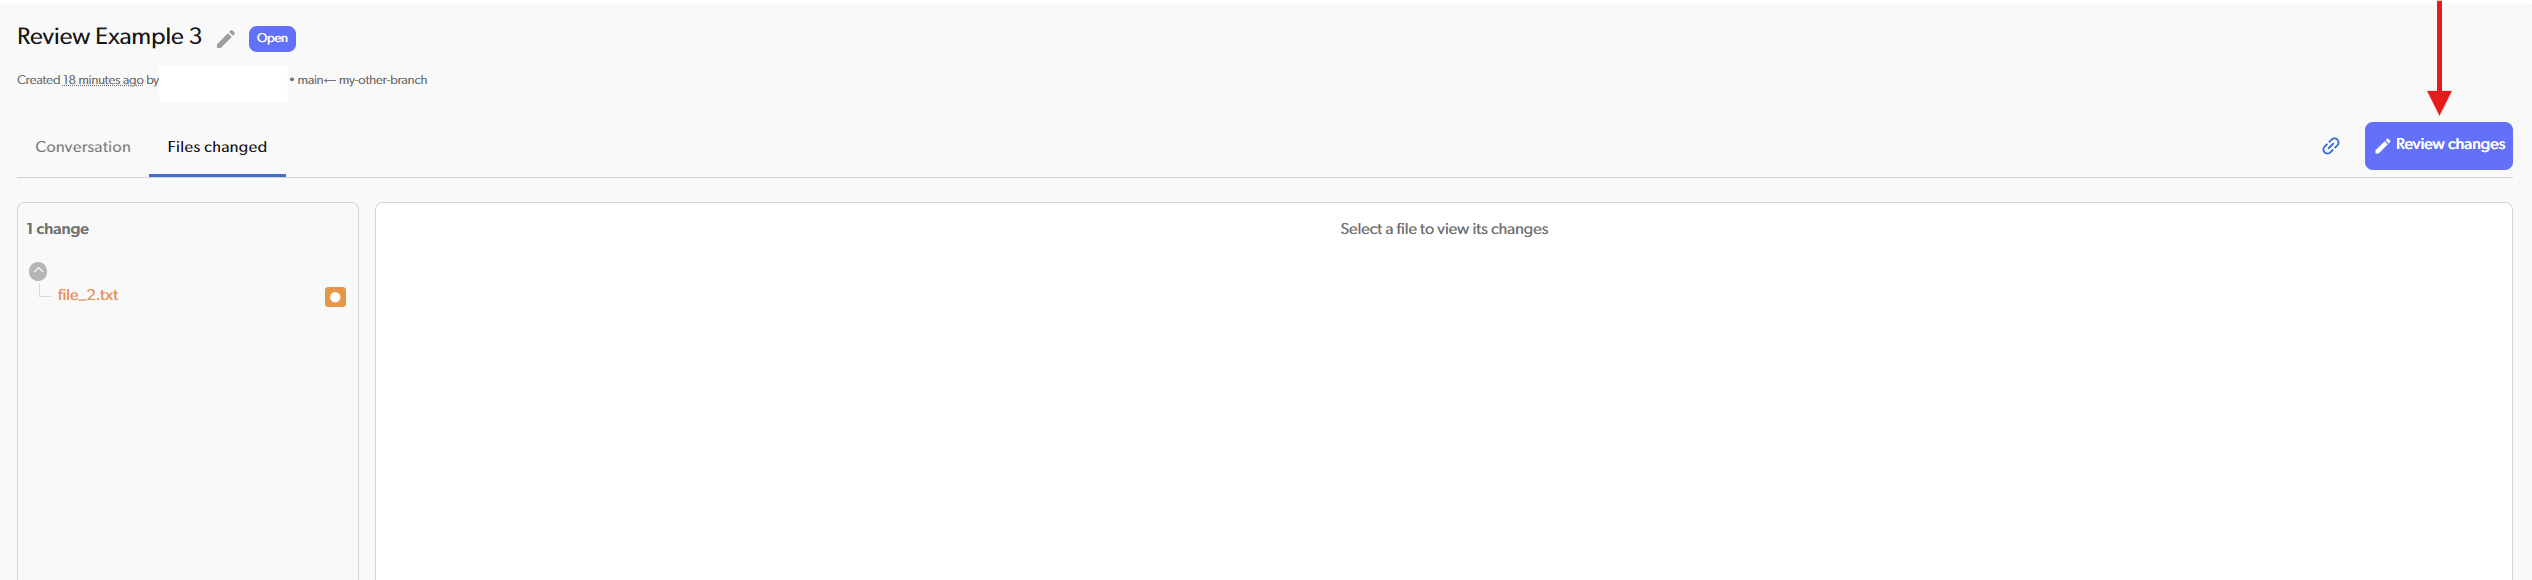
- Choose one of these options:
- “Approve”: Changes look good, ready to merge
- “Request Changes”: Something needs to be fixed
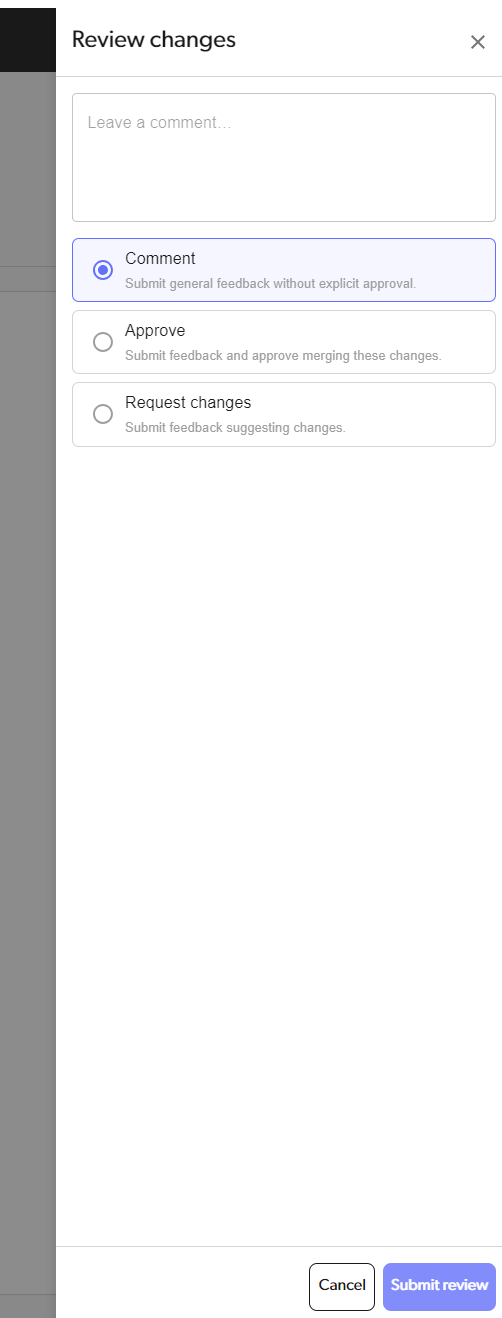
- Add an optional comment to explain your decision
- Click the “Submit review” to submit your decision
-
Done!
- The review author receives notification of your decision
- Your review status will be updated and appear both in the conversation and on your avatar under the “Reviewers” section
Adding Comments
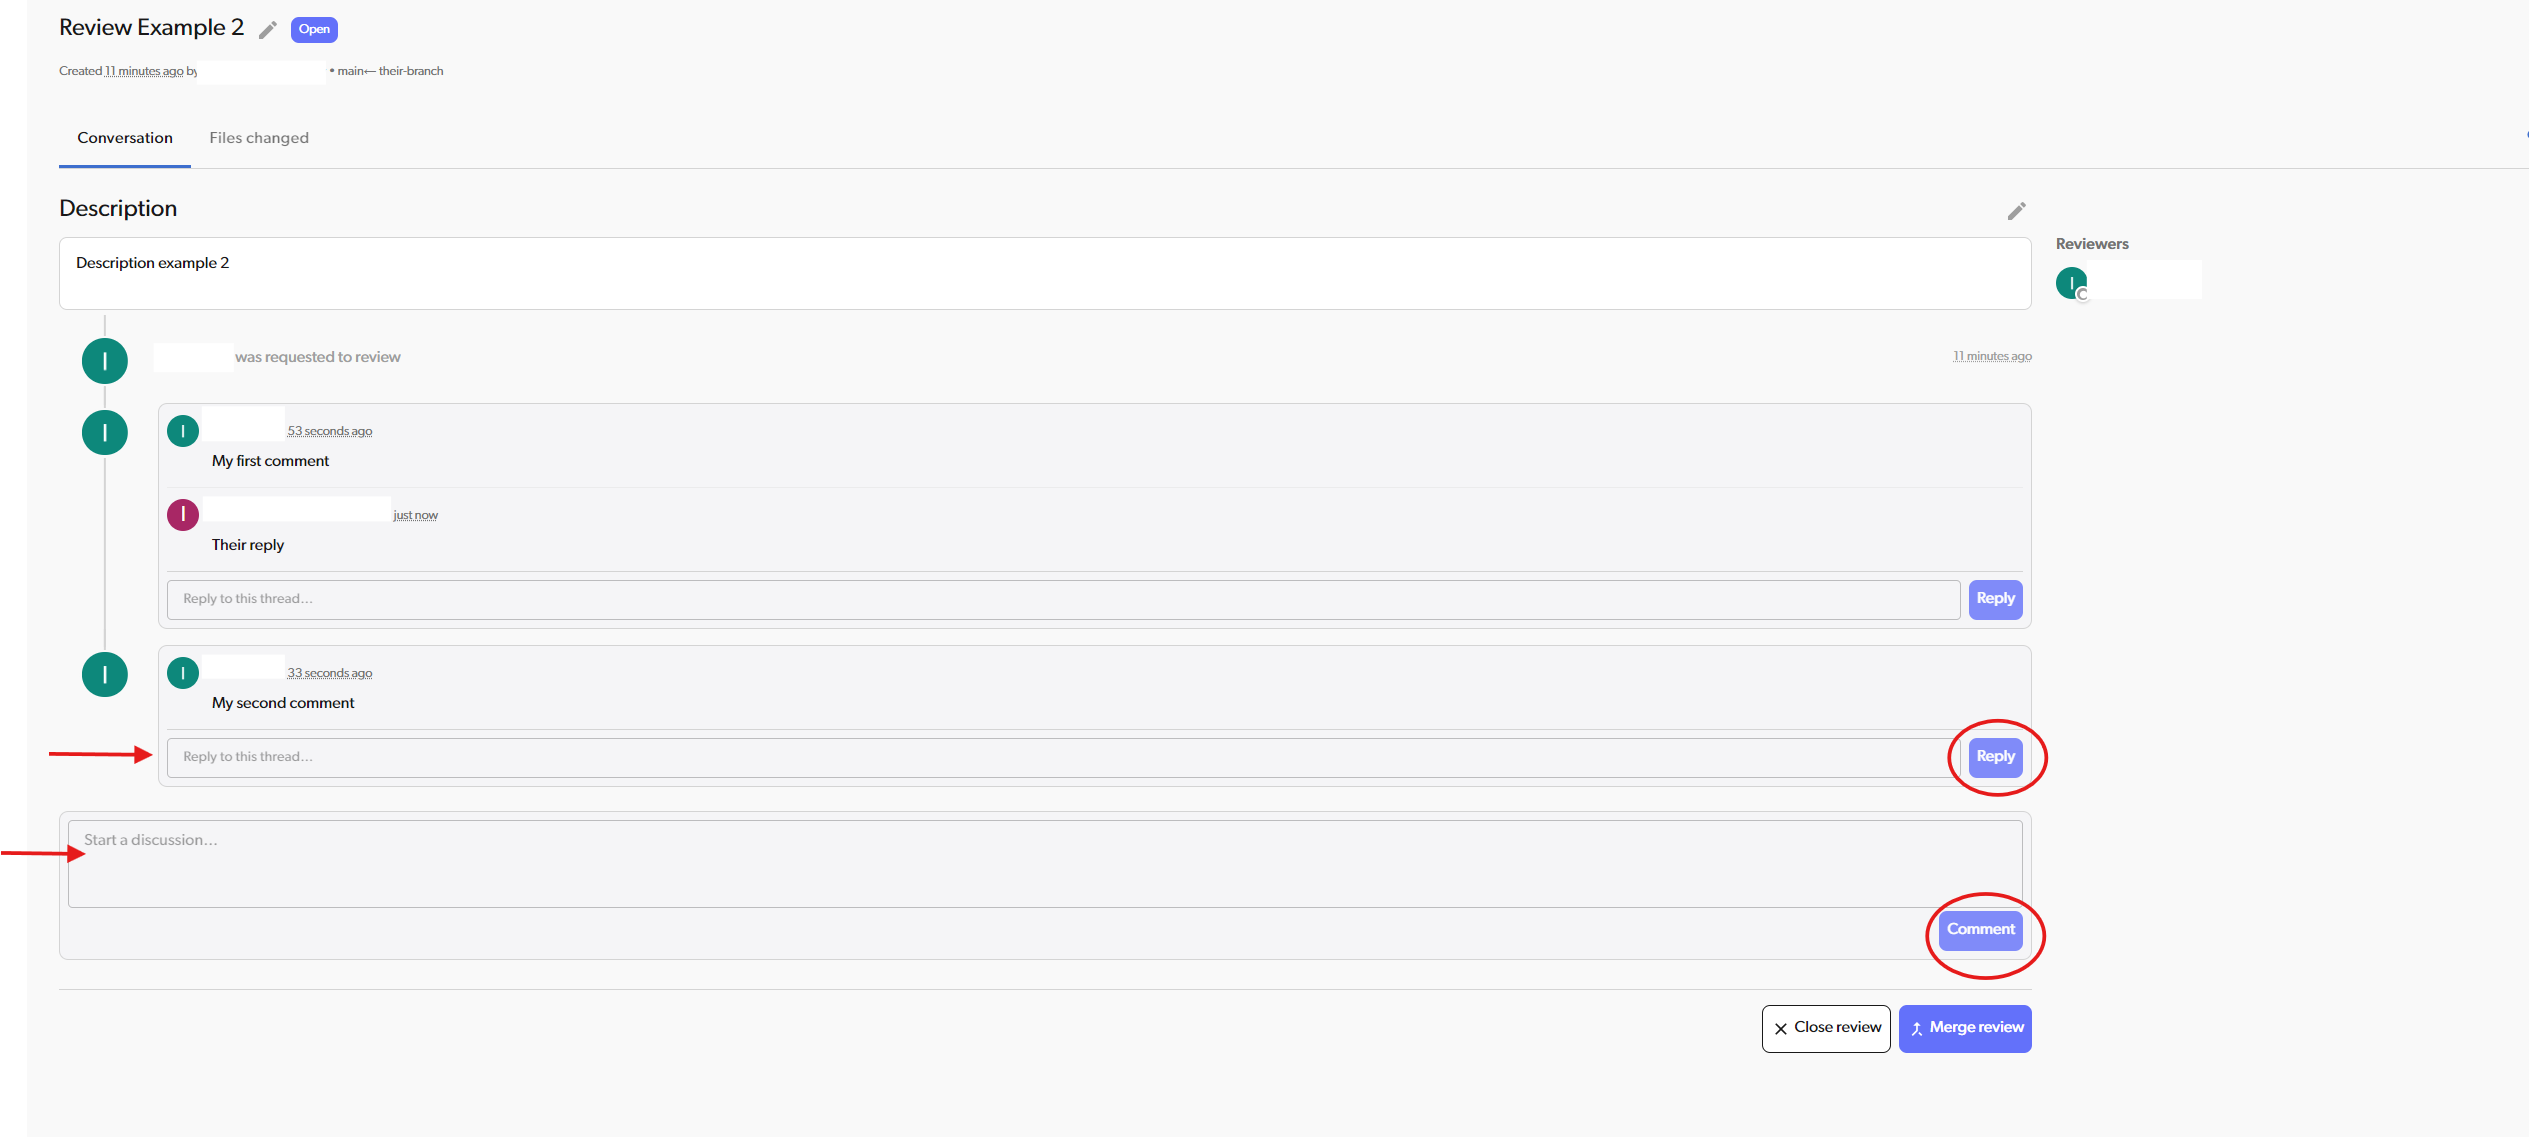
General Comments
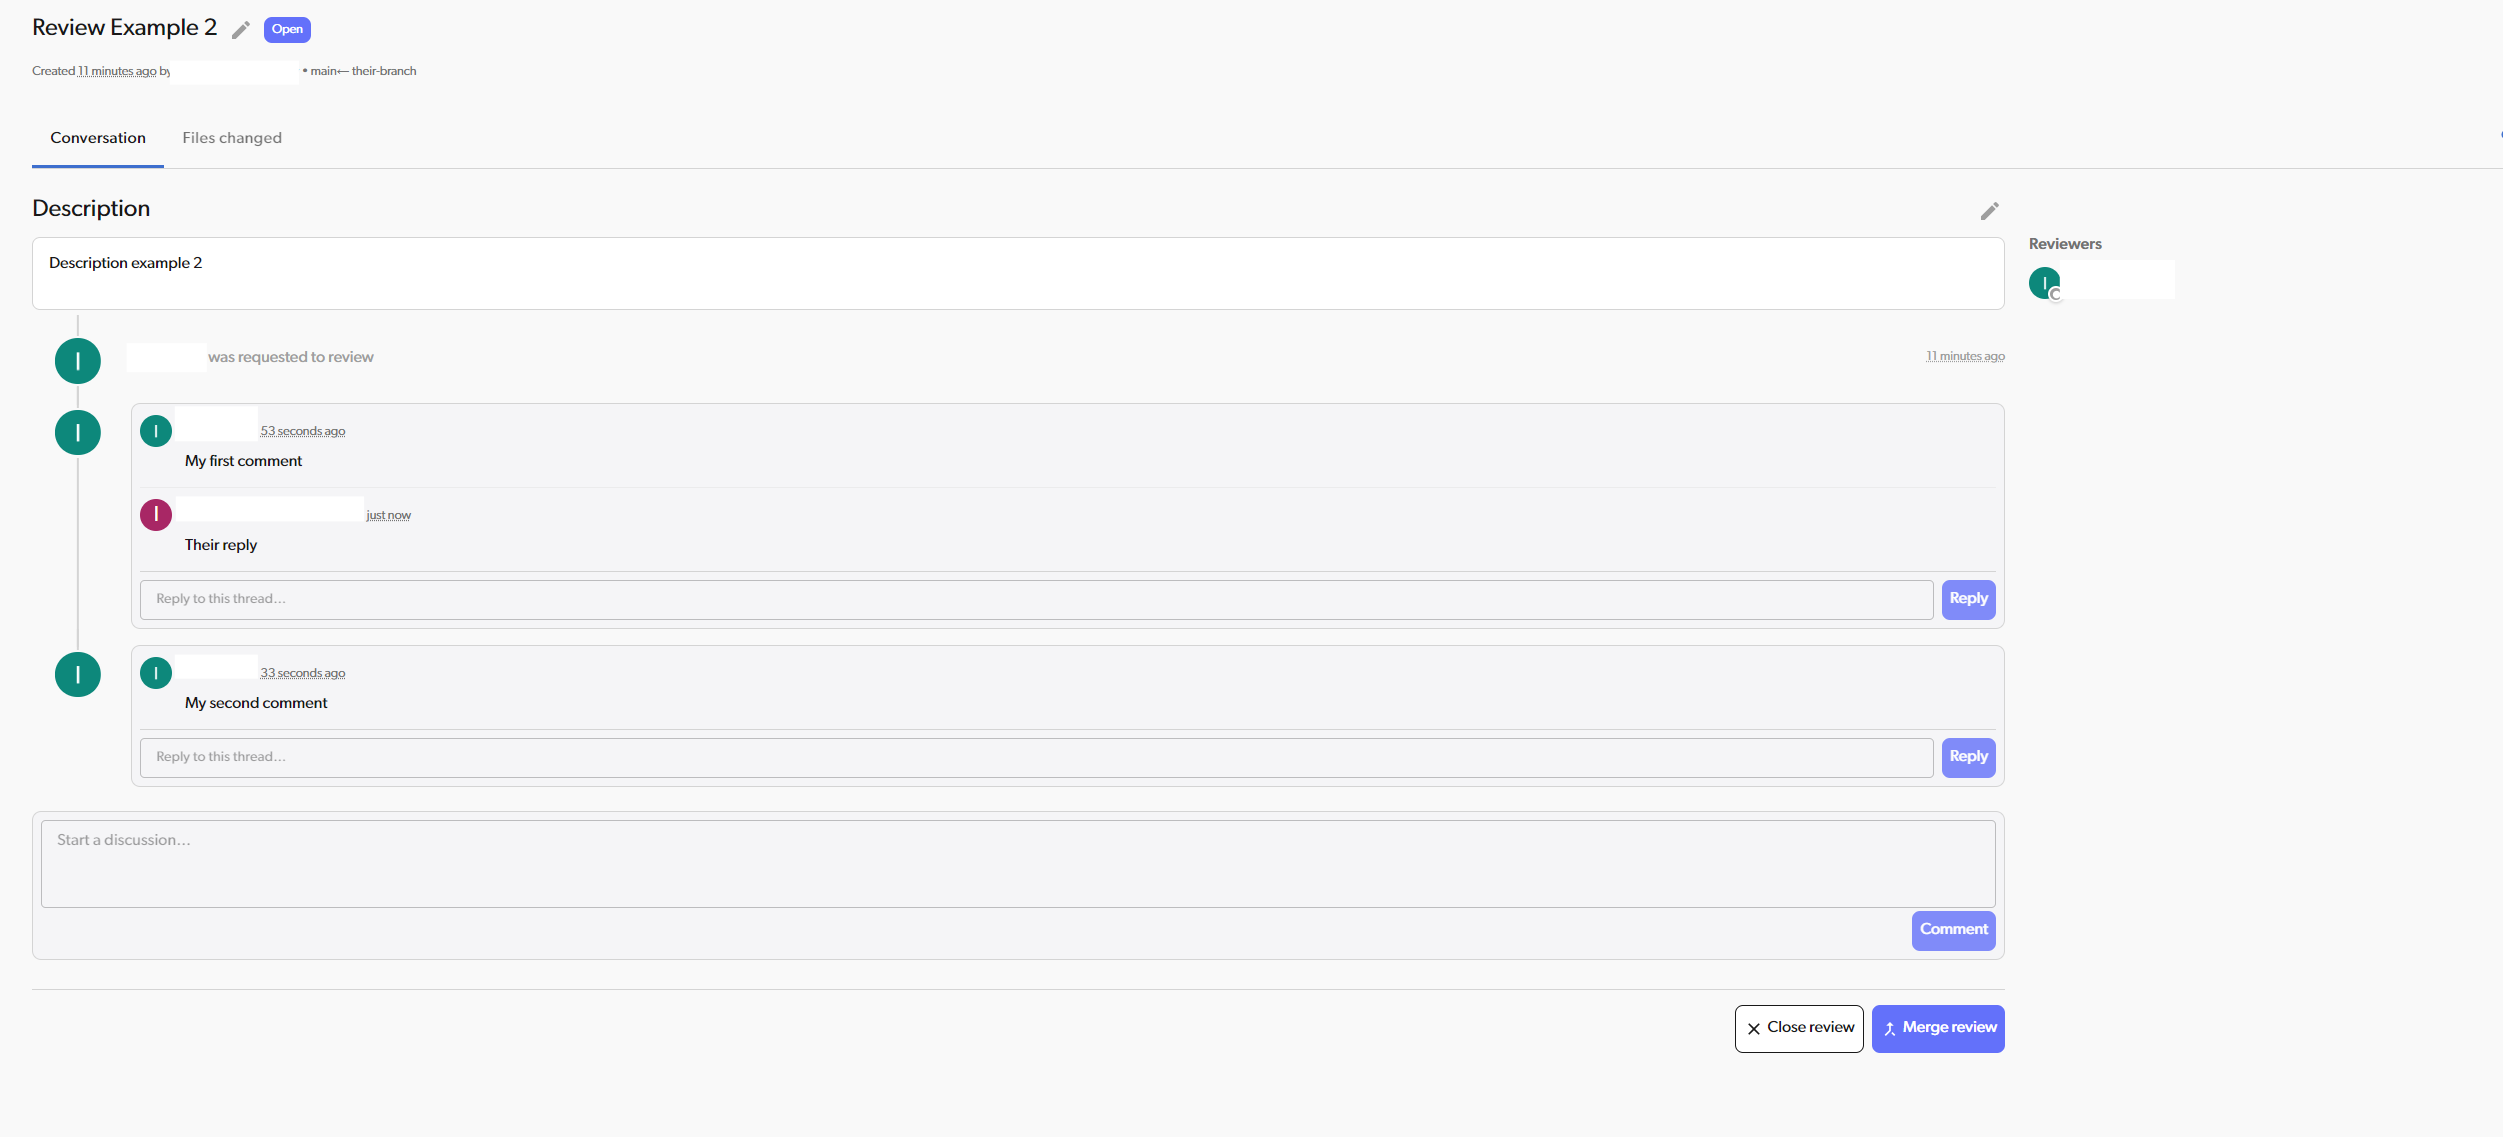
Use general comments for big-picture feedback about the whole review. How to add a general comment:- Open the review page
- Go to the “Conversation” tab
- Scroll to the comment box at the bottom
- Type your comment
- Click “Comment” button
- Find the comment you want to reply to in the “Conversation” tab
- Type your response
- Click “Reply” to post your reply
- “The overall approach looks great!”
- “Have you considered how this handles edge cases?”
- “This needs unit tests before we can merge”
- “Great work on the error handling!”
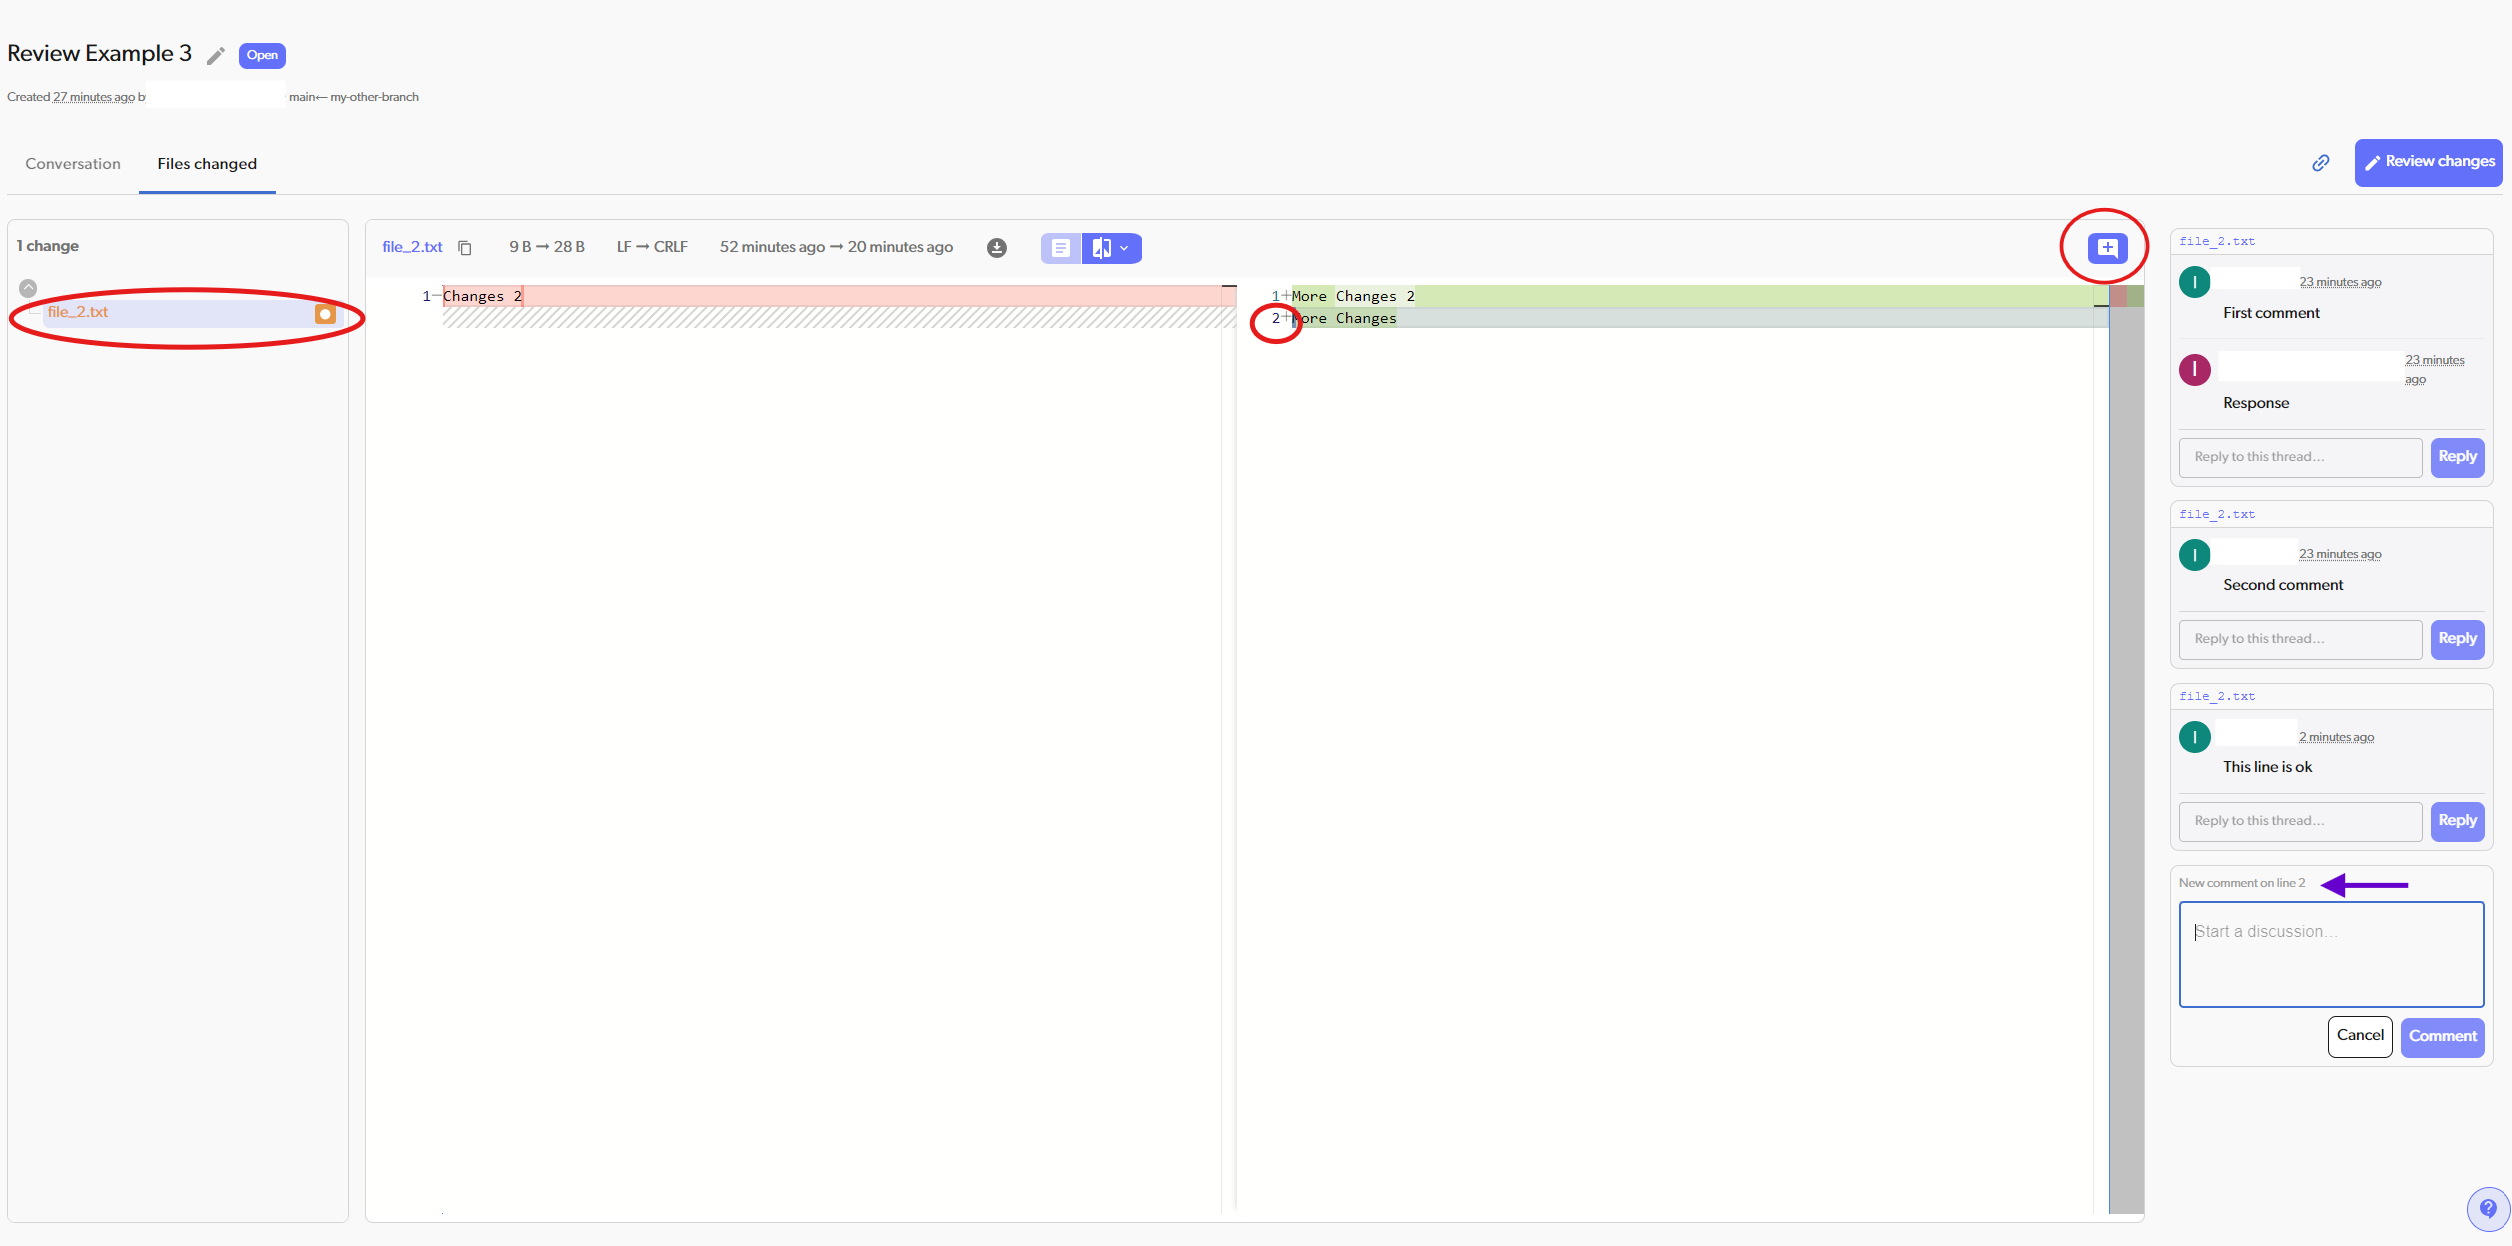
Inline Comments
Use inline comments to point out specific issues in particular lines of code. How to add an inline comment:- Open the review page
- Go to the “Files Changed” tab
- Find the file you want to comment on
- Click the line number in the diff view
- A comment box appears on the right side of the screen
- Type your comment about that specific line
- Click “Comment” button
- Open the review page
- Go to the “Files Changed” tab
- Find the file you want to comment on
- Click the ”+” button above the changed version of the file
- A comment box appears on the right side of the screen
- Type your comment about the entire file
- Click “Comment” button
- “This function should handle the case where user is null”
- “Consider using a constant here instead of magic number”
- “Great improvement over the previous version!”
- “This could cause a race condition if called concurrently”
Viewing Review Status
Your status as a reviewer:- REQUESTED: You haven’t responded yet - review is waiting for you
- APPROVED: You approved the changes
- CHANGES REQUESTED: You requested modifications
- OPEN (blue): Review is active, may still need approvals
- MERGED (purple): Changes were approved and merged
- CLOSED (gray): Review was closed without merging
Editing Review Details
After creating a review, you can edit the title and description by clicking the pencil icon next to them, or edit reviewers by clicking the settings icon next to the reviewers section.Working with Review Feedback
When Changes Are Requested
- Read through all the comments carefully
- Make the requested changes on your branch
- Commit the fixes (they’ll automatically show up in the review)
- Reply to comments to explain what you changed
- Ask reviewers to take another look
Updating Your Branch
If you’re using a branch review, any new commits you push will automatically appear in the review. Reviewers will see:- All your original changes
- Any new commits you added to address feedback
- The complete, updated diff
When You Get Approvals
Once all reviewers have approved (or enough approvals based on your team’s policy):- Do a final check that everything looks good
- Click the “Merge review” button on the review page to merge the changes
- The review status will automatically change to MERGED
Notifications
You’ll get email notifications for:- When someone requests your review
- When someone comments on your review
- When reviewers approve or request changes
- When a review is merged or closed