> ## Documentation Index
> Fetch the complete documentation index at: https://docs.diversion.dev/llms.txt
> Use this file to discover all available pages before exploring further.
# Quickstart
> Get started with Diversion in 3 simple steps
Get up and running with Diversion in just 3 simple steps: install, create an account, and create your first repository. Your changes will automatically sync with your team—no manual push or pull required.
For advanced workflows like branching, team collaboration, and conflict resolution, explore our [Basic Workflows](/basic/start-using-diversion) section.
This guide uses the Desktop App for Windows and macOS. You can also use the [CLI](/cmd-ref/about-cmd), [Unreal Engine Plugin](https://www.unrealengine.com/marketplace/en-US/product/diversion), or [WebUI](https://app.diversion.dev/). Driving Diversion from an AI coding agent (Claude Code, Cursor, Codex)? See the [Agent Quickstart](/agent-quickstart).
[Download the installer](https://get.diversion.dev/win) and follow the instructions.
By installing Diversion, you agree to the [Terms of Service](https://www.diversion.dev/terms-of-service)
After installing, launch the Diversion desktop application.
Create a new account or sign in with Google.
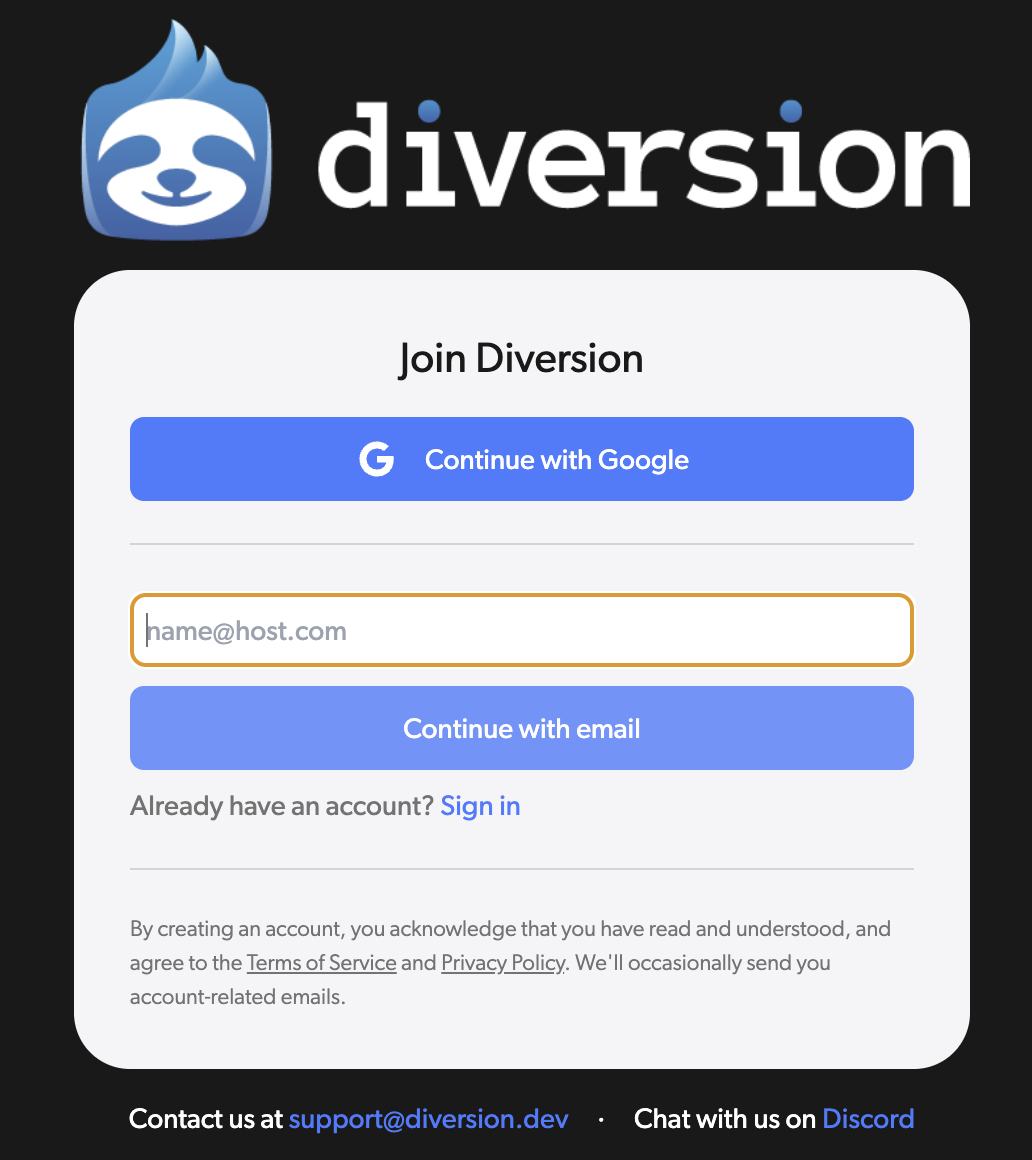 After creating your account, or if you already have one, log in.
Diversion will show you an option to create a new repository if you don't have any. Click on `New repository`.
After creating your account, or if you already have one, log in.
Diversion will show you an option to create a new repository if you don't have any. Click on `New repository`.
 You have the option to create a repository from an existing folder or create a new folder. Choose `Create New Folder` and specify the directory on your computer where you want your repository saved.
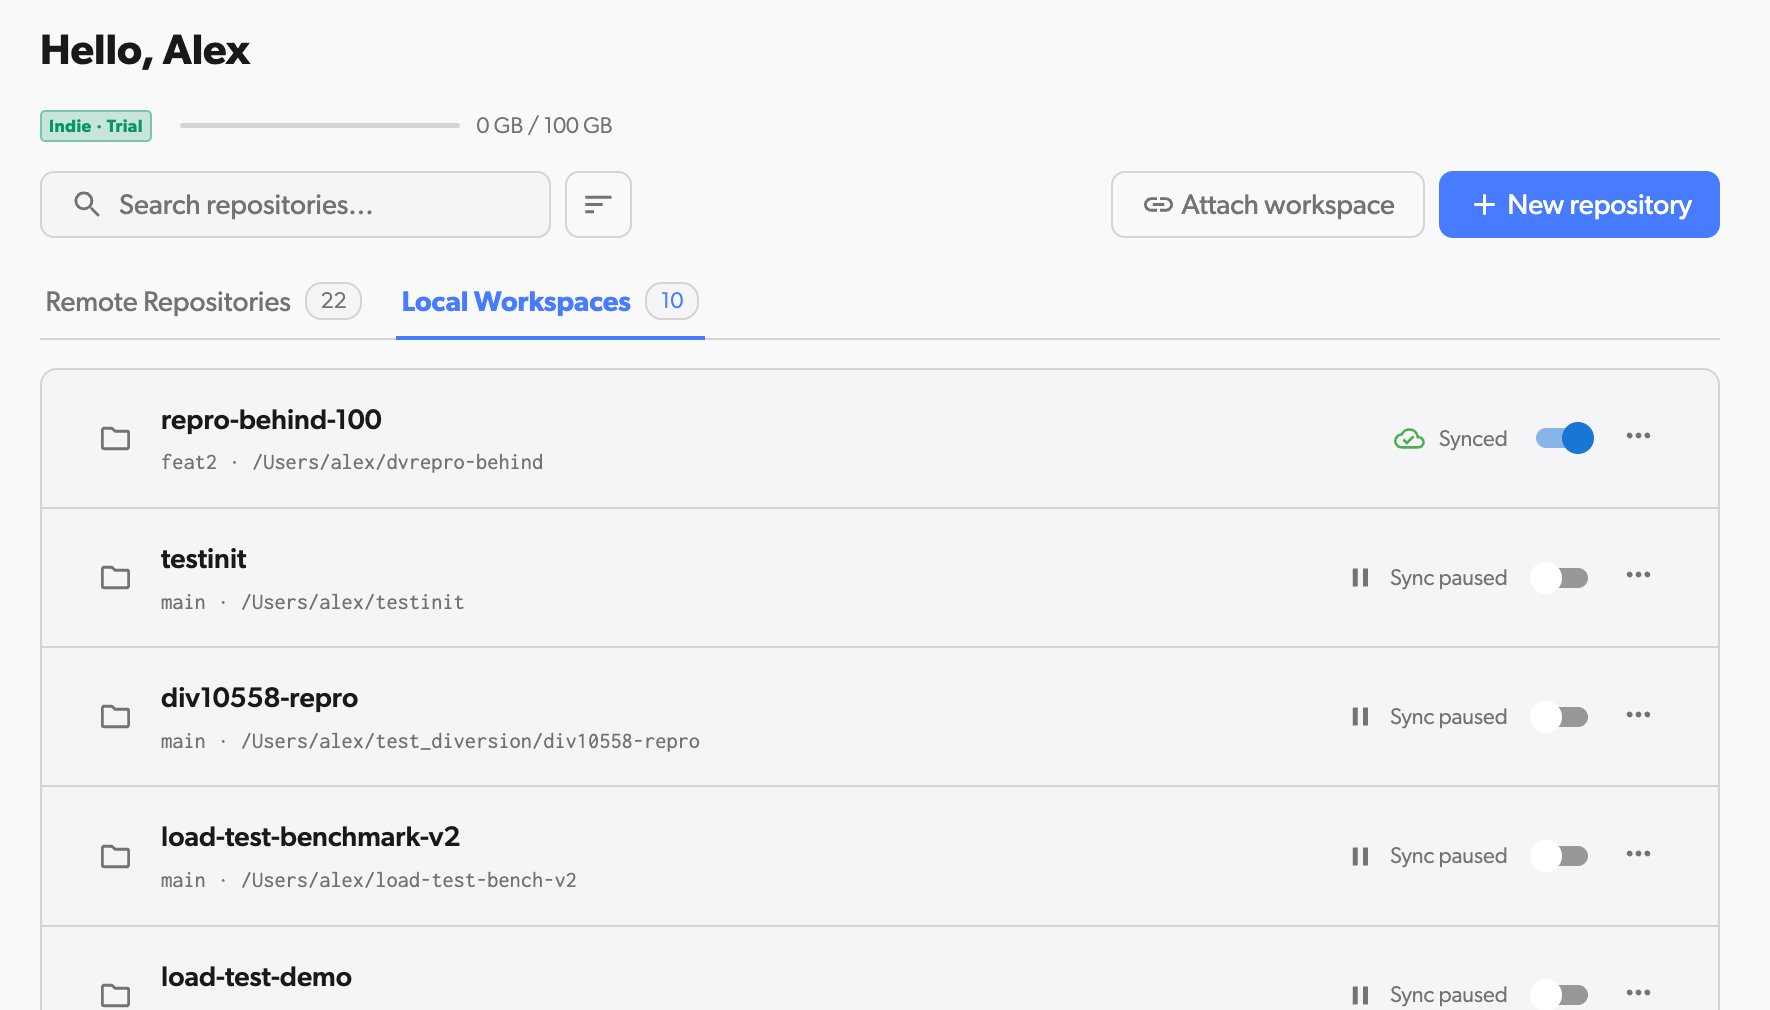
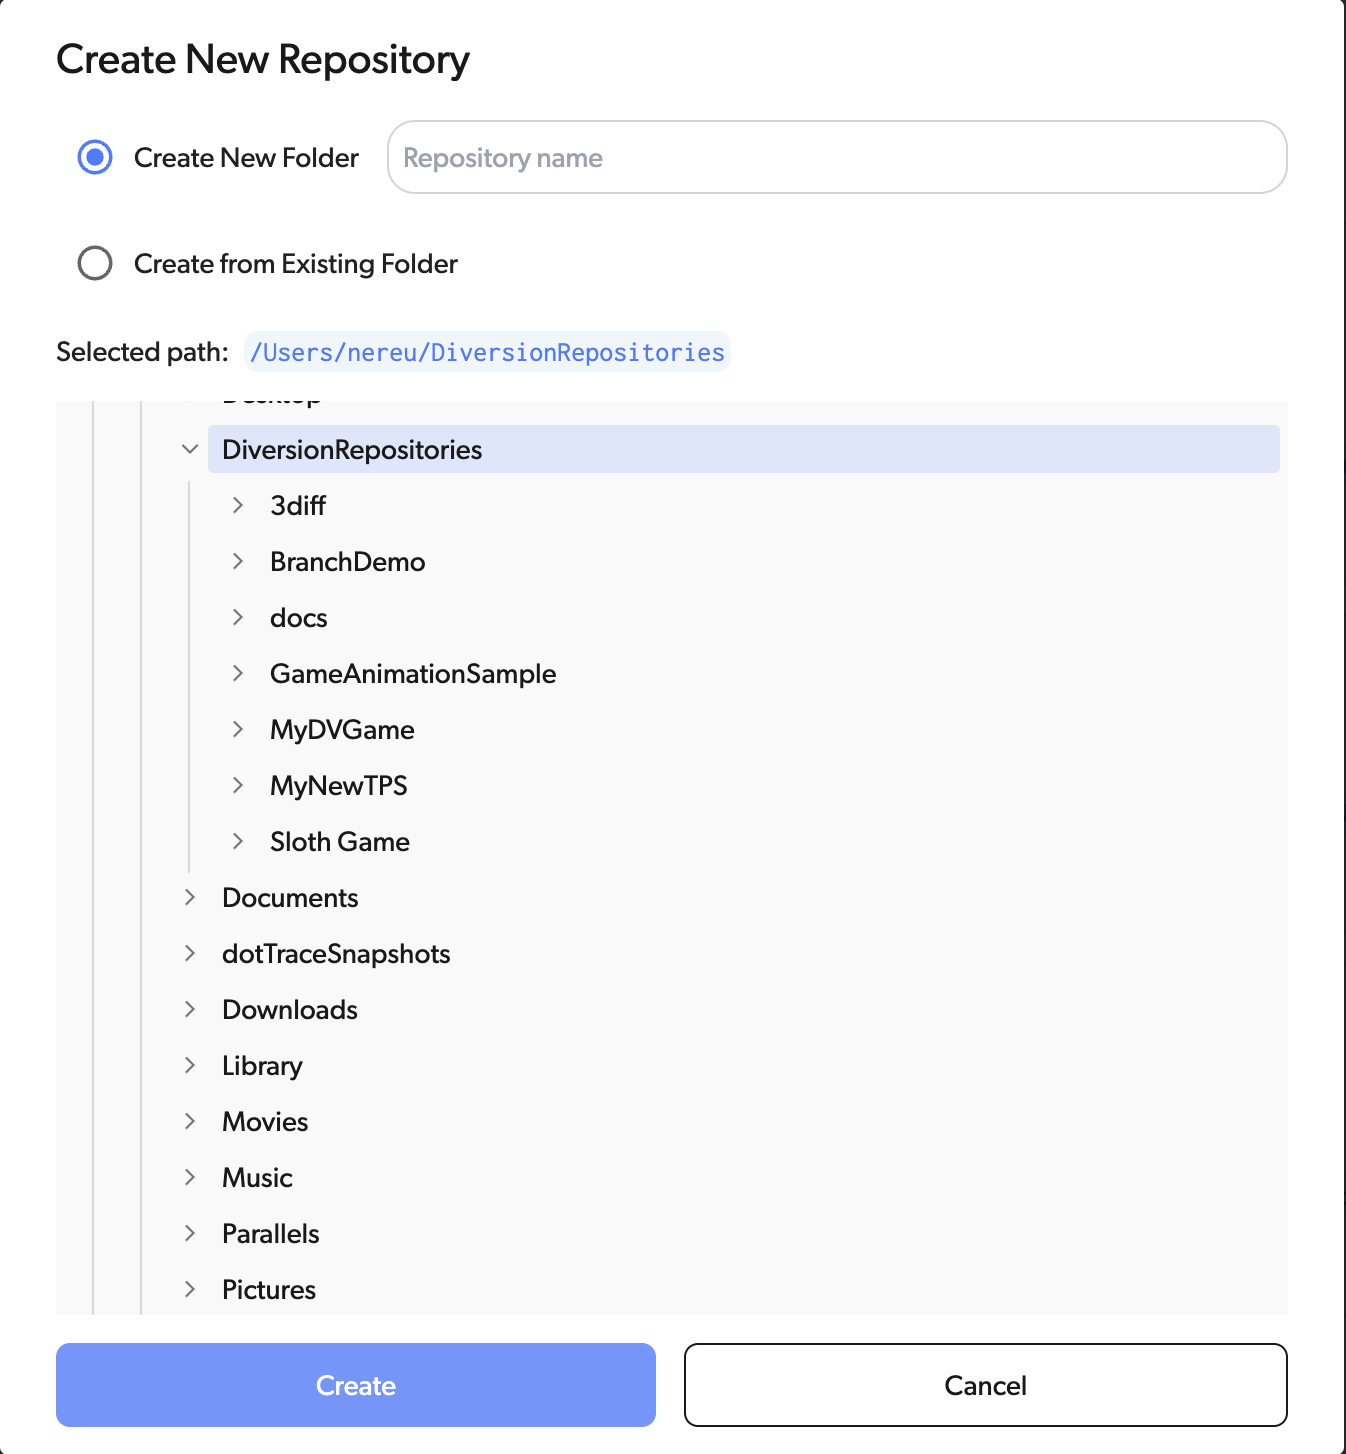 Your newly created repository is now listed in both the Local Workspaces and Remote Repositories tabs. A local workspace means it exists on your machine and you can start using it locally.
 Navigate to the folder you created for your repository and add your project files. You can drag and drop files, create new ones, or copy your existing project into this folder.
Diversion automatically tracks all changes in the background—no need to manually "add" files like in Git.
Open the Diversion desktop app to see your changes tracked in real-time.
Once you've made changes you want to save, open the Diversion desktop app and review your modified files.
Write a descriptive commit message explaining what you changed, then click the "Commit" button.
Your changes are automatically synced to the cloud and shared with your team—no push or pull required!
Open a terminal and run:
```bash theme={null}
curl -sL https://get.diversion.dev/unix | bash ; export PATH="$HOME/.diversion/bin:$PATH"
```
By installing Diversion, you agree to the [Terms of Service](https://www.diversion.dev/terms-of-service)
After installing, launch the Diversion desktop application.
Create a new account or sign in with Google.
After creating your account, or if you already have one, log in.
Diversion will show you an option to create a new repository if you don't have any. Click on `New repository`.
You have the option to create a repository from an existing folder or create a new folder. Choose `Create New Folder` and specify the directory on your computer where you want your repository saved.
Your newly created repository is now listed in both the Local Workspaces and Remote Repositories tabs. A local workspace means it exists on your machine and you can start using it locally.
Navigate to the folder you created for your repository and add your project files. You can drag and drop files, create new ones, or copy your existing project into this folder.
Diversion automatically tracks all changes in the background—no need to manually "add" files like in Git.
Open the Diversion desktop app to see your changes tracked in real-time.
Once you've made changes you want to save, open the Diversion desktop app and review your modified files.
Write a descriptive commit message explaining what you changed, then click the "Commit" button.
Your changes are automatically synced to the cloud and shared with your team—no push or pull required!
There is currently no Linux desktop app. The Linux workflow uses the CLI exclusively. You can also use the [WebUI](https://app.diversion.dev/) for browsing repositories, reviewing changes, and managing collaboration.
Open a terminal and run:
```bash theme={null}
curl -sL https://get.diversion.dev/unix | bash ; export PATH="$HOME/.diversion/bin:$PATH"
```
To make the path permanent, add it to your `.bashrc` or `.zshrc`:
```bash theme={null}
echo 'export PATH="$HOME/.diversion/bin:$PATH"' >> ~/.bashrc
```
By installing Diversion, you agree to the [Terms of Service](https://www.diversion.dev/terms-of-service)
Run the following command to open the WebUI and create your account:
```bash theme={null}
dv login
```
A browser window will open so you can authenticate. Once logged in, you're good to go!
Create a new repository using the [init command](/cmd-ref/init), or clone an existing repository you've been added to using the [clone command](/cmd-ref/clone).
Make changes to your files as usual. Diversion will track your changes in the background.
To check the status of your changes:
```bash theme={null}
dv status
```
Once you're ready to save a version of your progress:
```bash theme={null}
dv commit -a -m "your commit message"
```
By default, Diversion automatically syncs committed changes across the team. You don't need to push or pull manually, just commit your work and it gets shared.
You're now using Diversion on Linux. For the full list of CLI commands, check out the [CLI Reference](/cmd-ref/about-cmd).
## What's Next?
Now that you're set up, explore these guides to get the most out of Diversion:
Invite collaborators and manage permissions
Bring your existing codebase into Diversion
Work on features in parallel without conflicts
Install the Unreal Engine plugin
Navigate to the folder you created for your repository and add your project files. You can drag and drop files, create new ones, or copy your existing project into this folder.
Diversion automatically tracks all changes in the background—no need to manually "add" files like in Git.
Open the Diversion desktop app to see your changes tracked in real-time.
Once you've made changes you want to save, open the Diversion desktop app and review your modified files.
Write a descriptive commit message explaining what you changed, then click the "Commit" button.
Your changes are automatically synced to the cloud and shared with your team—no push or pull required!
Open a terminal and run:
```bash theme={null}
curl -sL https://get.diversion.dev/unix | bash ; export PATH="$HOME/.diversion/bin:$PATH"
```
By installing Diversion, you agree to the [Terms of Service](https://www.diversion.dev/terms-of-service)
After installing, launch the Diversion desktop application.
Create a new account or sign in with Google.
After creating your account, or if you already have one, log in.
Diversion will show you an option to create a new repository if you don't have any. Click on `New repository`.
You have the option to create a repository from an existing folder or create a new folder. Choose `Create New Folder` and specify the directory on your computer where you want your repository saved.
Your newly created repository is now listed in both the Local Workspaces and Remote Repositories tabs. A local workspace means it exists on your machine and you can start using it locally.
Navigate to the folder you created for your repository and add your project files. You can drag and drop files, create new ones, or copy your existing project into this folder.
Diversion automatically tracks all changes in the background—no need to manually "add" files like in Git.
Open the Diversion desktop app to see your changes tracked in real-time.
Once you've made changes you want to save, open the Diversion desktop app and review your modified files.
Write a descriptive commit message explaining what you changed, then click the "Commit" button.
Your changes are automatically synced to the cloud and shared with your team—no push or pull required!
There is currently no Linux desktop app. The Linux workflow uses the CLI exclusively. You can also use the [WebUI](https://app.diversion.dev/) for browsing repositories, reviewing changes, and managing collaboration.
Open a terminal and run:
```bash theme={null}
curl -sL https://get.diversion.dev/unix | bash ; export PATH="$HOME/.diversion/bin:$PATH"
```
To make the path permanent, add it to your `.bashrc` or `.zshrc`:
```bash theme={null}
echo 'export PATH="$HOME/.diversion/bin:$PATH"' >> ~/.bashrc
```
By installing Diversion, you agree to the [Terms of Service](https://www.diversion.dev/terms-of-service)
Run the following command to open the WebUI and create your account:
```bash theme={null}
dv login
```
A browser window will open so you can authenticate. Once logged in, you're good to go!
Create a new repository using the [init command](/cmd-ref/init), or clone an existing repository you've been added to using the [clone command](/cmd-ref/clone).
Make changes to your files as usual. Diversion will track your changes in the background.
To check the status of your changes:
```bash theme={null}
dv status
```
Once you're ready to save a version of your progress:
```bash theme={null}
dv commit -a -m "your commit message"
```
By default, Diversion automatically syncs committed changes across the team. You don't need to push or pull manually, just commit your work and it gets shared.
You're now using Diversion on Linux. For the full list of CLI commands, check out the [CLI Reference](/cmd-ref/about-cmd).
## What's Next?
Now that you're set up, explore these guides to get the most out of Diversion:
Invite collaborators and manage permissions
Bring your existing codebase into Diversion
Work on features in parallel without conflicts
Install the Unreal Engine plugin