> ## Documentation Index
> Fetch the complete documentation index at: https://docs.diversion.dev/llms.txt
> Use this file to discover all available pages before exploring further.
# Unreal Engine プラグイン
> Unreal Engine エディターを離れずに Diversion を使用する
ソースコントロールを使いたいけれど、複数のソフトウェアをインストールして使う手間を避けたい、そして Unreal Engine を使っている、というあなたのためのものです。
Unreal Engine 5.8 のサポートは現在 **Windows と Mac のみ** に限定されています。UE 5.8 では Linux はまだサポートされていません。
## インストール
### 前提条件
プラグインをインストールする前に、Diversion をインストールしてサインインしておく必要があります。まだの場合は [クイックスタート](/ja/quickstart) ガイドを参照してください。
### プラグインのインストール
[//]: #
[//]: # ""
[//]: # " "
[//]: # " Download the plugin for your Unreal Engine version:"
[//]: # " - Unreal Engine 5.3: [https://get.diversion.dev/ue-plugin/Diversion-v0.1.4-ue5.3.zip](https://get.diversion.dev/ue-plugin/Diversion-v0.1.4-ue5.3.zip)."
[//]: # " - Unreal Engine 5.4: [https://get.diversion.dev/ue-plugin/Diversion-v0.1.4-ue5.4.zip](https://get.diversion.dev/ue-plugin/Diversion-v0.1.4-ue5.4.zip)."
[//]: # " "
[//]: # " "
[//]: # " Unzip it, and copy the `Diversion` folder (the folder and all of its contents, not just the folder) into the `Marketplace` folder inside Unreal Engine's `Plugins` folder. Depending on your engine's version and where you installed it, it should look something like this: `C:\Program Files\Epic Games\UE_5.3\Engine\Plugins\Marketplace`."
[//]: # " Create the `Marketplace` folder in case it doesn't exist."
[//]: # " "
[//]: # ""
[//]: # "The plugin will also be available in the Unreal Engine Marketplace in the near future."
Fab マーケットプレイス で `Diversion` を検索し、
`Add to My Library` ボタンをクリックしてアカウントにプラグインを追加します。
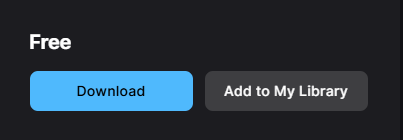 次に、`Download` ボタンをクリックし、`Epic Games Launcher` リンクをクリックしてエンジンアセットライブラリに移動します。
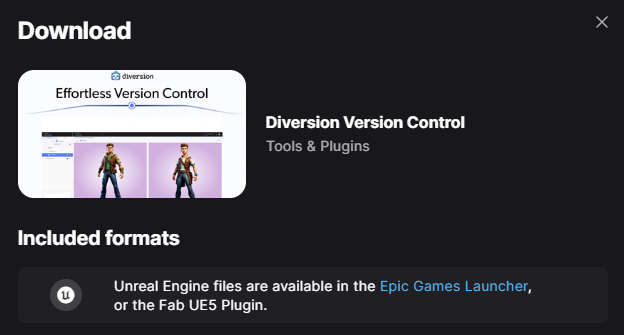 あるいは、単純に こちらをクリックして Epic Games Launcher を開く こともできます。
プラグインは FAB 経由でダウンロードされますが、**Epic Games Launcher からインストール** する必要があります。FAB でライブラリに追加した後、インストールを完了するにはランチャーに切り替える必要があります(次のステップ)。
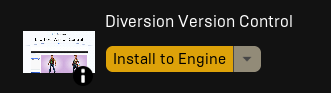
Epic Games Launcher を開き、エンジンアセットライブラリ(`Library` > `Fab Library`)に移動します。下部で Diversion プラグインを見つけ、`Install to Engine` をクリックします。
あるいは、単純に こちらをクリックして Epic Games Launcher を開く こともできます。
プラグインは FAB 経由でダウンロードされますが、**Epic Games Launcher からインストール** する必要があります。FAB でライブラリに追加した後、インストールを完了するにはランチャーに切り替える必要があります(次のステップ)。
Epic Games Launcher を開き、エンジンアセットライブラリ(`Library` > `Fab Library`)に移動します。下部で Diversion プラグインを見つけ、`Install to Engine` をクリックします。
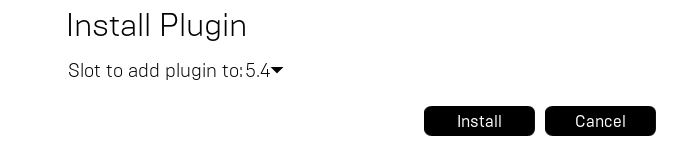
 プラグインをインストールしたい Unreal Engine の正しいバージョンを選択し、`Install` をクリックします。
 マーケットプレイスからダウンロードする代わりに、UE プロジェクトにプラグインを手動で追加したい場合は、
以下のリンクからソースコードを入手できます:
* Unreal Engine 5.3: [Diversion-v2.0.19-ue5.3.0.zip](https://get.diversion.dev/ue-plugin/Diversion-v2.0.19-ue5.3.0-nobin.zip)
* Unreal Engine 5.4: [Diversion-v2.0.19-ue5.4.0.zip](https://get.diversion.dev/ue-plugin/Diversion-v2.0.19-ue5.4.0-nobin.zip)
* Unreal Engine 5.5: [Diversion-v2.0.19-ue5.5.0.zip](https://get.diversion.dev/ue-plugin/Diversion-v2.0.19-ue5.5.0-nobin.zip)
* Unreal Engine 5.6: [Diversion-v2.0.19-ue5.6.0.zip](https://get.diversion.dev/ue-plugin/Diversion-v2.0.19-ue5.6.0-nobin.zip)
* Unreal Engine 5.7: [Diversion-v2.0.19-ue5.7.0.zip](https://get.diversion.dev/ue-plugin/Diversion-v2.0.19-ue5.7.0-nobin.zip)
* Unreal Engine 5.8(Windows/Mac のみ): [Diversion-v2.0.19-ue5.8.0.zip](https://get.diversion.dev/ue-plugin/Diversion-v2.0.19-ue5.8.0-nobin.zip)
このオプションを選択すると、プラグインをソースからビルドし、最新機能や改善に追従するためにバージョンを手動でメンテナンスする必要があります。
## 設定
プラグインをインストールしたら、Diversion をソースコントロールプロバイダーとして使用するために、プロジェクトごとに設定する必要があります。
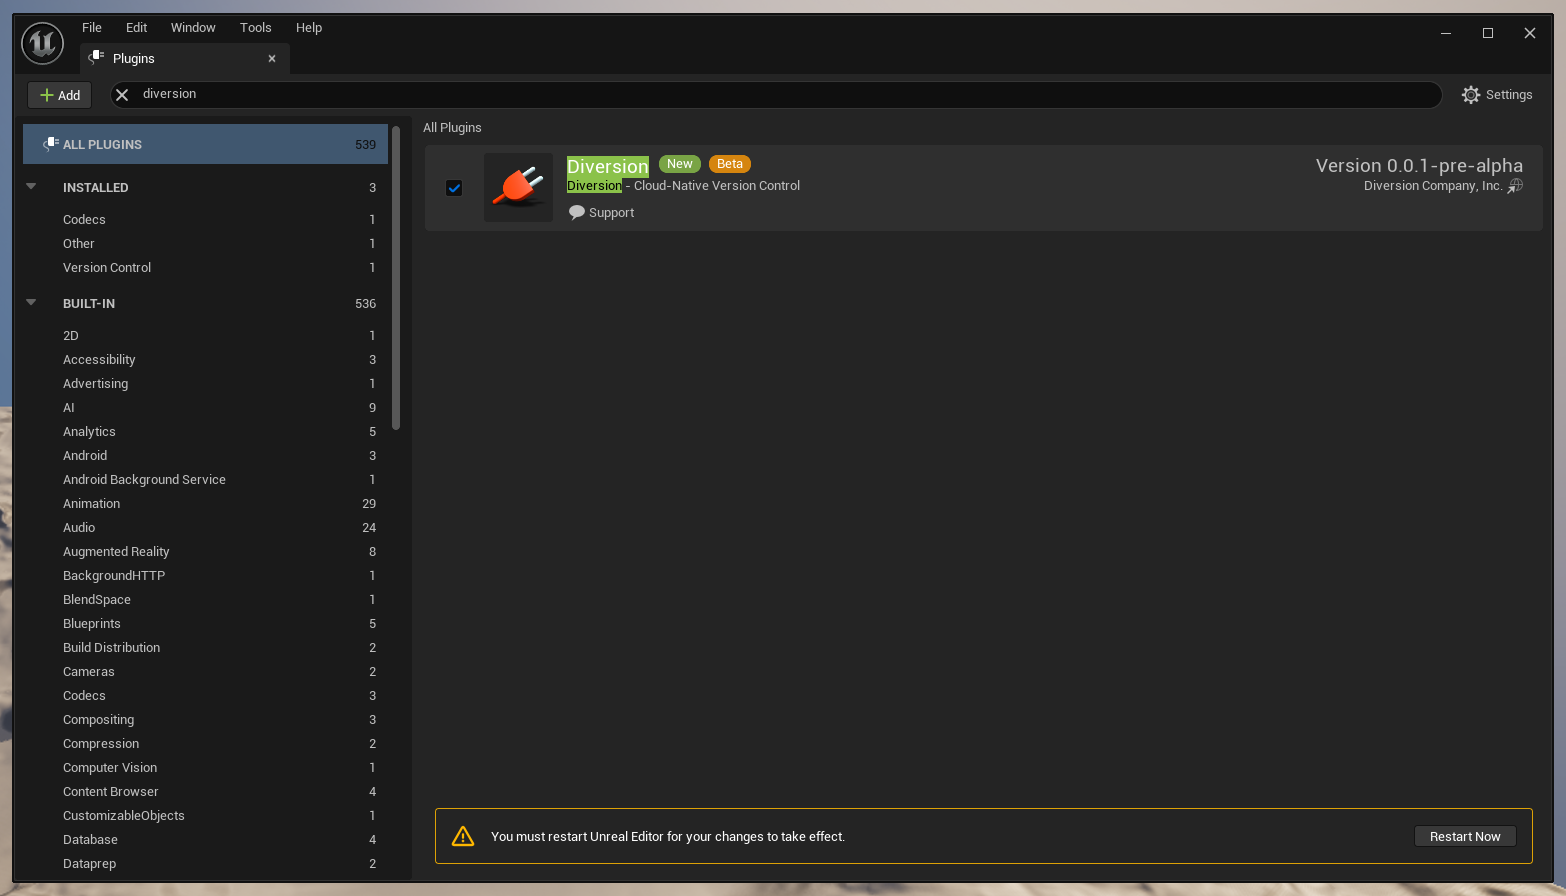
エディターで `Edit` > `Plugins` に移動します。`Diversion` を検索し、チェックボックスをクリックしてプラグインを有効化します。エディターの再起動を求められた場合は、再起動してください。
マーケットプレイスからダウンロードする代わりに、UE プロジェクトにプラグインを手動で追加したい場合は、
以下のリンクからソースコードを入手できます:
* Unreal Engine 5.3: [Diversion-v2.0.19-ue5.3.0.zip](https://get.diversion.dev/ue-plugin/Diversion-v2.0.19-ue5.3.0-nobin.zip)
* Unreal Engine 5.4: [Diversion-v2.0.19-ue5.4.0.zip](https://get.diversion.dev/ue-plugin/Diversion-v2.0.19-ue5.4.0-nobin.zip)
* Unreal Engine 5.5: [Diversion-v2.0.19-ue5.5.0.zip](https://get.diversion.dev/ue-plugin/Diversion-v2.0.19-ue5.5.0-nobin.zip)
* Unreal Engine 5.6: [Diversion-v2.0.19-ue5.6.0.zip](https://get.diversion.dev/ue-plugin/Diversion-v2.0.19-ue5.6.0-nobin.zip)
* Unreal Engine 5.7: [Diversion-v2.0.19-ue5.7.0.zip](https://get.diversion.dev/ue-plugin/Diversion-v2.0.19-ue5.7.0-nobin.zip)
* Unreal Engine 5.8(Windows/Mac のみ): [Diversion-v2.0.19-ue5.8.0.zip](https://get.diversion.dev/ue-plugin/Diversion-v2.0.19-ue5.8.0-nobin.zip)
このオプションを選択すると、プラグインをソースからビルドし、最新機能や改善に追従するためにバージョンを手動でメンテナンスする必要があります。
## 設定
プラグインをインストールしたら、Diversion をソースコントロールプロバイダーとして使用するために、プロジェクトごとに設定する必要があります。
エディターで `Edit` > `Plugins` に移動します。`Diversion` を検索し、チェックボックスをクリックしてプラグインを有効化します。エディターの再起動を求められた場合は、再起動してください。
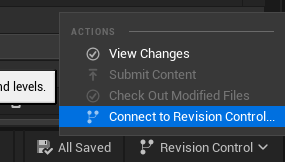
 プラグインが有効になった状態で、右下の `Revision Control -> Connect to Revision Control` をクリックします。
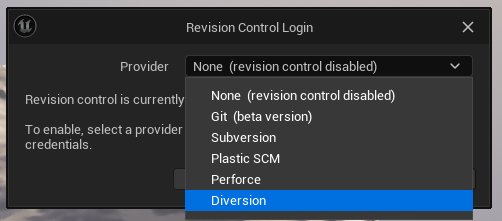
 表示されるウィンドウで、プロバイダーのドロップダウンリストから `Diversion` を選択します。
 ログインしていないと次のステップは機能しません。方法が分からない場合は [クイックスタート](/ja/quickstart) を参照してください。
プロジェクトフォルダーが Diversion リポジトリでない場合、初期化を促されます。
Unreal Engine が `.uproject` ファイルのあるフォルダーから開かれていることを確認してください。ここにリポジトリが作成されます。
`Initialize project with Diversion` をクリックすると、プラグインが残りを処理します。何も起こっていないように見える場合は、ログイン状態を確認し、プロバイダーのドロップダウンリストから Diversion を再選択してみてください。
プラグインはリポジトリのルートと Diversion のインストールを認識します。
ログインしていないと次のステップは機能しません。方法が分からない場合は [クイックスタート](/ja/quickstart) を参照してください。
プロジェクトフォルダーが Diversion リポジトリでない場合、初期化を促されます。
Unreal Engine が `.uproject` ファイルのあるフォルダーから開かれていることを確認してください。ここにリポジトリが作成されます。
`Initialize project with Diversion` をクリックすると、プラグインが残りを処理します。何も起こっていないように見える場合は、ログイン状態を確認し、プロバイダーのドロップダウンリストから Diversion を再選択してみてください。
プラグインはリポジトリのルートと Diversion のインストールを認識します。
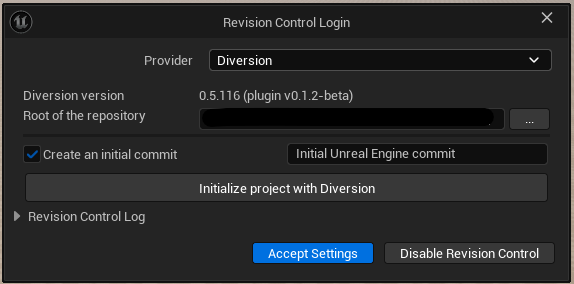 初期化後、次の画面が表示されます。
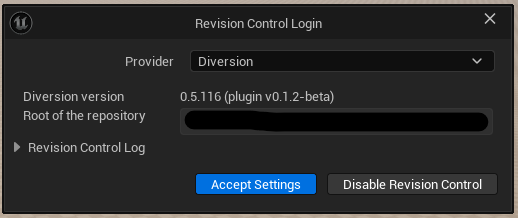 `Accept Settings` をクリックすれば準備完了です!
プロジェクトが既に Diversion リポジトリの場合(例: リポジトリのクローン時)は、`Accept Settings` をクリックするだけで準備完了です!
## 使い方
プラグインを使った一般的なワークフローを見ていきましょう。
ここでは、プラグインがすでにインストール・設定されたクリーンな Unreal プロジェクトを使用します。
### 変更を加える
このプロジェクトは、いずれ Multiplayer Open World Survival RPG With Crafting and Building Mechanics™ になります。
そのためには、キャラクターが必要です。作成しましょう。`Content Browser` で右クリックして `Blueprint Class` を選択します。
表示されるウィンドウで、`Character` を選択して `MyCharacter` と名付けます。
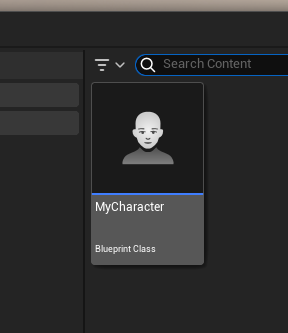
新しいファイルが見慣れないものに見えるかもしれません。黄色のクエスチョンマークが付いています。これは、Unreal Engine がファイルをメモリ内に作成したばかりで、まだディスクに保存していないため、Diversion がそれを認識していないからです。
`Accept Settings` をクリックすれば準備完了です!
プロジェクトが既に Diversion リポジトリの場合(例: リポジトリのクローン時)は、`Accept Settings` をクリックするだけで準備完了です!
## 使い方
プラグインを使った一般的なワークフローを見ていきましょう。
ここでは、プラグインがすでにインストール・設定されたクリーンな Unreal プロジェクトを使用します。
### 変更を加える
このプロジェクトは、いずれ Multiplayer Open World Survival RPG With Crafting and Building Mechanics™ になります。
そのためには、キャラクターが必要です。作成しましょう。`Content Browser` で右クリックして `Blueprint Class` を選択します。
表示されるウィンドウで、`Character` を選択して `MyCharacter` と名付けます。
新しいファイルが見慣れないものに見えるかもしれません。黄色のクエスチョンマークが付いています。これは、Unreal Engine がファイルをメモリ内に作成したばかりで、まだディスクに保存していないため、Diversion がそれを認識していないからです。
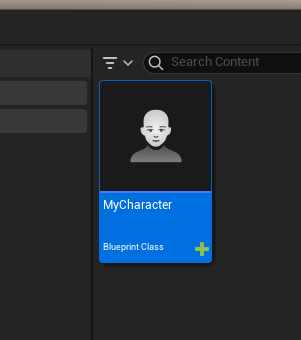
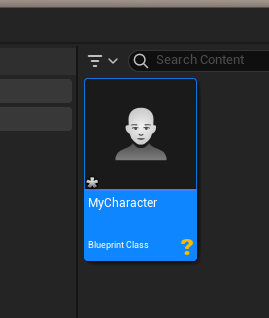 修正しましょう。ファイルをダブルクリックして開き、左上の `Save` ボタンをクリックします。あるいは、Content Browser でファイルを選択した状態で `Ctrl + S` を押して保存することもできます。
クエスチョンマークがなくなり、代わりに緑のプラス記号が表示されます。これは、ファイルが Diversion によって追跡され、新しく追加されたファイルとして認識されたことを意味します。
修正しましょう。ファイルをダブルクリックして開き、左上の `Save` ボタンをクリックします。あるいは、Content Browser でファイルを選択した状態で `Ctrl + S` を押して保存することもできます。
クエスチョンマークがなくなり、代わりに緑のプラス記号が表示されます。これは、ファイルが Diversion によって追跡され、新しく追加されたファイルとして認識されたことを意味します。
 ### 変更をコミットする
この変更をリポジトリに保存して、バックアップしたり、チームと共有できるようにしたいと思います。
右下の `Revision Control` ボタンを再度クリックし、`Submit Content` をクリックします。
### 変更をコミットする
この変更をリポジトリに保存して、バックアップしたり、チームと共有できるようにしたいと思います。
右下の `Revision Control` ボタンを再度クリックし、`Submit Content` をクリックします。
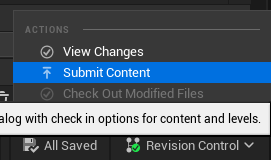 表示されるウィンドウには、前回のコミットから変更されたすべてのファイルのリストが表示されます。この場合、緑のプラス記号が付いた `MyCharacter` が表示されます。`.uproject` ファイルも表示されます。Diversion がこれも新しいファイルとして認識しているためです。
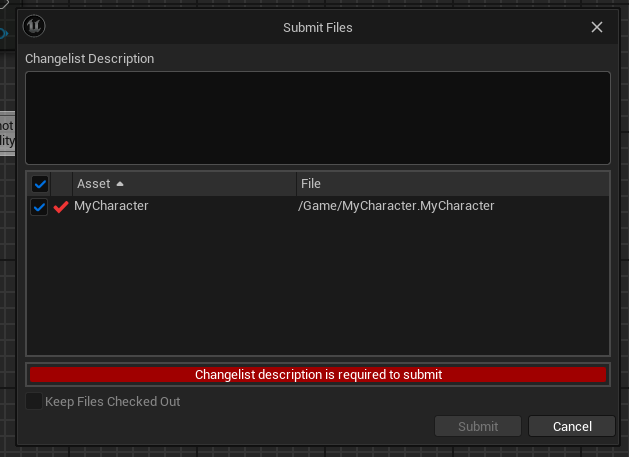
`Changelist Description` というラベルのテキストボックスに、コミットする変更の簡単な説明を書きます。この場合、`Added MyCharacter` と書けます。
表示されるウィンドウには、前回のコミットから変更されたすべてのファイルのリストが表示されます。この場合、緑のプラス記号が付いた `MyCharacter` が表示されます。`.uproject` ファイルも表示されます。Diversion がこれも新しいファイルとして認識しているためです。
`Changelist Description` というラベルのテキストボックスに、コミットする変更の簡単な説明を書きます。この場合、`Added MyCharacter` と書けます。
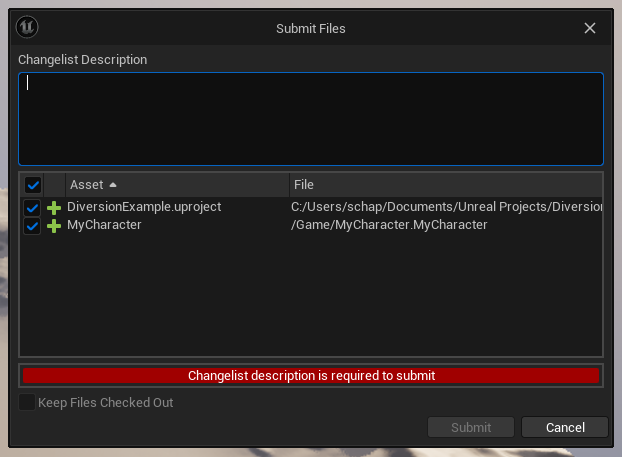 Diversion は、あいまい、不明瞭、または簡潔すぎるコミットメッセージの使用を推奨しません。これはあくまでデモ用です。意味のあるコミットメッセージを書いてください。
`Submit` ボタンをクリックすると、`MyCharacter` の緑のプラス記号が消え、Diversion がファイルをコミットしたことを意味します。
Diversion は、あいまい、不明瞭、または簡潔すぎるコミットメッセージの使用を推奨しません。これはあくまでデモ用です。意味のあるコミットメッセージを書いてください。
`Submit` ボタンをクリックすると、`MyCharacter` の緑のプラス記号が消え、Diversion がファイルをコミットしたことを意味します。
 ### Web UI で確認する
ブラウザを開き、[ダッシュボード](https://app.diversion.dev) に移動します。リポジトリを選択します(**Remote Repositories** タブの `View` ボタン、または左上のリポジトリセレクター経由)。プロジェクトのフォルダーと同じ名前になっているはずです。
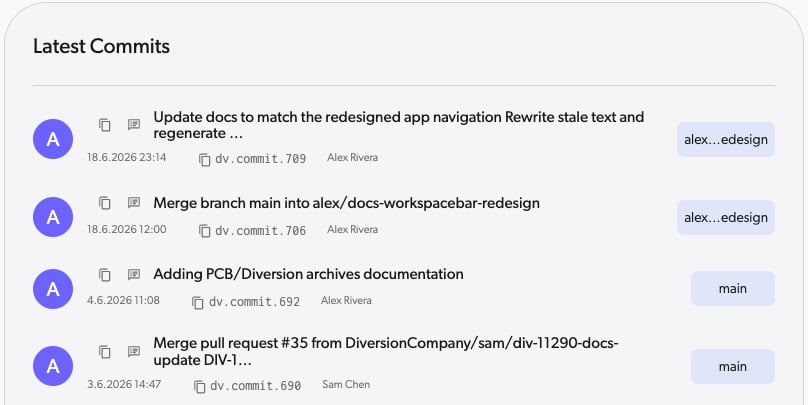
先ほど作成したコミットと、書いた説明、追加したファイルが表示されます。左のナビゲーションレールから **Commits** ビューを開いてコミットを確認します。
### Web UI で確認する
ブラウザを開き、[ダッシュボード](https://app.diversion.dev) に移動します。リポジトリを選択します(**Remote Repositories** タブの `View` ボタン、または左上のリポジトリセレクター経由)。プロジェクトのフォルダーと同じ名前になっているはずです。
先ほど作成したコミットと、書いた説明、追加したファイルが表示されます。左のナビゲーションレールから **Commits** ビューを開いてコミットを確認します。
 ### もう一度変更を加える
今のキャラクターは空のコライダーだけなので、見えるようにプレースホルダーのメッシュを追加しましょう。
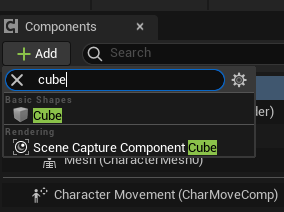
`MyCharacter` ブループリントで、左上の `Add Component` ボタンをクリックし、`Cube` を検索して追加します。これで、キャラクターが見えるようになりました。
### もう一度変更を加える
今のキャラクターは空のコライダーだけなので、見えるようにプレースホルダーのメッシュを追加しましょう。
`MyCharacter` ブループリントで、左上の `Add Component` ボタンをクリックし、`Cube` を検索して追加します。これで、キャラクターが見えるようになりました。
 しかし、キャラクターは何もしません。キャラクターの `Event Graph` で、`Print String` ノードを追加し、`Event Begin Play` ノードに接続します。これで、キャラクターに基本的な機能が追加されました。
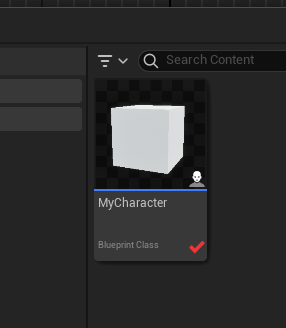
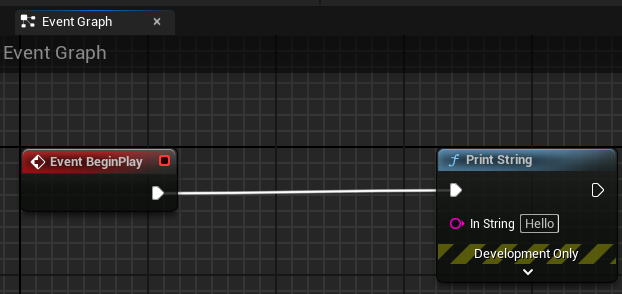 コンパイルしてファイルを保存します。`Content Browser` を開くと、`MyCharacter` の隣に赤いチェックマークが表示されているのが分かります。これは、Diversion がファイルの変更を認識したことを意味します。
 ### もう一度コミットする
前回と同様、右下の `Revision Control` ボタンをクリックし、`Submit Content` をクリックします。
`MyCharacter` ファイルの隣に赤いチェックマークが付いた状態が表示されます。
### もう一度コミットする
前回と同様、右下の `Revision Control` ボタンをクリックし、`Submit Content` をクリックします。
`MyCharacter` ファイルの隣に赤いチェックマークが付いた状態が表示されます。
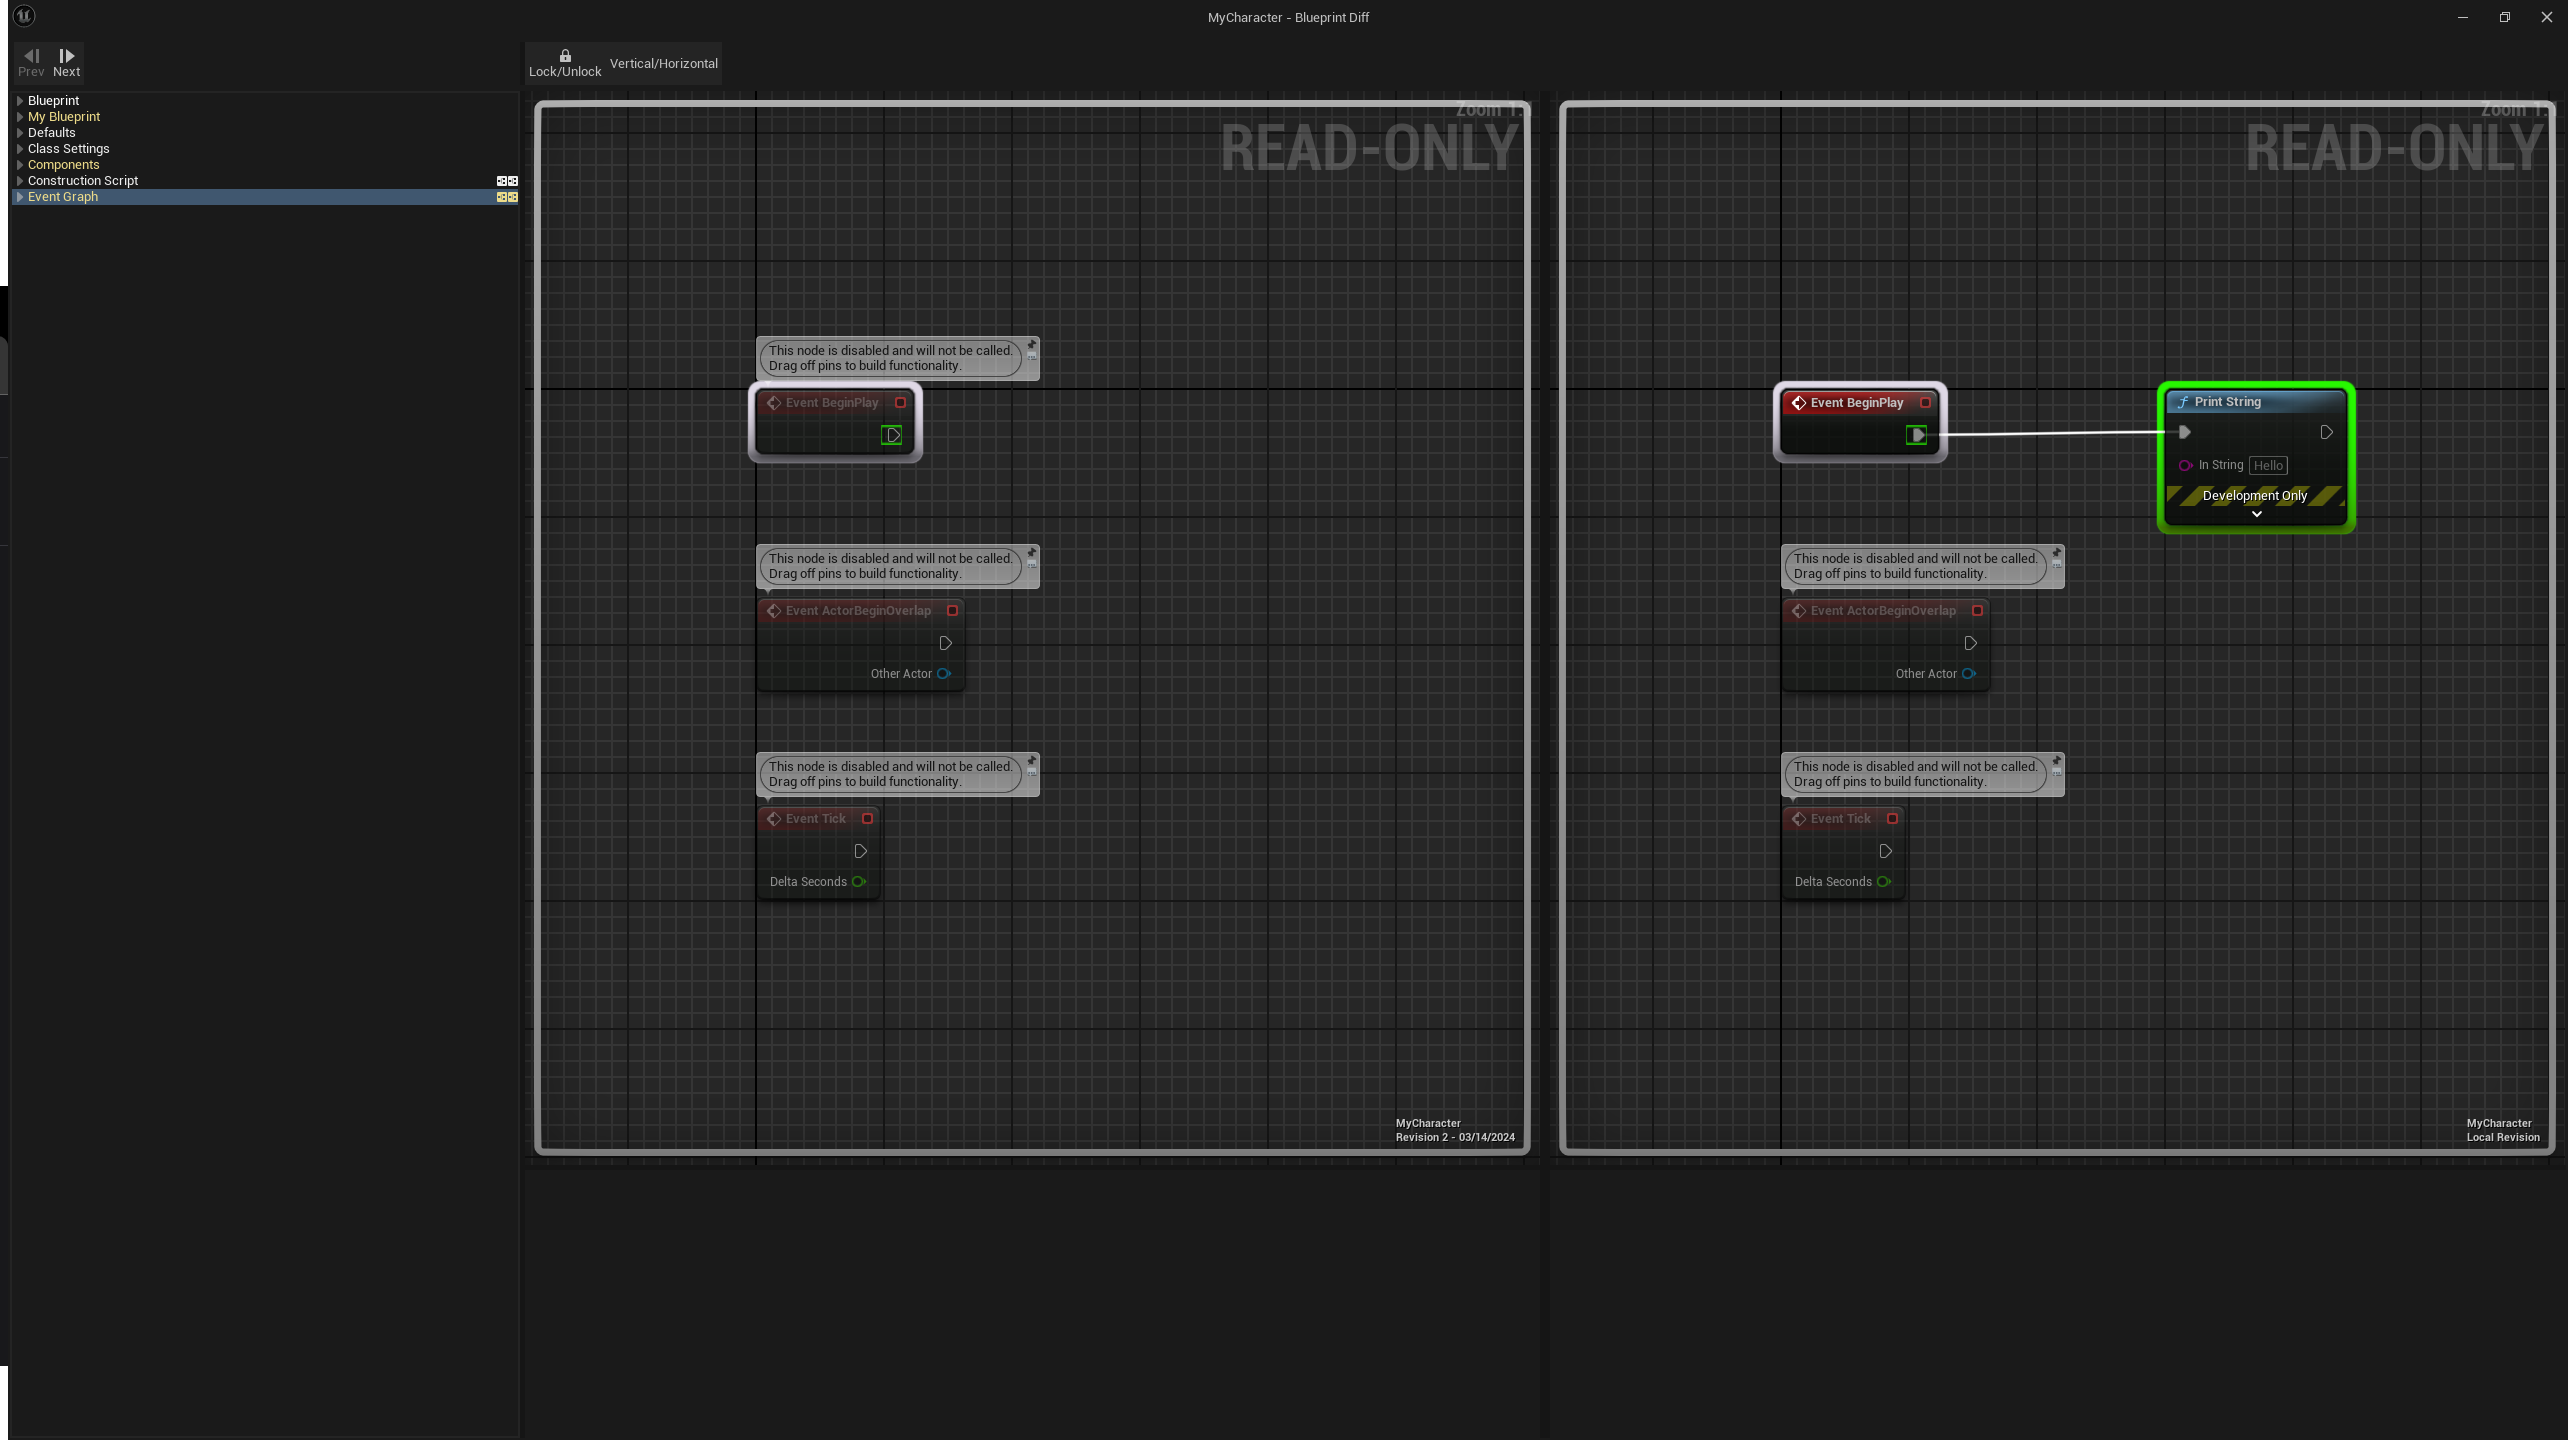
 ファイルをダブルクリックして、Unreal の diff ツールで加えた変更を確認します。
このウィンドウでは、右側の自分のリビジョンと、左側の最後にコミットされたリビジョンの差分を確認できます。左側のリストに `Event Graph` というエントリが表示されるはずです。
それをクリックすると、ブループリントに加えた変更が表示され、追加した `Print String` ノードが見えるはずです。
ファイルをダブルクリックして、Unreal の diff ツールで加えた変更を確認します。
このウィンドウでは、右側の自分のリビジョンと、左側の最後にコミットされたリビジョンの差分を確認できます。左側のリストに `Event Graph` というエントリが表示されるはずです。
それをクリックすると、ブループリントに加えた変更が表示され、追加した `Print String` ノードが見えるはずです。
 作業内容を確認したら、再度コミットする変更の説明を書きます。この場合、`Adding placeholder mesh and basic functionality to MyCharacter` と書けます。
`Submit` ボタンをクリックすると、赤いチェックマークが消え、Diversion がファイルをコミットしたことを意味します。
### ソフトロック警告を無効にする
Diversion のソフトロック機能は、ファイルが他のチームメンバーによって編集中であることを警告し、潜在的なマージ競合の回避に役立ちます。他の人が作業中のファイルを開こうとすると、警告メッセージが表示されます。
これらの警告を無効にしたい場合は、次の手順に従います:
上部のメニューバーで `Edit` をクリックし、`Project Settings` を選択します。
作業内容を確認したら、再度コミットする変更の説明を書きます。この場合、`Adding placeholder mesh and basic functionality to MyCharacter` と書けます。
`Submit` ボタンをクリックすると、赤いチェックマークが消え、Diversion がファイルをコミットしたことを意味します。
### ソフトロック警告を無効にする
Diversion のソフトロック機能は、ファイルが他のチームメンバーによって編集中であることを警告し、潜在的なマージ競合の回避に役立ちます。他の人が作業中のファイルを開こうとすると、警告メッセージが表示されます。
これらの警告を無効にしたい場合は、次の手順に従います:
上部のメニューバーで `Edit` をクリックし、`Project Settings` を選択します。
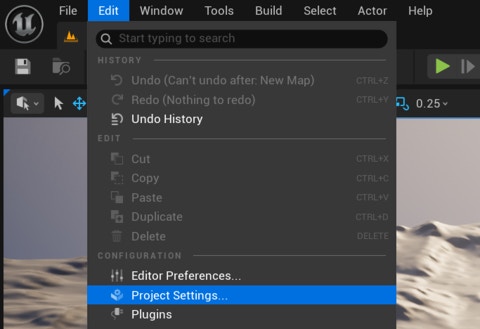 「soft lock」を検索し、`Enable Diversion Auto Soft Lock Confirmations` フィールドの **チェックを外します**。
 設定ウィンドウを閉じ、変更を反映させるためにエディターを再起動します。
**重要:** ソフトロック警告を無効にすると、プロジェクトの構成ファイルが変更されます。この変更をリポジトリにコミットすると、チーム全体に影響します。チーム全体の設定ではなく個人的な設定にしたい場合は、この構成ファイルをコミットしないか、[無視リスト](/ja/basic/dvignore) に追加することを検討してください。
設定ウィンドウを閉じ、変更を反映させるためにエディターを再起動します。
**重要:** ソフトロック警告を無効にすると、プロジェクトの構成ファイルが変更されます。この変更をリポジトリにコミットすると、チーム全体に影響します。チーム全体の設定ではなく個人的な設定にしたい場合は、この構成ファイルをコミットしないか、[無視リスト](/ja/basic/dvignore) に追加することを検討してください。