> ## Documentation Index
> Fetch the complete documentation index at: https://docs.diversion.dev/llms.txt
> Use this file to discover all available pages before exploring further.
# Coming from perforce
このガイドでは、Unreal Engine プロジェクトを Perforce から Diversion に移行する方法について、機能比較と段階的な移行プロセスを含めて説明します。
## 移行を検討する理由
Diversion は Perforce と同じ中核的なバージョン管理機能を、いくつかの重要な改善とともに提供します:
* インストールサイズが小さい(クライアント側、サーバーのセットアップは不要)
* **コミット** 速度が大幅に高速\
*(Diversion はバックグラウンドで継続的にアップロードします。コミットとは、履歴にスナップショットを保存する瞬間のことです)*
* 必須のワークフローに焦点を当てたシンプルな UI
* アーティストや非技術系のチームメンバーにとって優れたユーザー体験
## 機能比較
| 機能 | Perforce | Diversion |
| -------------------- | ----------------------- | ------------------------------------------------- |
| **クライアントインストールサイズ** | 大きく複雑なインストーラー | 小さく簡単なインストーラー |
| **学習曲線** | 急峻で圧倒される UI | 直感的で洗練されたインターフェース |
| **コミット速度** | 標準 | 大幅に高速 |
| **ビジュアル差分** | ✅ 利用可能 | ✅ 利用可能 |
| **変更リスト管理** | ✅ 利用可能 | ✅ 利用可能 |
| **ロックモデル** | ハード(排他的)ロック | ソフトロック(ブロックしない) + [ハードロック](/ja/hard-locks)(オプション) |
| **リビジョン制限** | `+S` ファイルタイプ(最新 N 個を保持) | [リビジョン制限](/ja/advanced/revision-limits)(ブランチセーフ) |
| **履歴追跡** | ✅ 完全な履歴 | ✅ 完全な履歴 |
| **Unreal Engine 連携** | ✅ ネイティブプラグイン | ✅ ネイティブプラグイン |
| **ユーザー体験** | 複雑でツール重視 | クリーンでアクション中心 |
| **アーティストフレンドリー度** | 非技術系ユーザーには難しい | あらゆるスキルレベル向けに設計 |
## ソフトロック vs. ハードロック
Diversion は、ファイルが編集中であることを自動的に示します(**ソフトロック**)— 明示的に編集権を取得する必要はありません。
**ブロックされることはありません**:プロンプトから編集を確認して先に進むことができます。
チームメイトのバージョンがコミットされていた場合、それを自分のブランチにマージできます(同じブランチで競合がなければ自動マージ)。
一部のチームではハードロックが必要な場合があります。排他的なファイルロックの構成の詳細は [ハードロック](/ja/hard-locks) をご覧ください。
**なぜ重要か:**\
Perforce では、ファイルの編集権を明示的に取得する(チェックアウトする)必要があります。他の誰かがロックしていて解除できない場合(休暇、病気など)、デッドロック状態になります。\
Diversion では、バックエンドが自動的かつ暗黙的にアクティブな編集を示し、作業をブロックしません。
***
## 移行オプション
Perforce にプロジェクトがあり Diversion に移行したい場合、2つのオプションがあります:
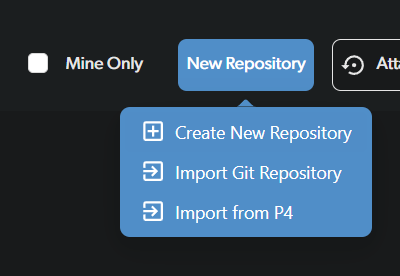 **オプション 1: P4 からのインポート** – 完全な Perforce の履歴を引き継ぎます。`+S` 保持ルールは Diversion の [リビジョン制限](/ja/advanced/revision-limits) として引き継げます。このプロセスの完了については Diversion チームにお問い合わせください。
**オプション 2: 新しいリポジトリを作成** – 履歴なしで一からスタートします。すぐに使い始めるにはこちらのほうが早くセットアップできます。
このガイドでは、オプション 2 を使用します。ローカルの Perforce プロジェクトパスを参照します:
**オプション 1: P4 からのインポート** – 完全な Perforce の履歴を引き継ぎます。`+S` 保持ルールは Diversion の [リビジョン制限](/ja/advanced/revision-limits) として引き継げます。このプロセスの完了については Diversion チームにお問い合わせください。
**オプション 2: 新しいリポジトリを作成** – 履歴なしで一からスタートします。すぐに使い始めるにはこちらのほうが早くセットアップできます。
このガイドでは、オプション 2 を使用します。ローカルの Perforce プロジェクトパスを参照します:
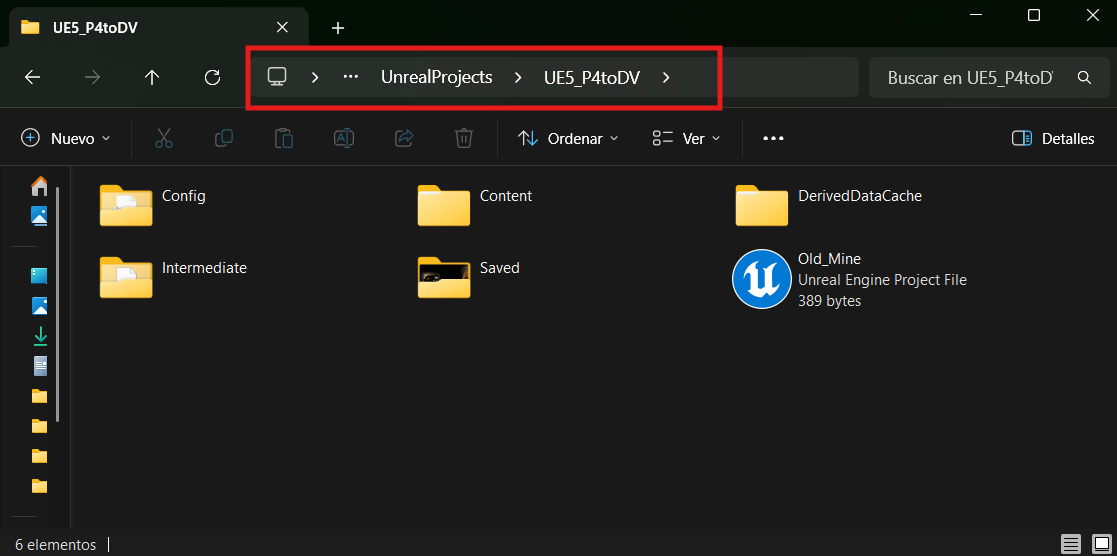 以前 Perforce で使用していたプロジェクトフォルダーを見つけたら、Diversion で **Create from Existing Folder**(既存のフォルダーから作成)を選択します。
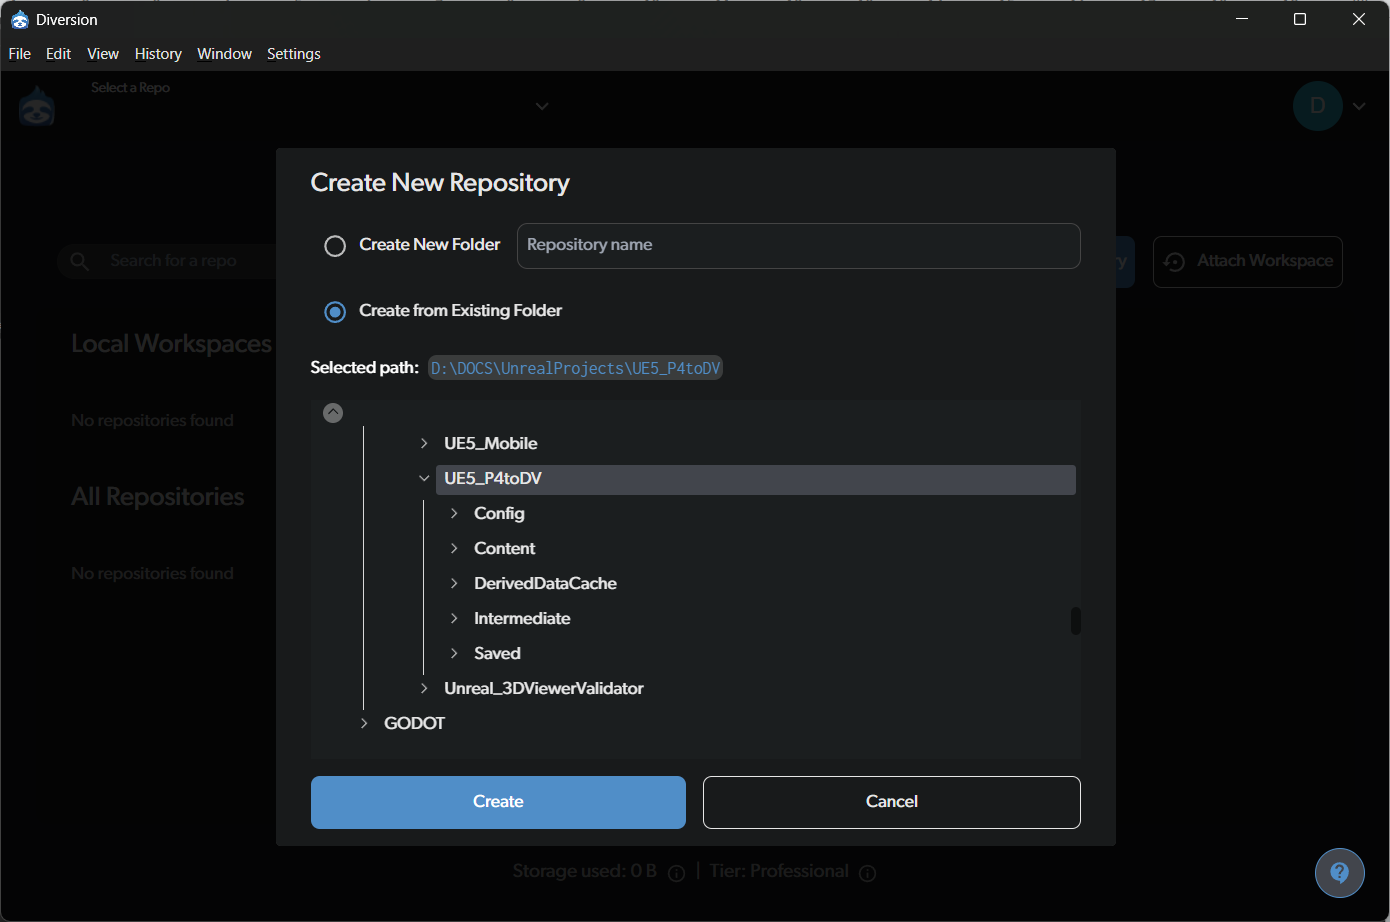 選択したパスからワークスペースがローカルに作成されると、メールアドレスを指定してコラボレーターを招待できます。
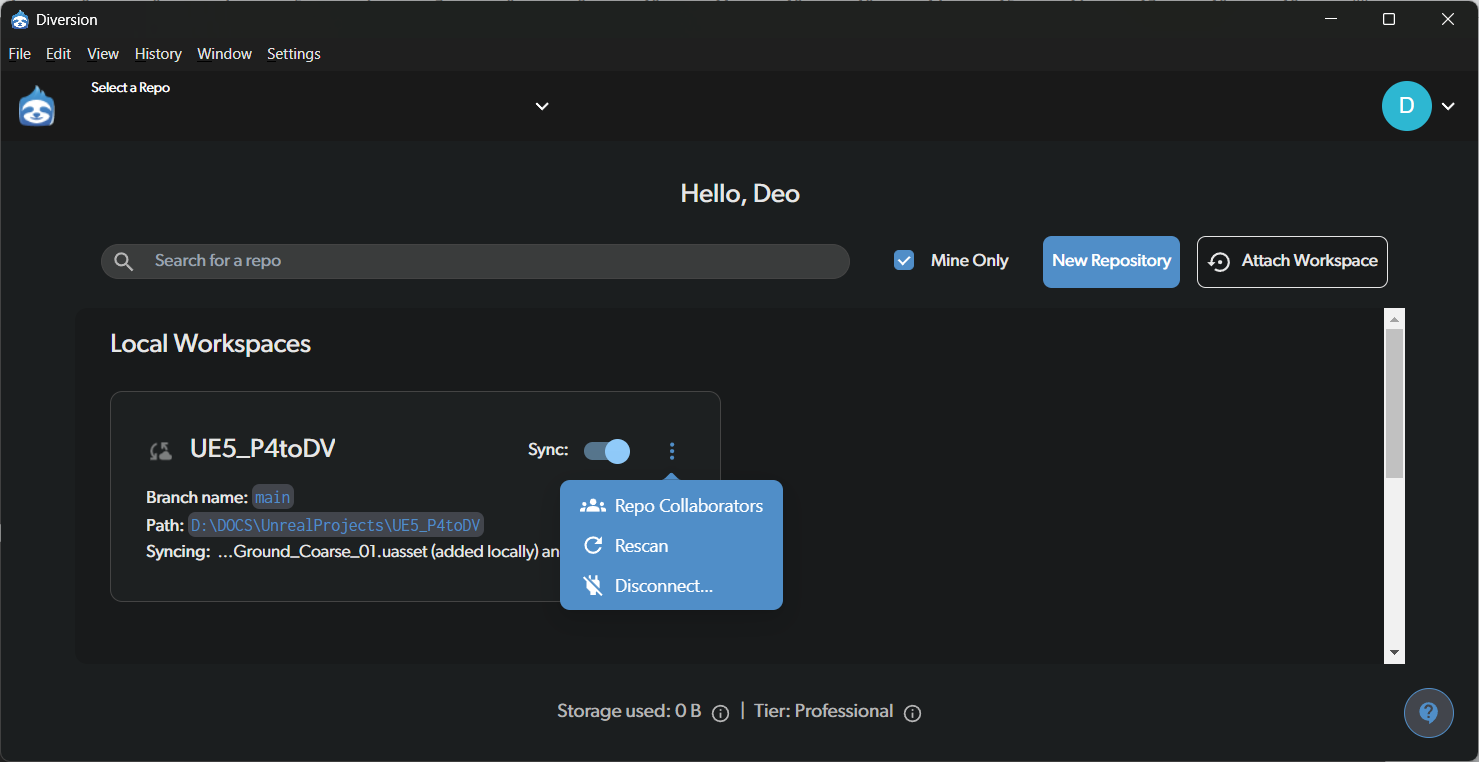 コラボレーターをプロジェクトに招待するのは簡単です。
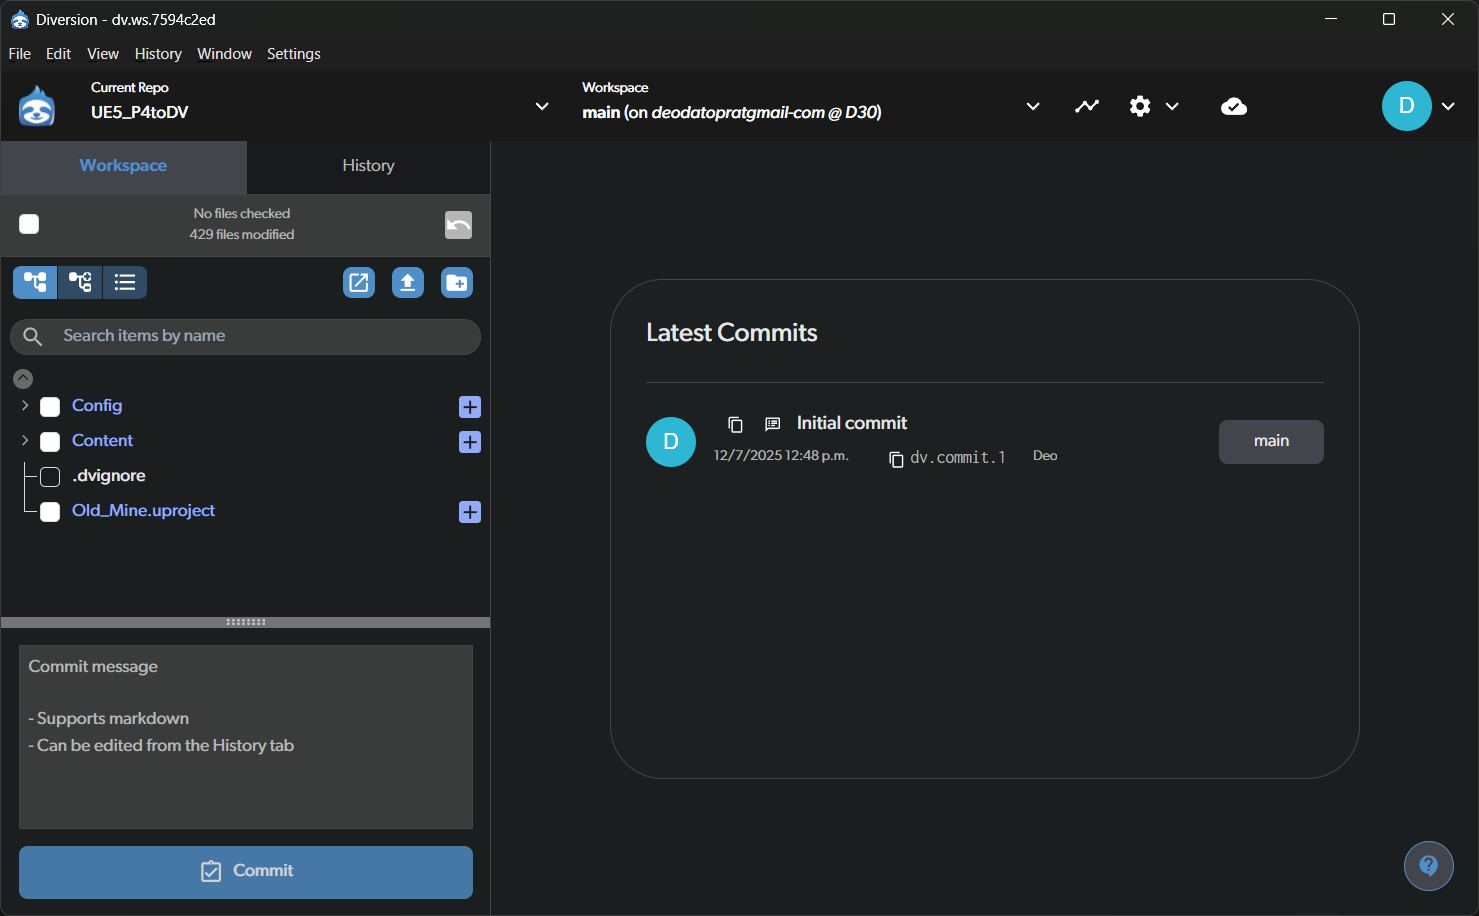
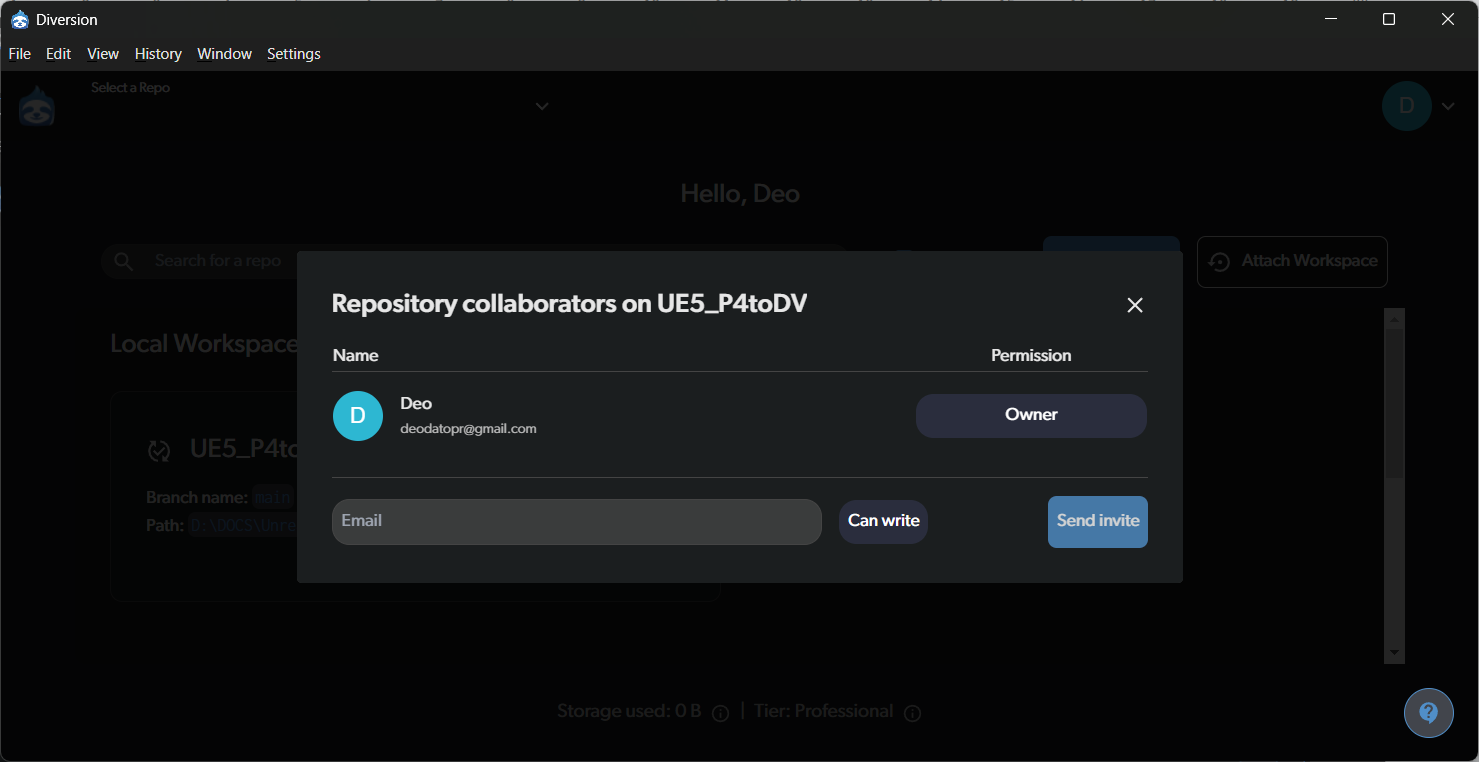 ワークスペースがセットアップされたら、リストからプロジェクトを選択するだけです。Diversion はプロジェクト管理パネルを自動的に起動し、履歴に何をコミットするかを正確に選べます。
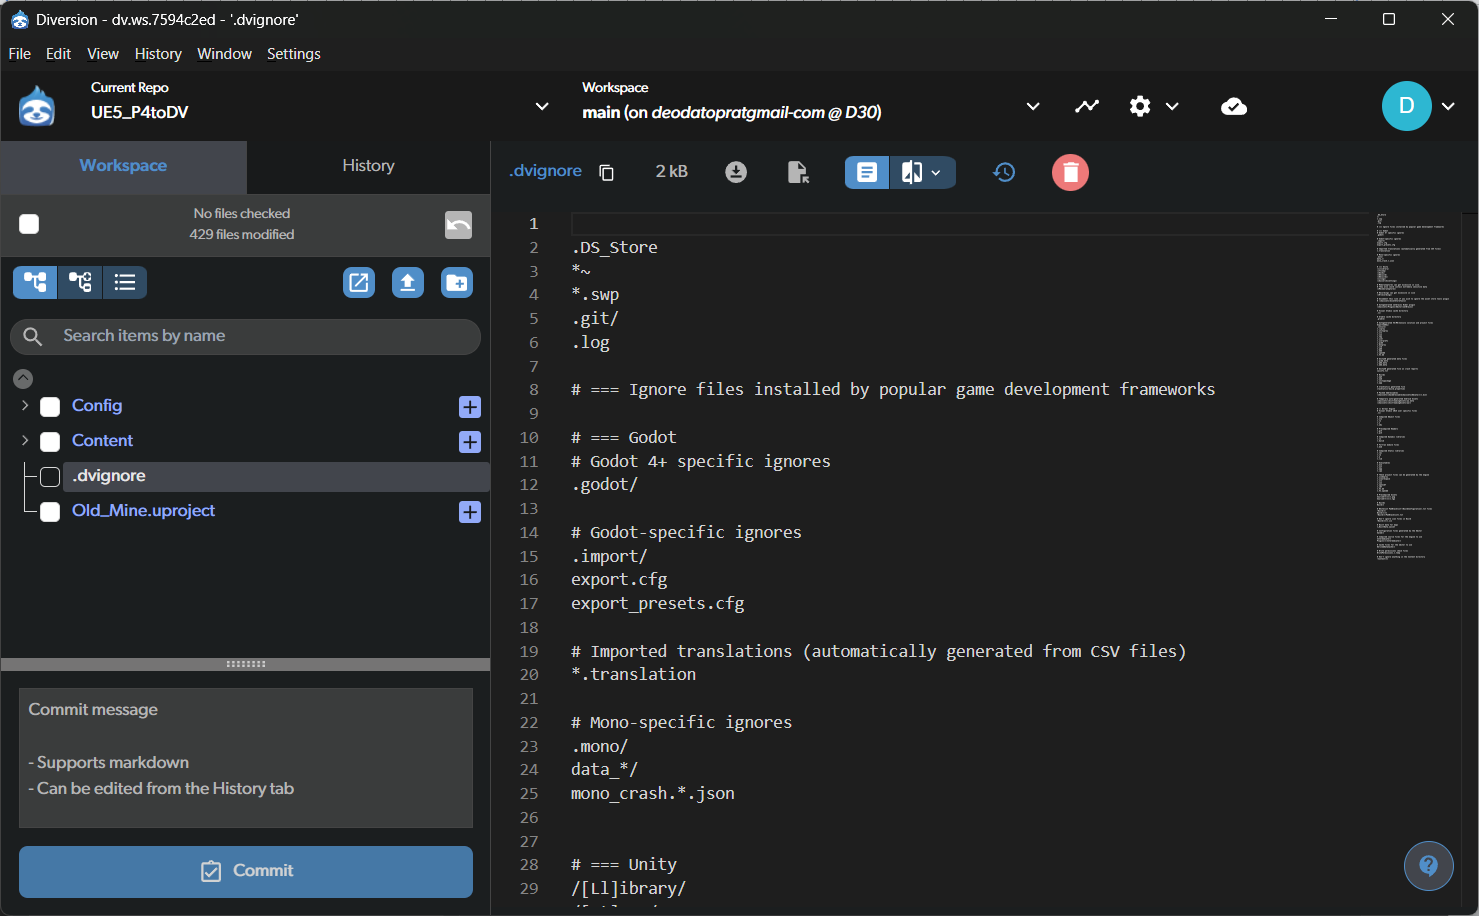
 Unreal、Godot、Unity を使用している場合、Diversion は `.dvignore` ファイルを自動的にセットアップし、エンジンによって一時的に生成または再構築されるフォルダーをスキップします。
 ## コミット時間
Diversion では、ワークスペースは継続的にクラウドと同期されます。**コミット** とは、履歴にスナップショットを保存することを選ぶ瞬間のことです。Diversion のアーキテクチャのおかげで、大規模な UE プロジェクトでもコミット操作は高速です。
5.6 以降、Diversion は UI からのより高速なコミットのための専用の **Commit** ボタンを備えています。
## コミット時間
Diversion では、ワークスペースは継続的にクラウドと同期されます。**コミット** とは、履歴にスナップショットを保存することを選ぶ瞬間のことです。Diversion のアーキテクチャのおかげで、大規模な UE プロジェクトでもコミット操作は高速です。
5.6 以降、Diversion は UI からのより高速なコミットのための専用の **Commit** ボタンを備えています。
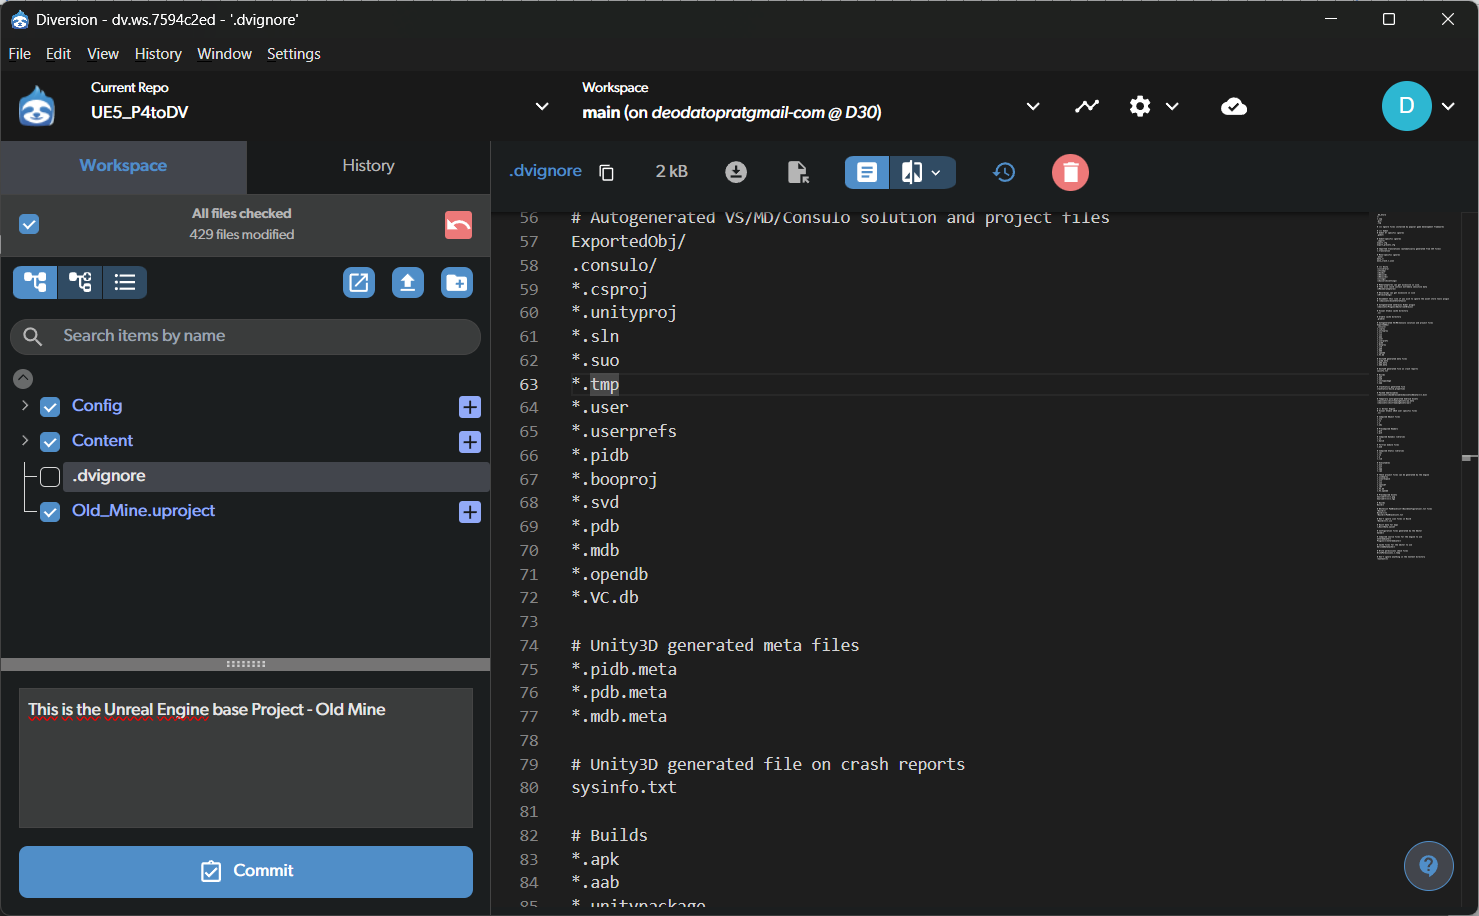 Perforce と比較して、コミット速度は大幅に高速です。
プロジェクト全体がわずかな時間で履歴にコミットされました!
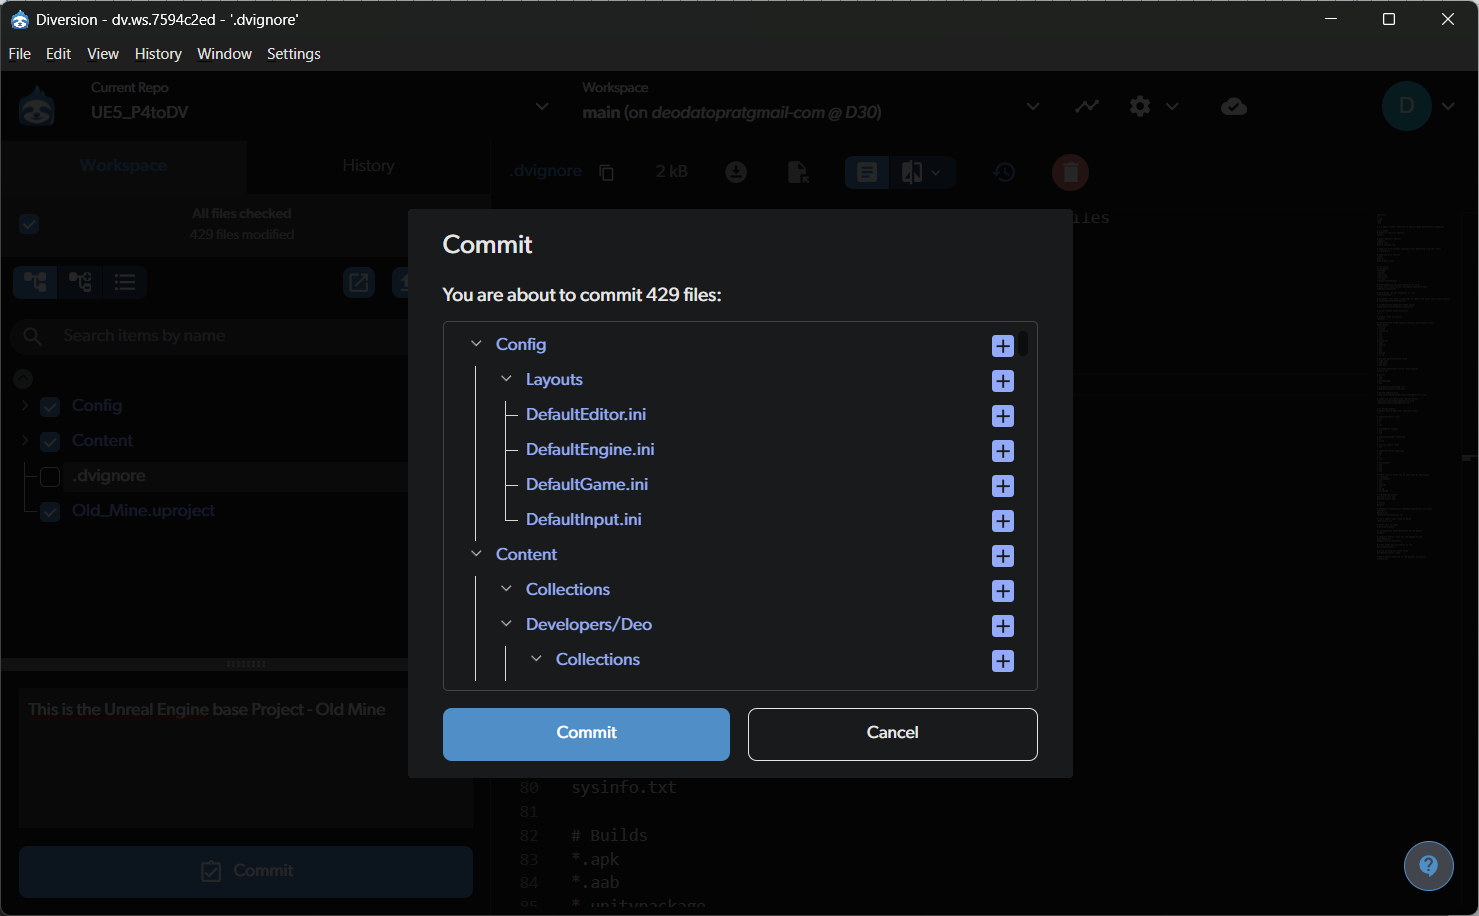
Perforce と比較して、コミット速度は大幅に高速です。
プロジェクト全体がわずかな時間で履歴にコミットされました!
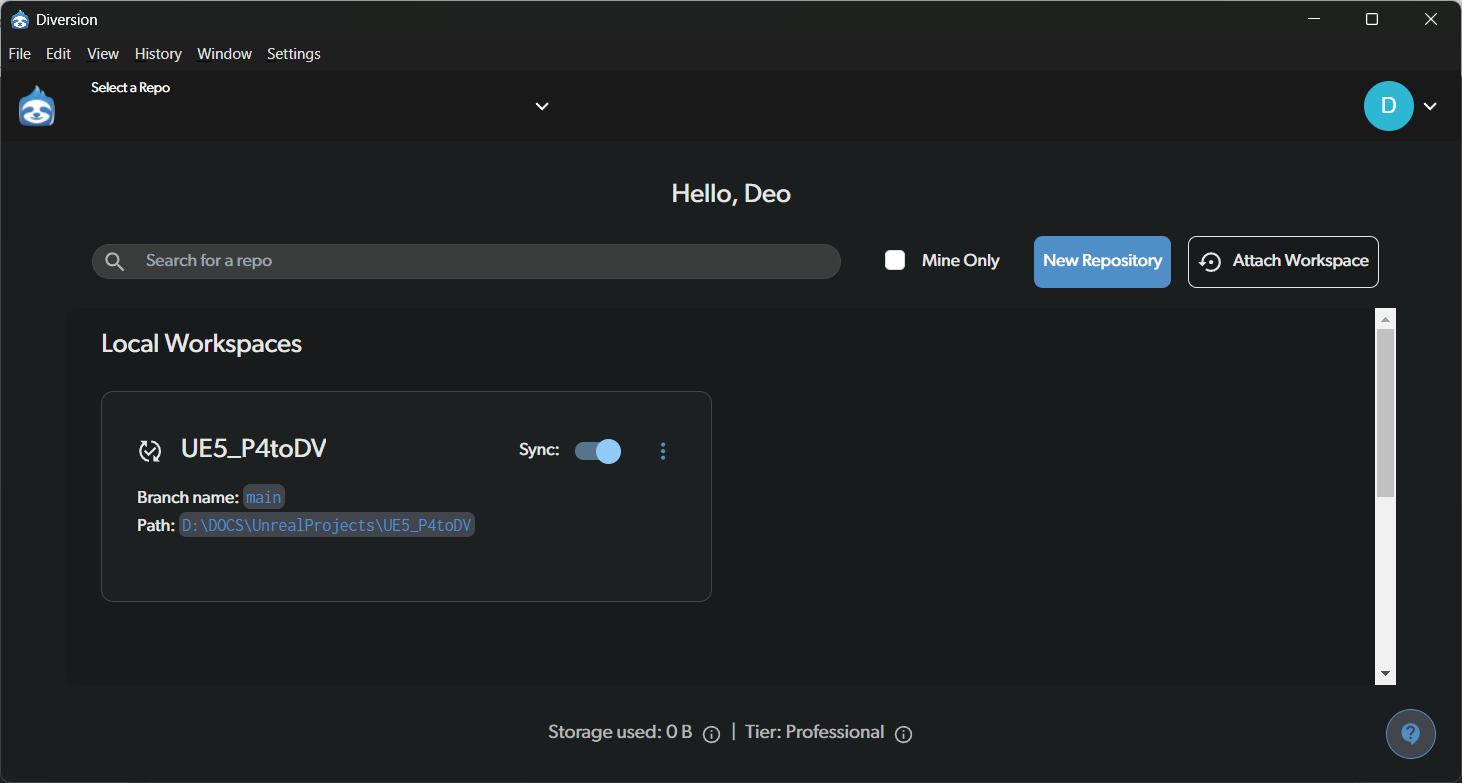
 これで、プロジェクトはローカルマシンとクラウドの両方に存在し、共同作業の準備が整いました。
 ***
## Unreal Engine 連携
Diversion を Unreal Engine と統合するには、[FAB](https://www.fab.com) にアクセスし、「Diversion」を検索してプラグインをダウンロードします。
***
## Unreal Engine 連携
Diversion を Unreal Engine と統合するには、[FAB](https://www.fab.com) にアクセスし、「Diversion」を検索してプラグインをダウンロードします。
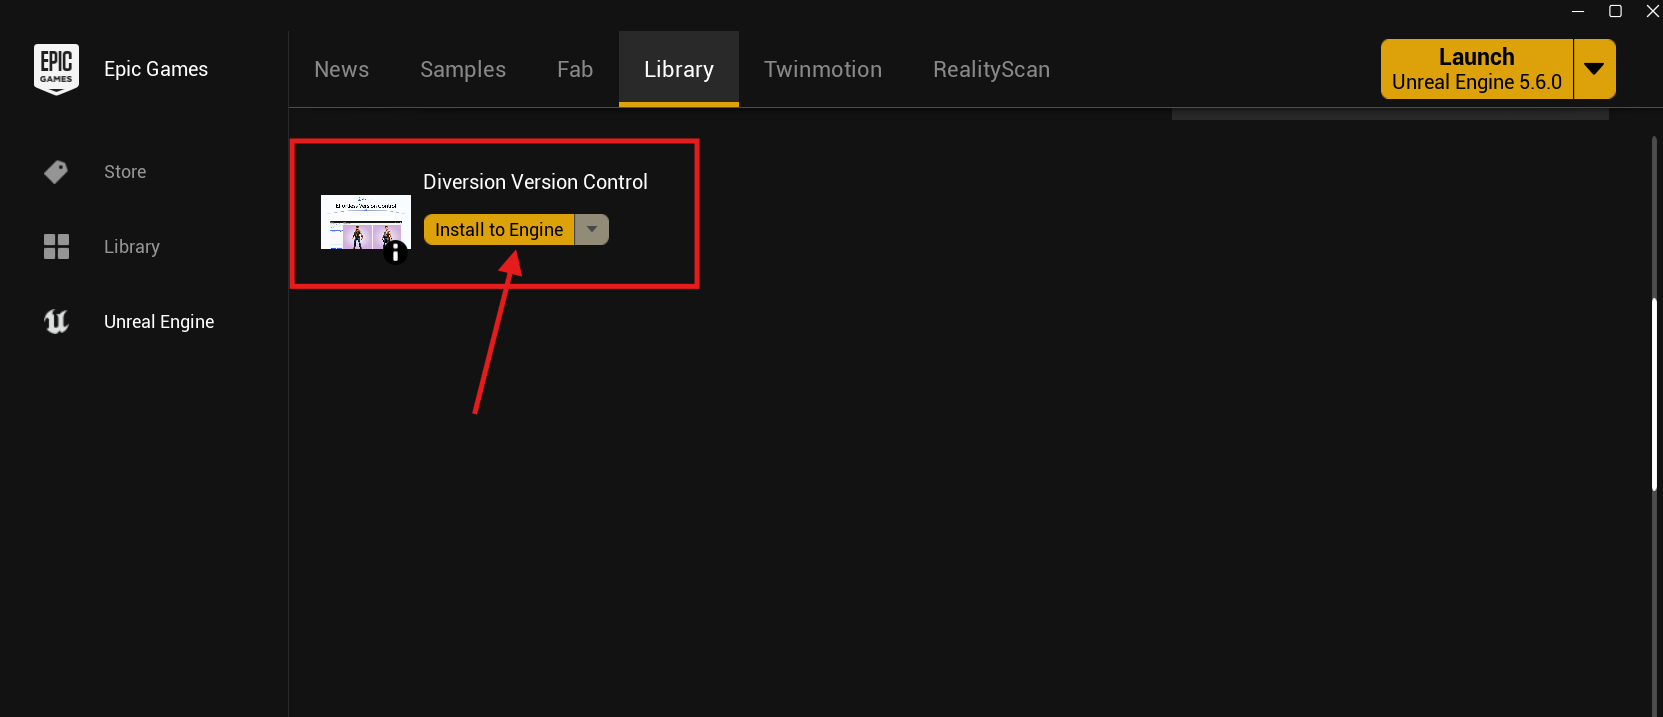
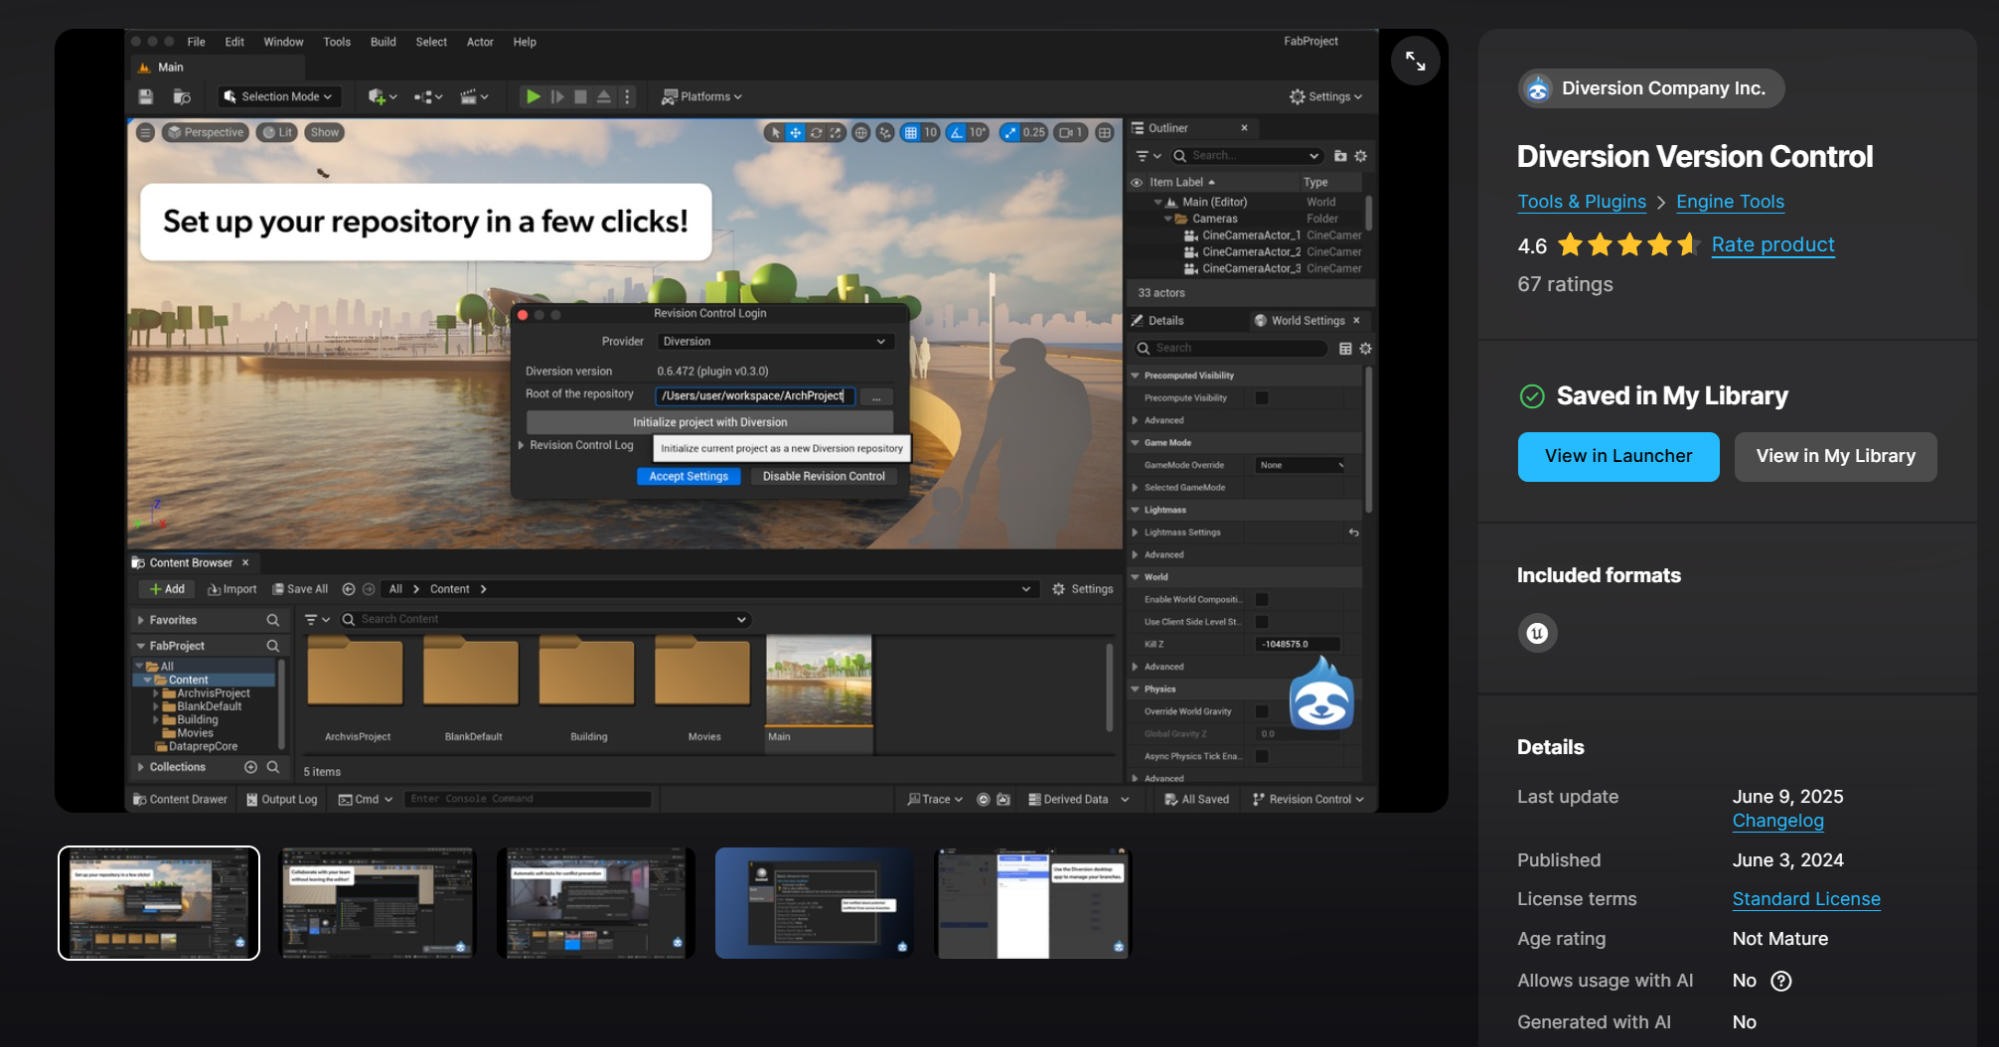 プラグインは Diversion Version Control パネルからダウンロードとインストールされます。**Install to Engine** をクリックすると、Unreal Launcher と統合され、すべての Unreal プロジェクトで Diversion のサポートが有効になります。
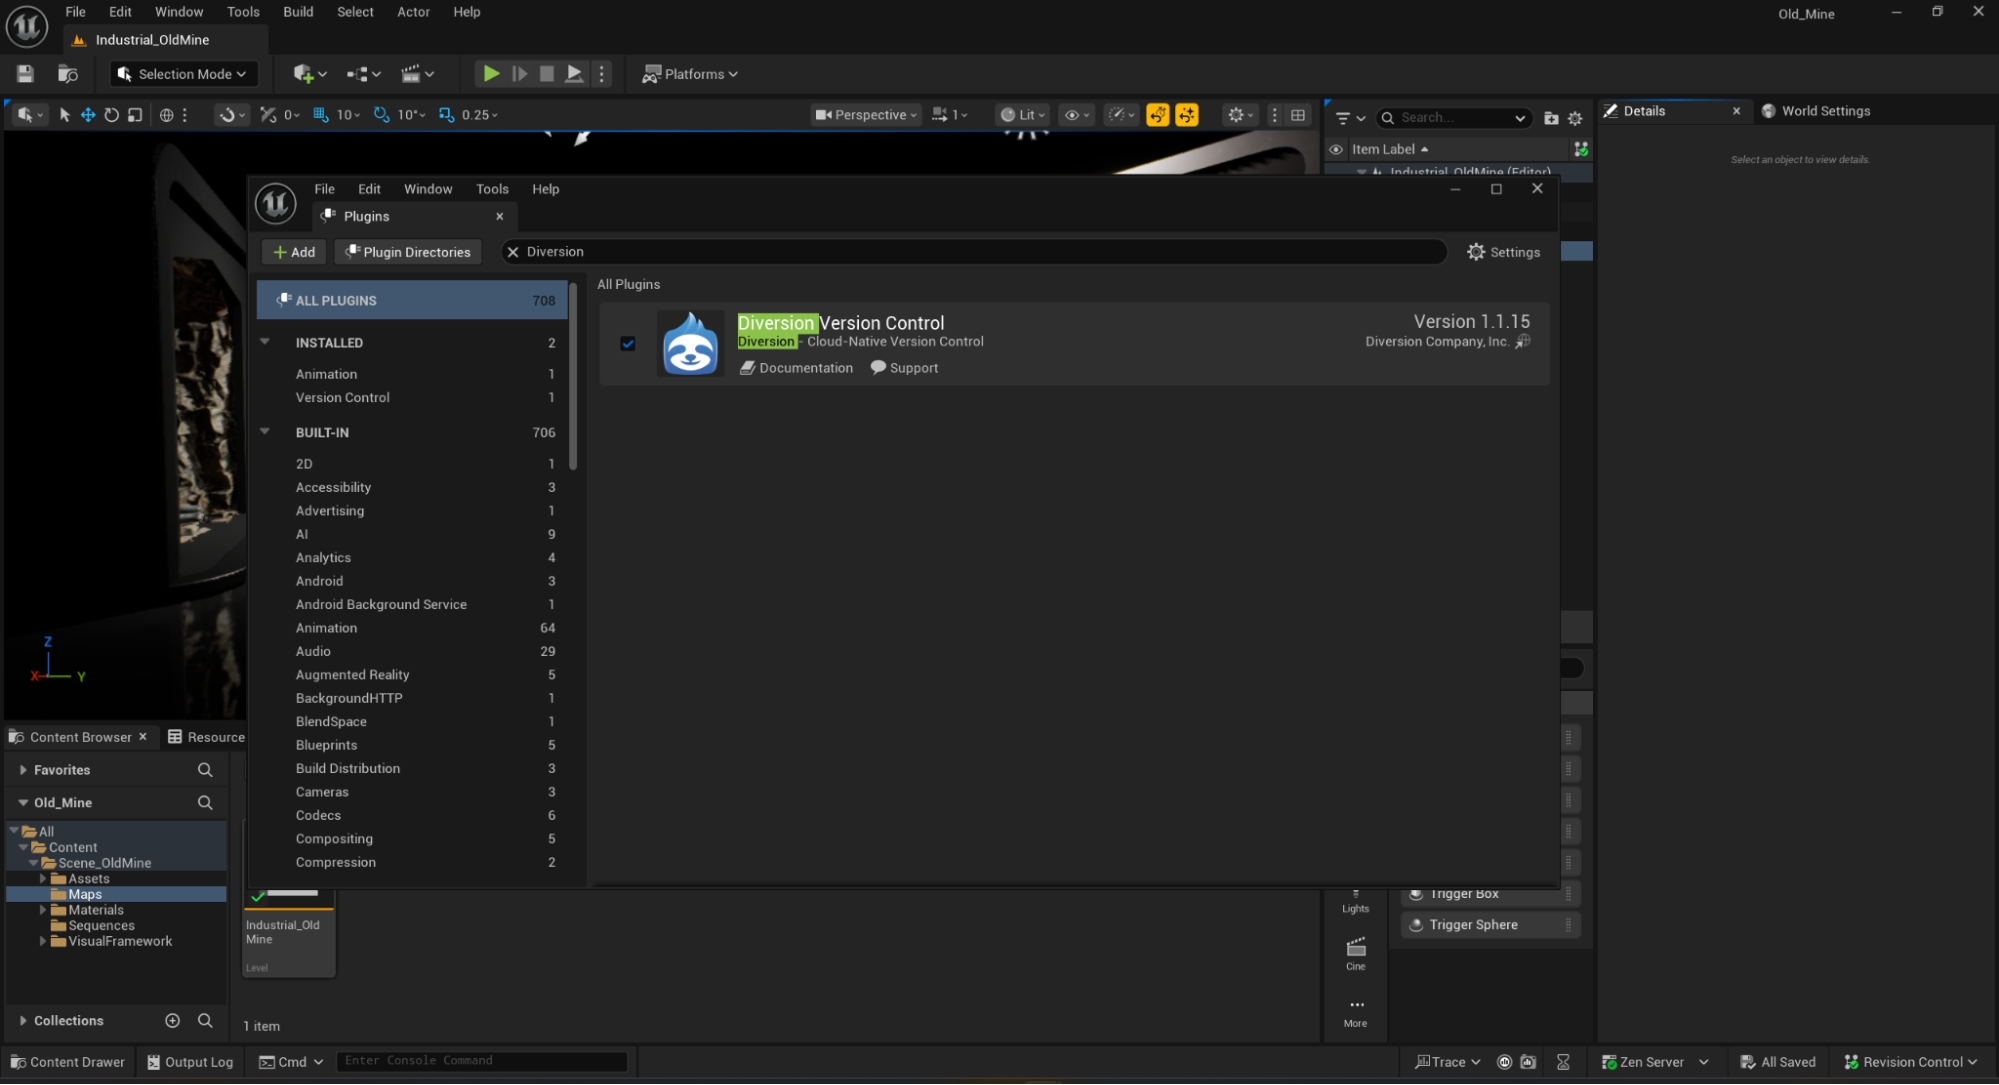
 Unreal Engine の Plugins パネルを開き、検索バーに「Diversion Version Control」と入力し、プラグインを有効化して Unreal Engine を再起動して変更を適用します。
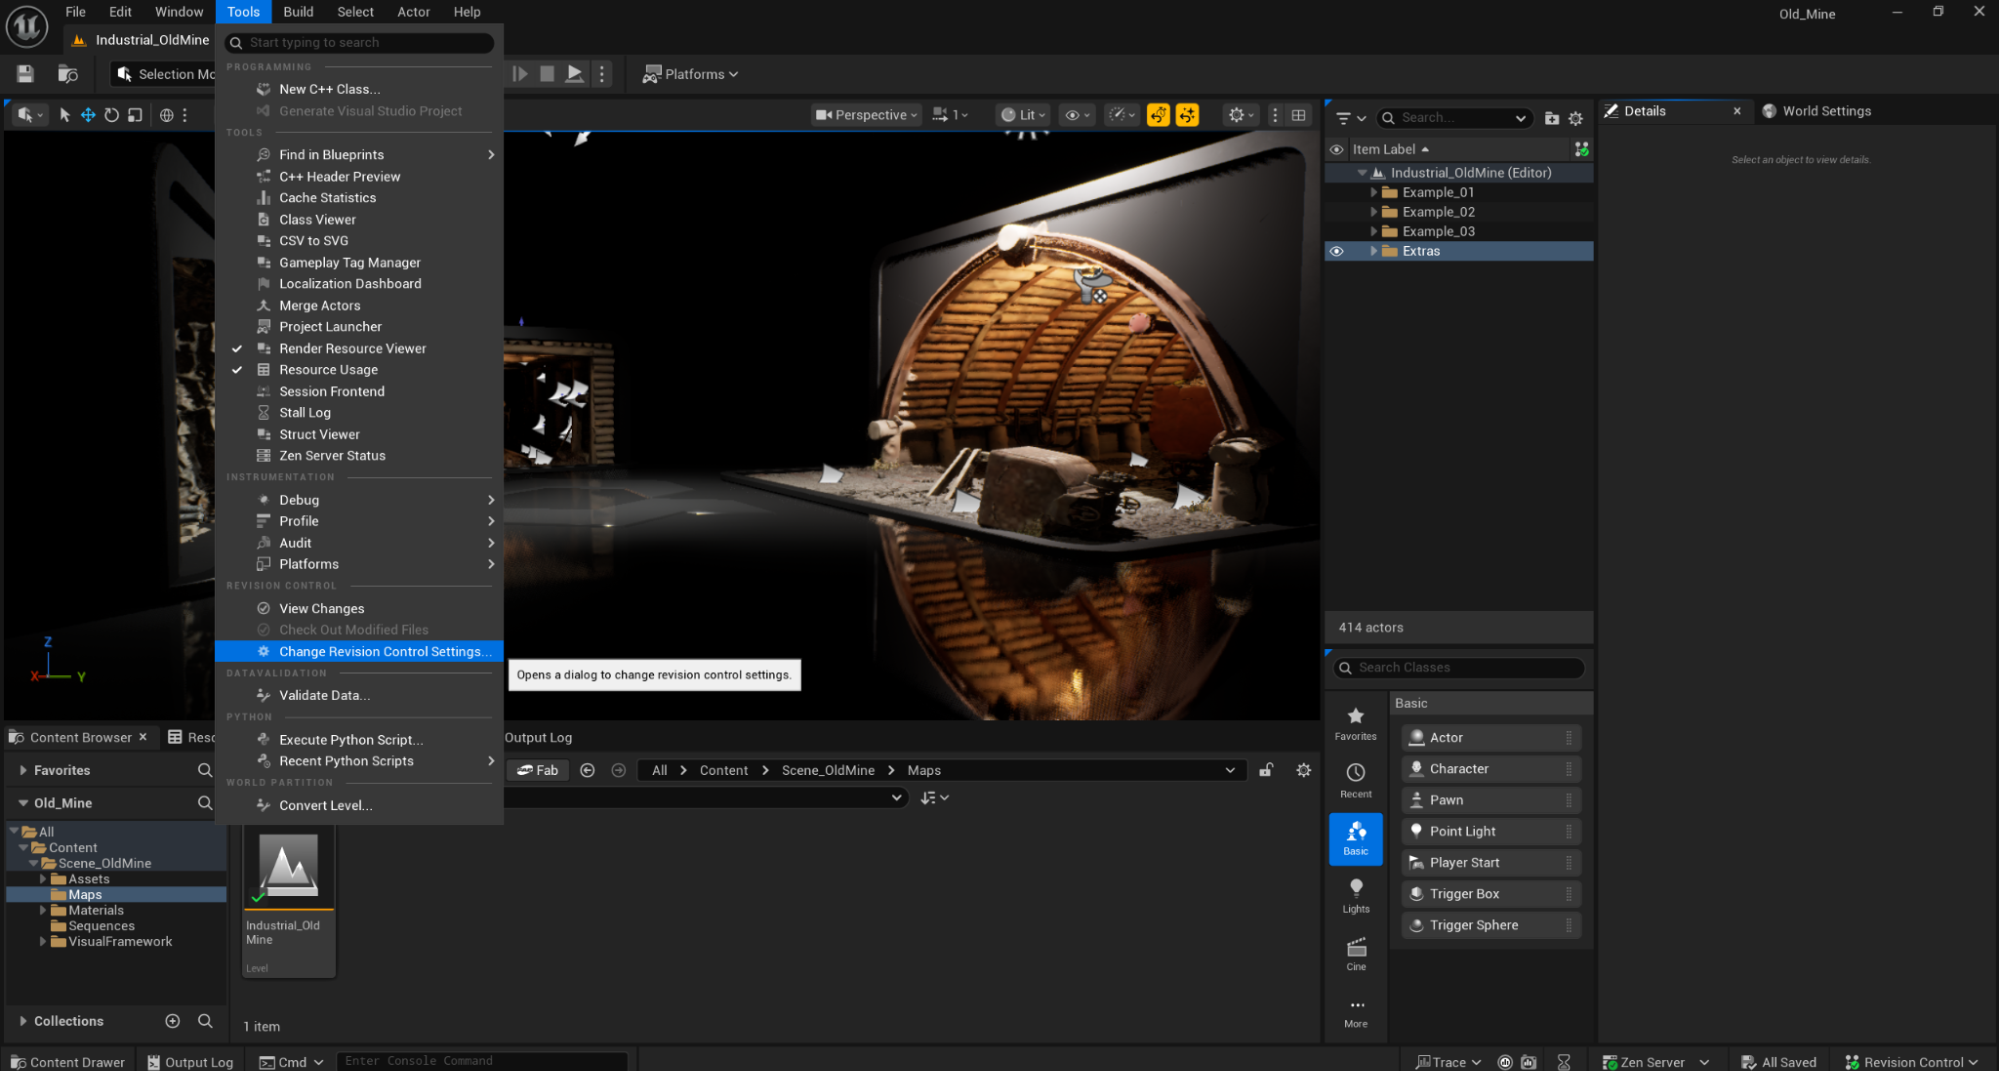
 Unreal Engine のメインツールバーから、**Tools > Change Revision Control Settings…** に移動し、バージョン管理システムを Diversion に設定します。
 Diversion がアクティブになり、プロジェクトのバージョン管理を行う準備が整いました。
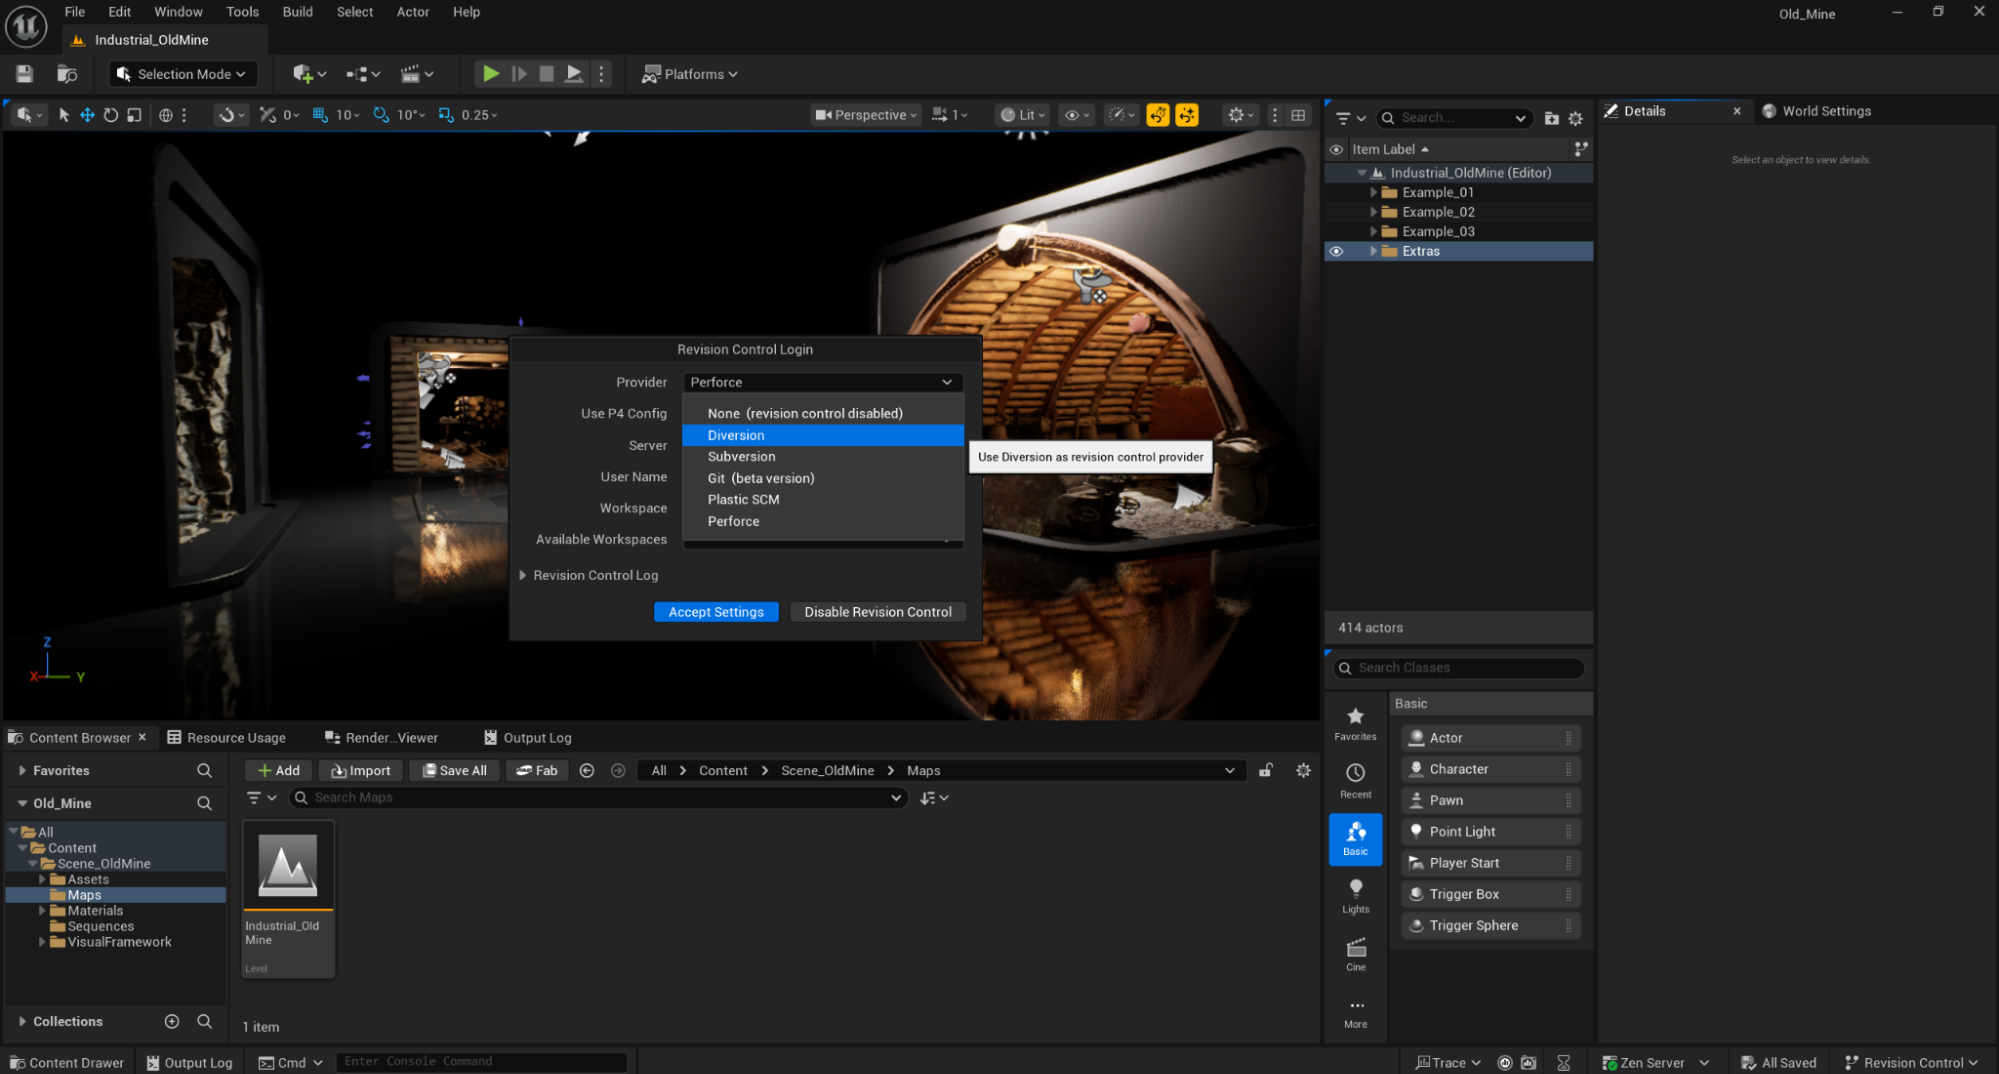 ***
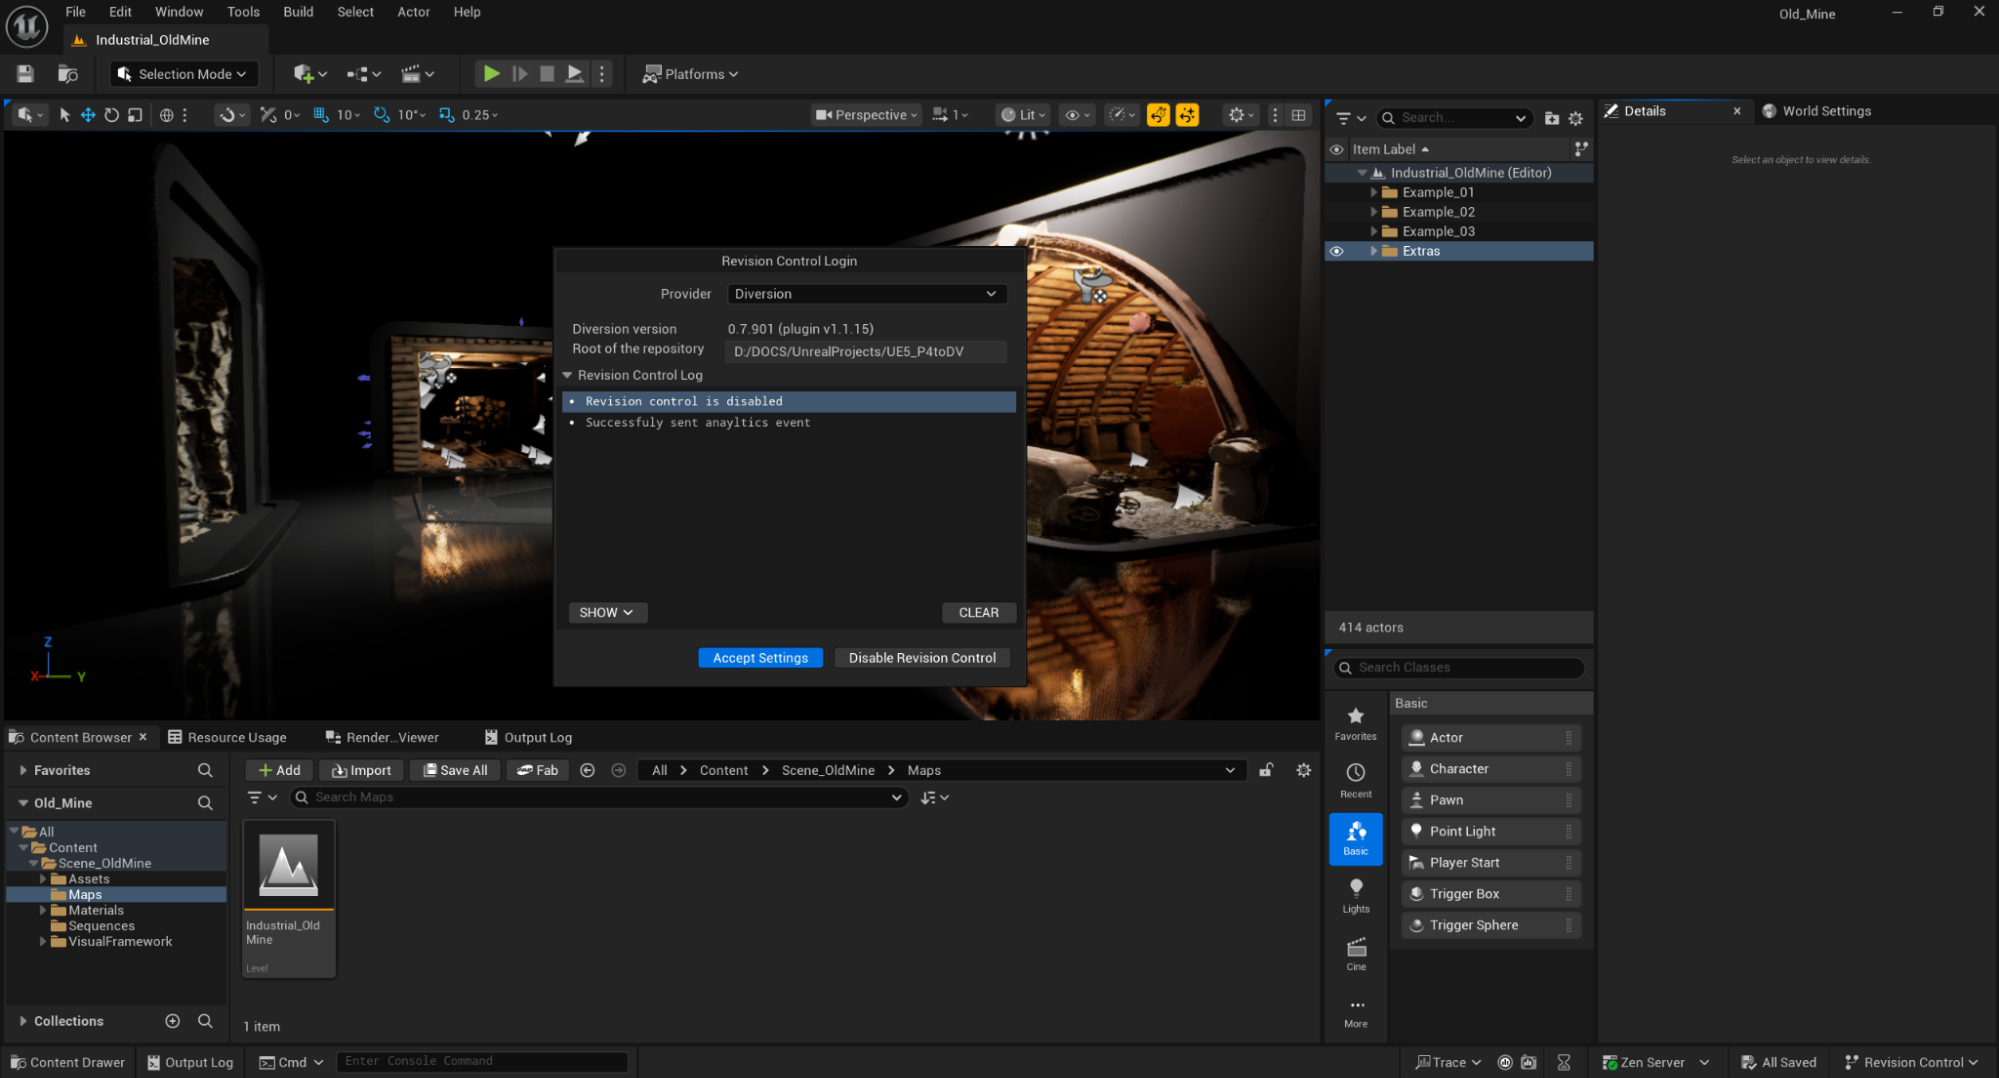
Diversion をバージョン管理プロバイダーとして選択すると、Unreal Engine は構成を自動的に検出し、手動セットアップなしで接続を確立します。
***
Diversion をバージョン管理プロバイダーとして選択すると、Unreal Engine は構成を自動的に検出し、手動セットアップなしで接続を確立します。
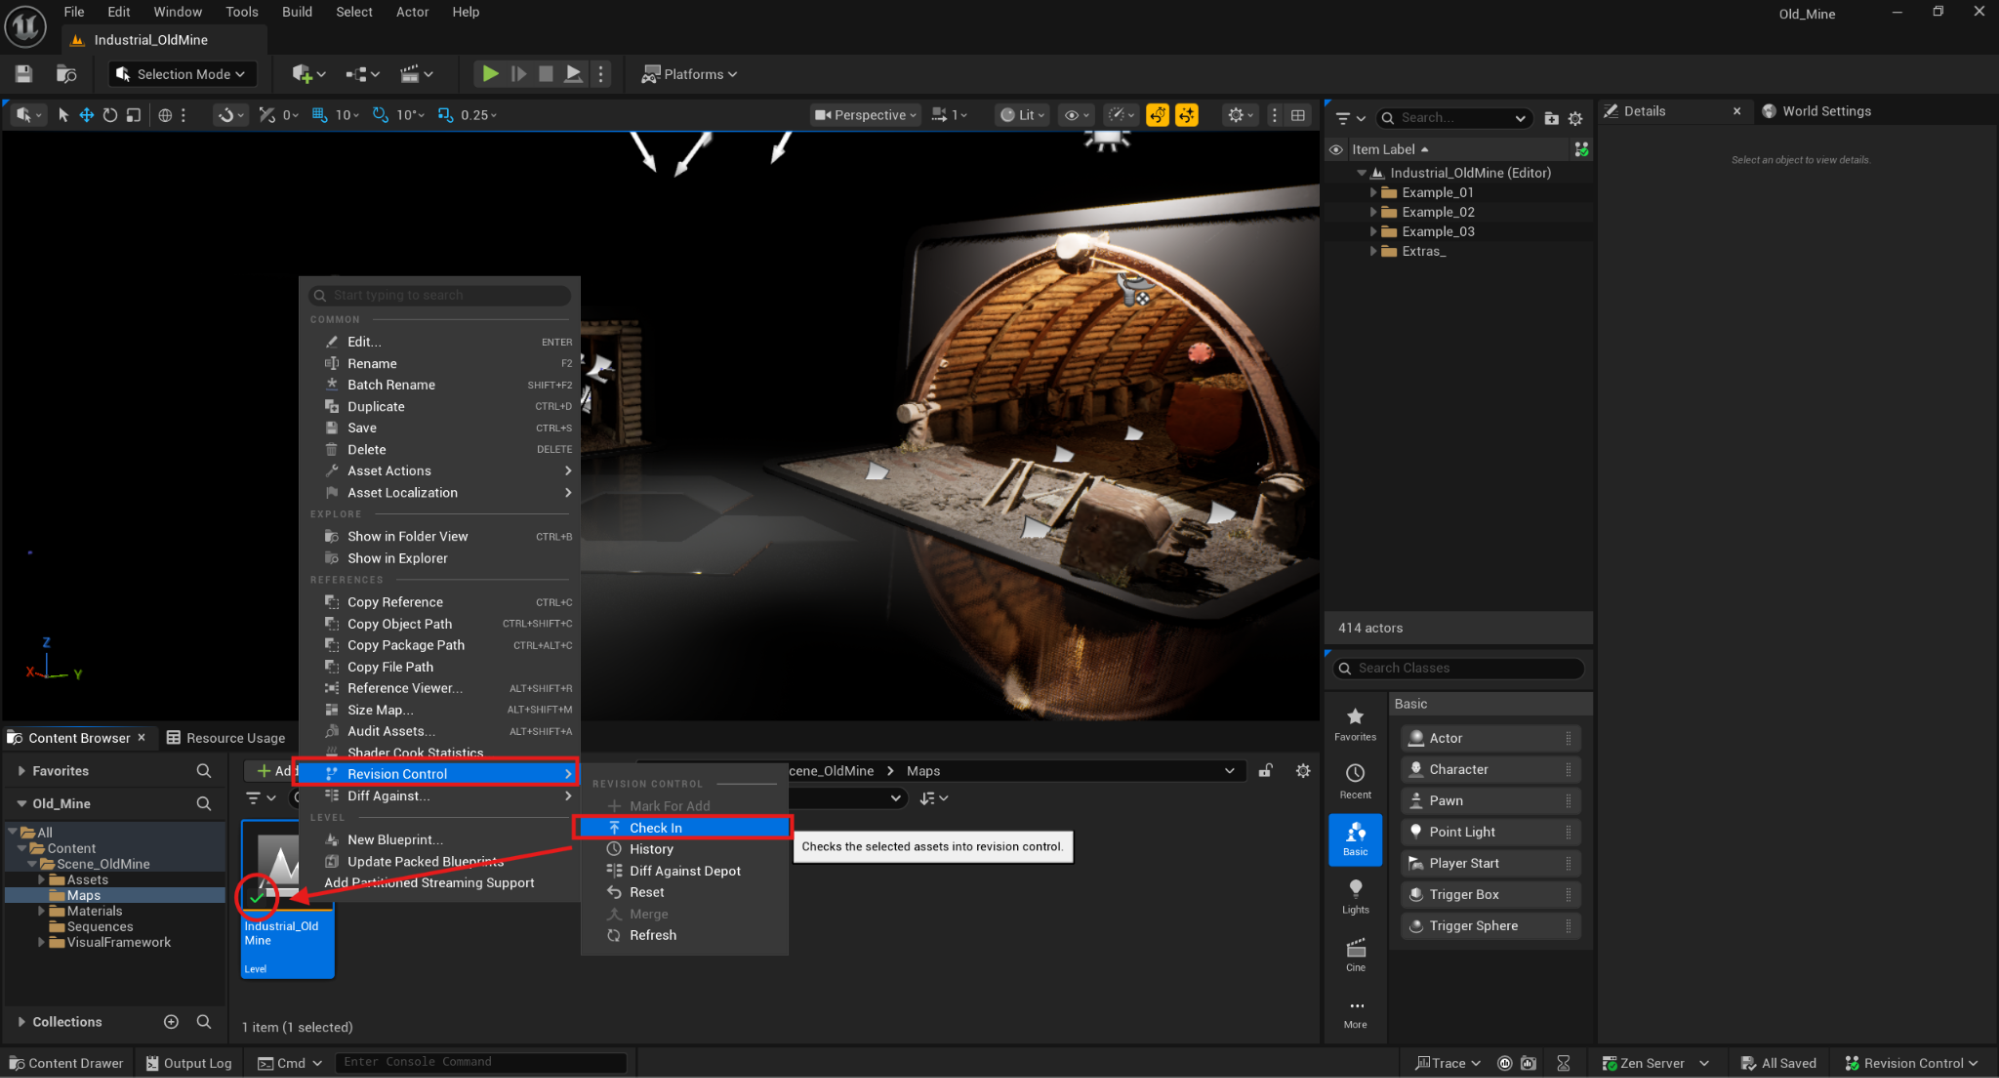
 Unreal では、**Revision Control > Check In** が **コミット** を実行します。\
Perforce では、排他ロックが **チェックアウト** に相当します。Diversion は **ソフトロック**(ブロックしないインジケーター)を使用し、マージベースの共同作業をサポートします。
Unreal では、**Revision Control > Check In** が **コミット** を実行します。\
Perforce では、排他ロックが **チェックアウト** に相当します。Diversion は **ソフトロック**(ブロックしないインジケーター)を使用し、マージベースの共同作業をサポートします。
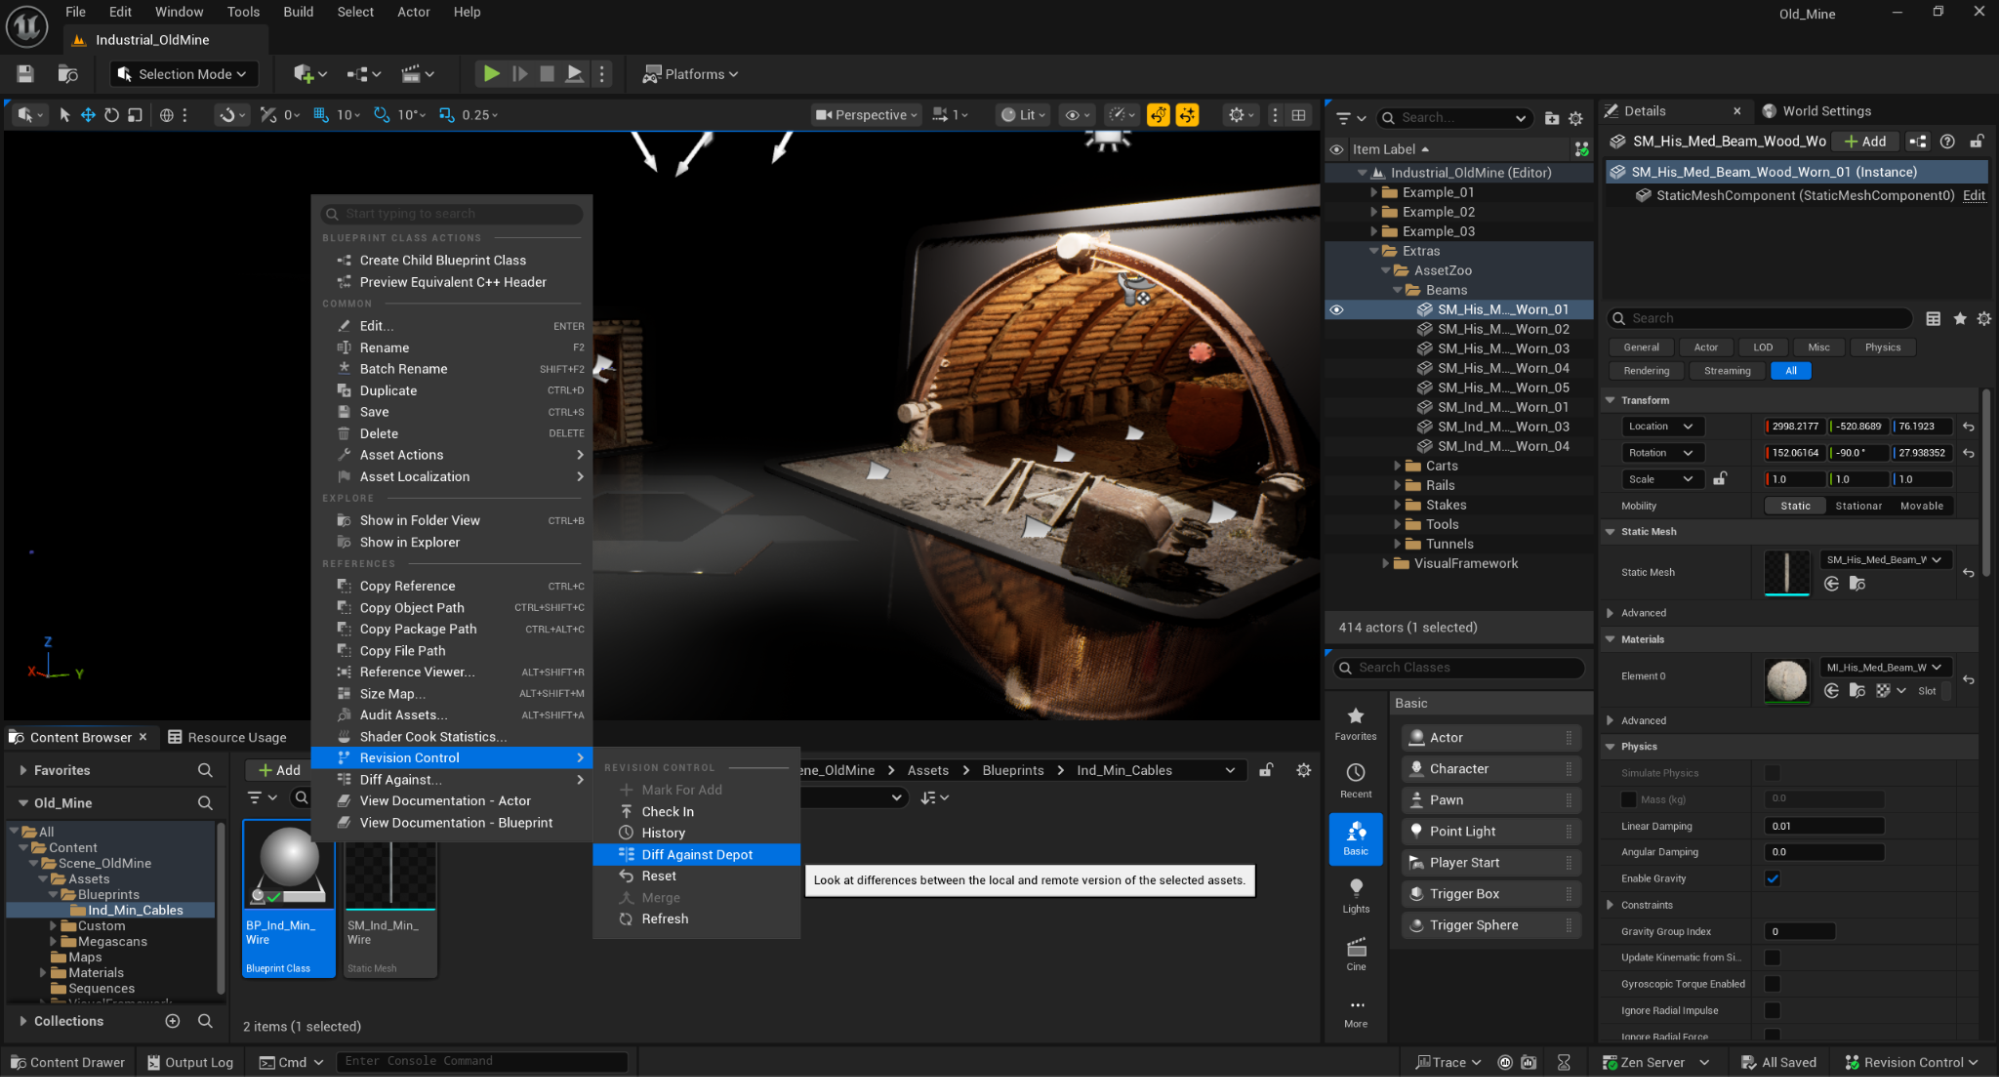
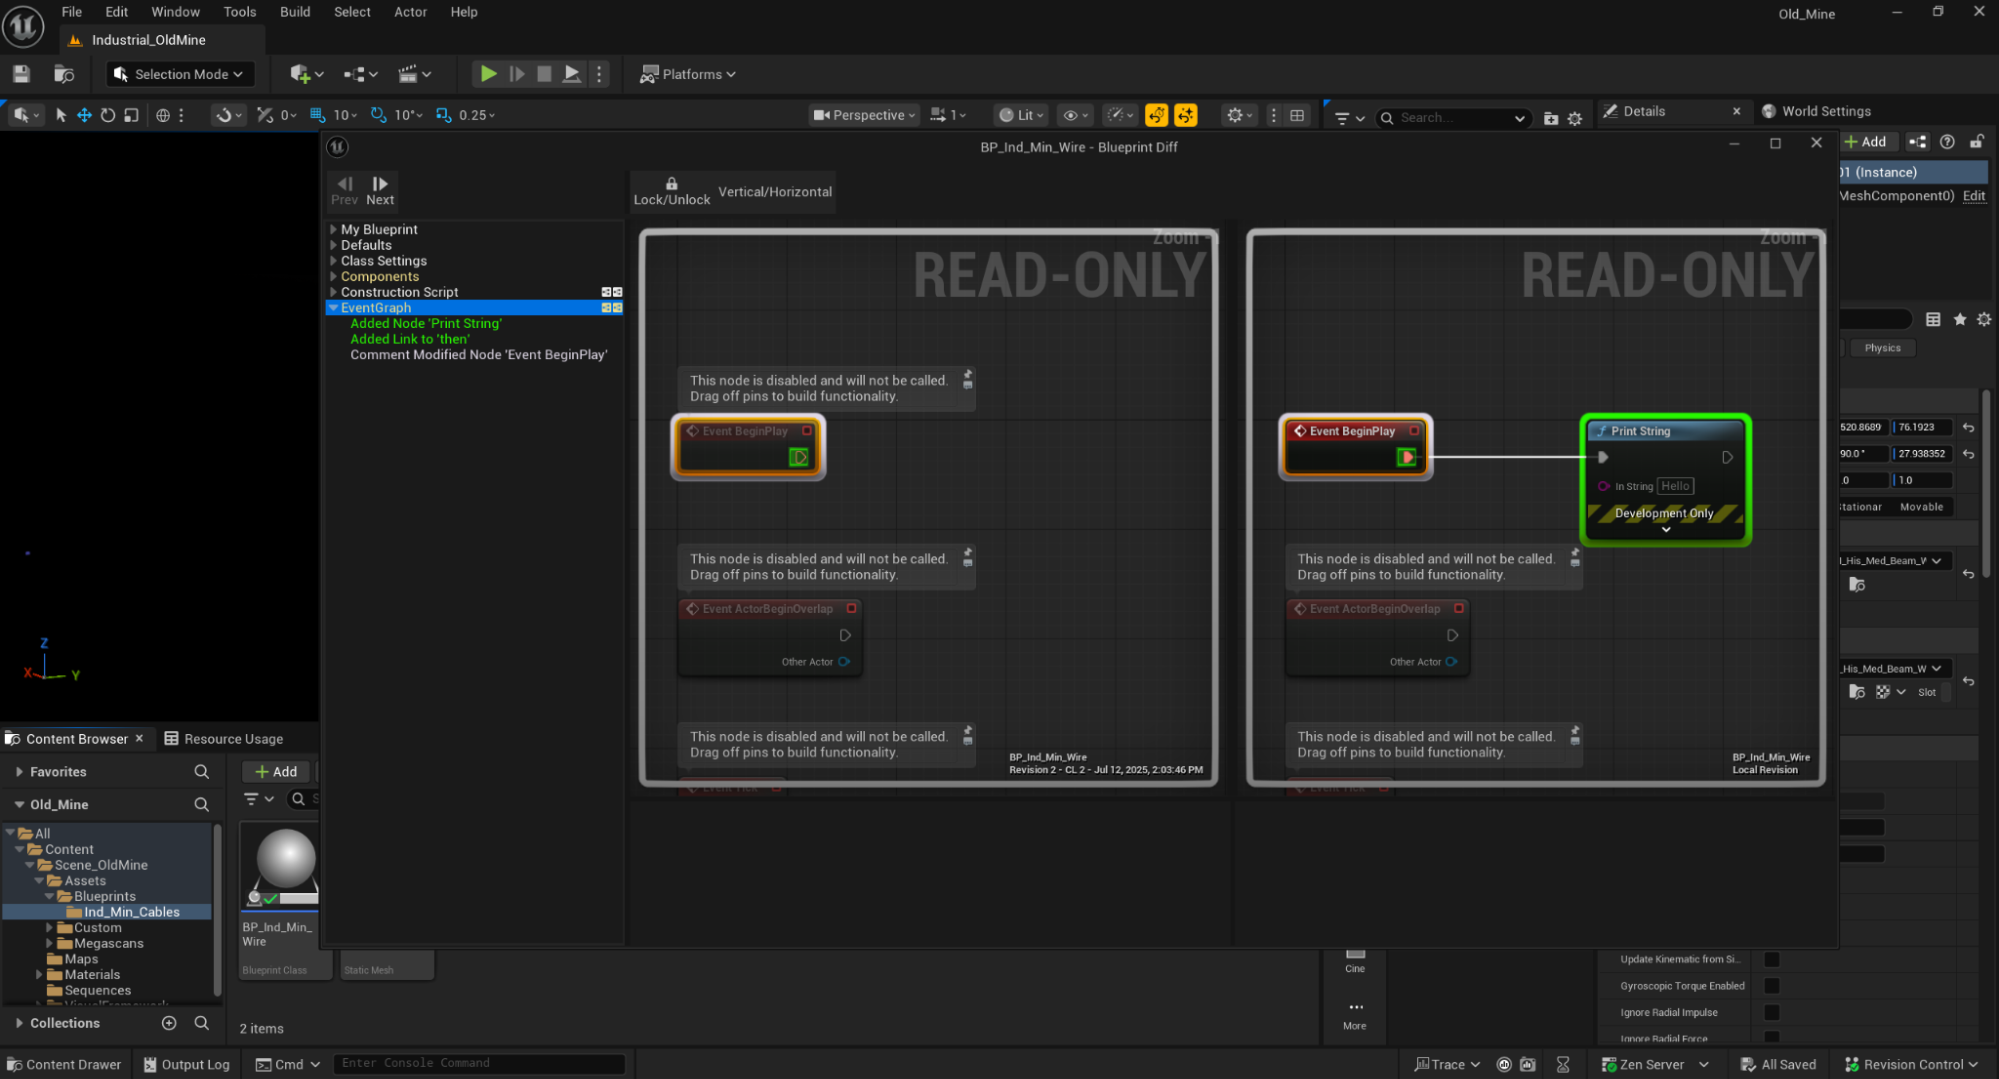
 ファイル比較は Perforce の最も強力なツールの1つです。Diversion でも同じメリットを得られます。**Revision Control > Diff Against Depot** に移動して、ローカルファイルとリポジトリに保存されているバージョンとの違いを視覚的に確認できます。
 Diversion では、各ファイルに加えられた変更を視覚的に確認するための同様の差分パネルが提供されます。
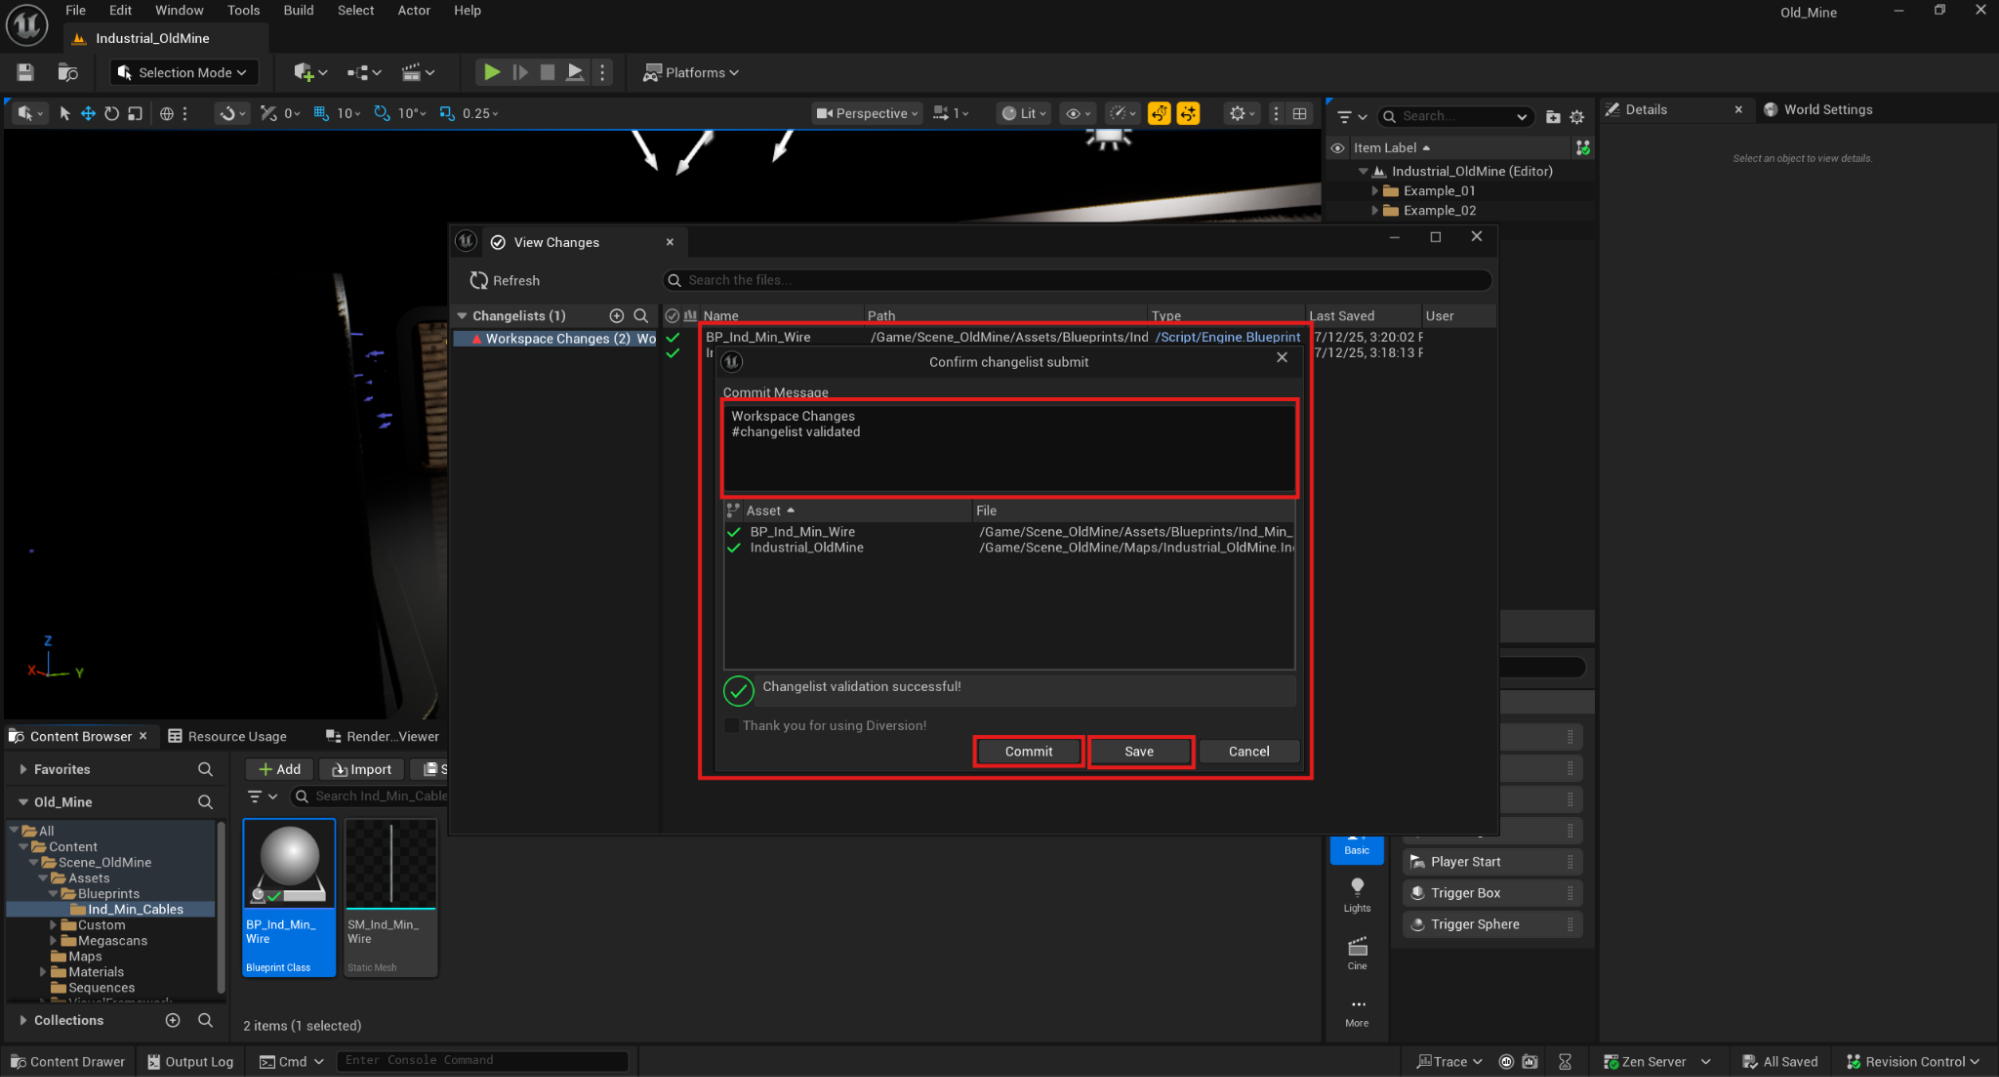
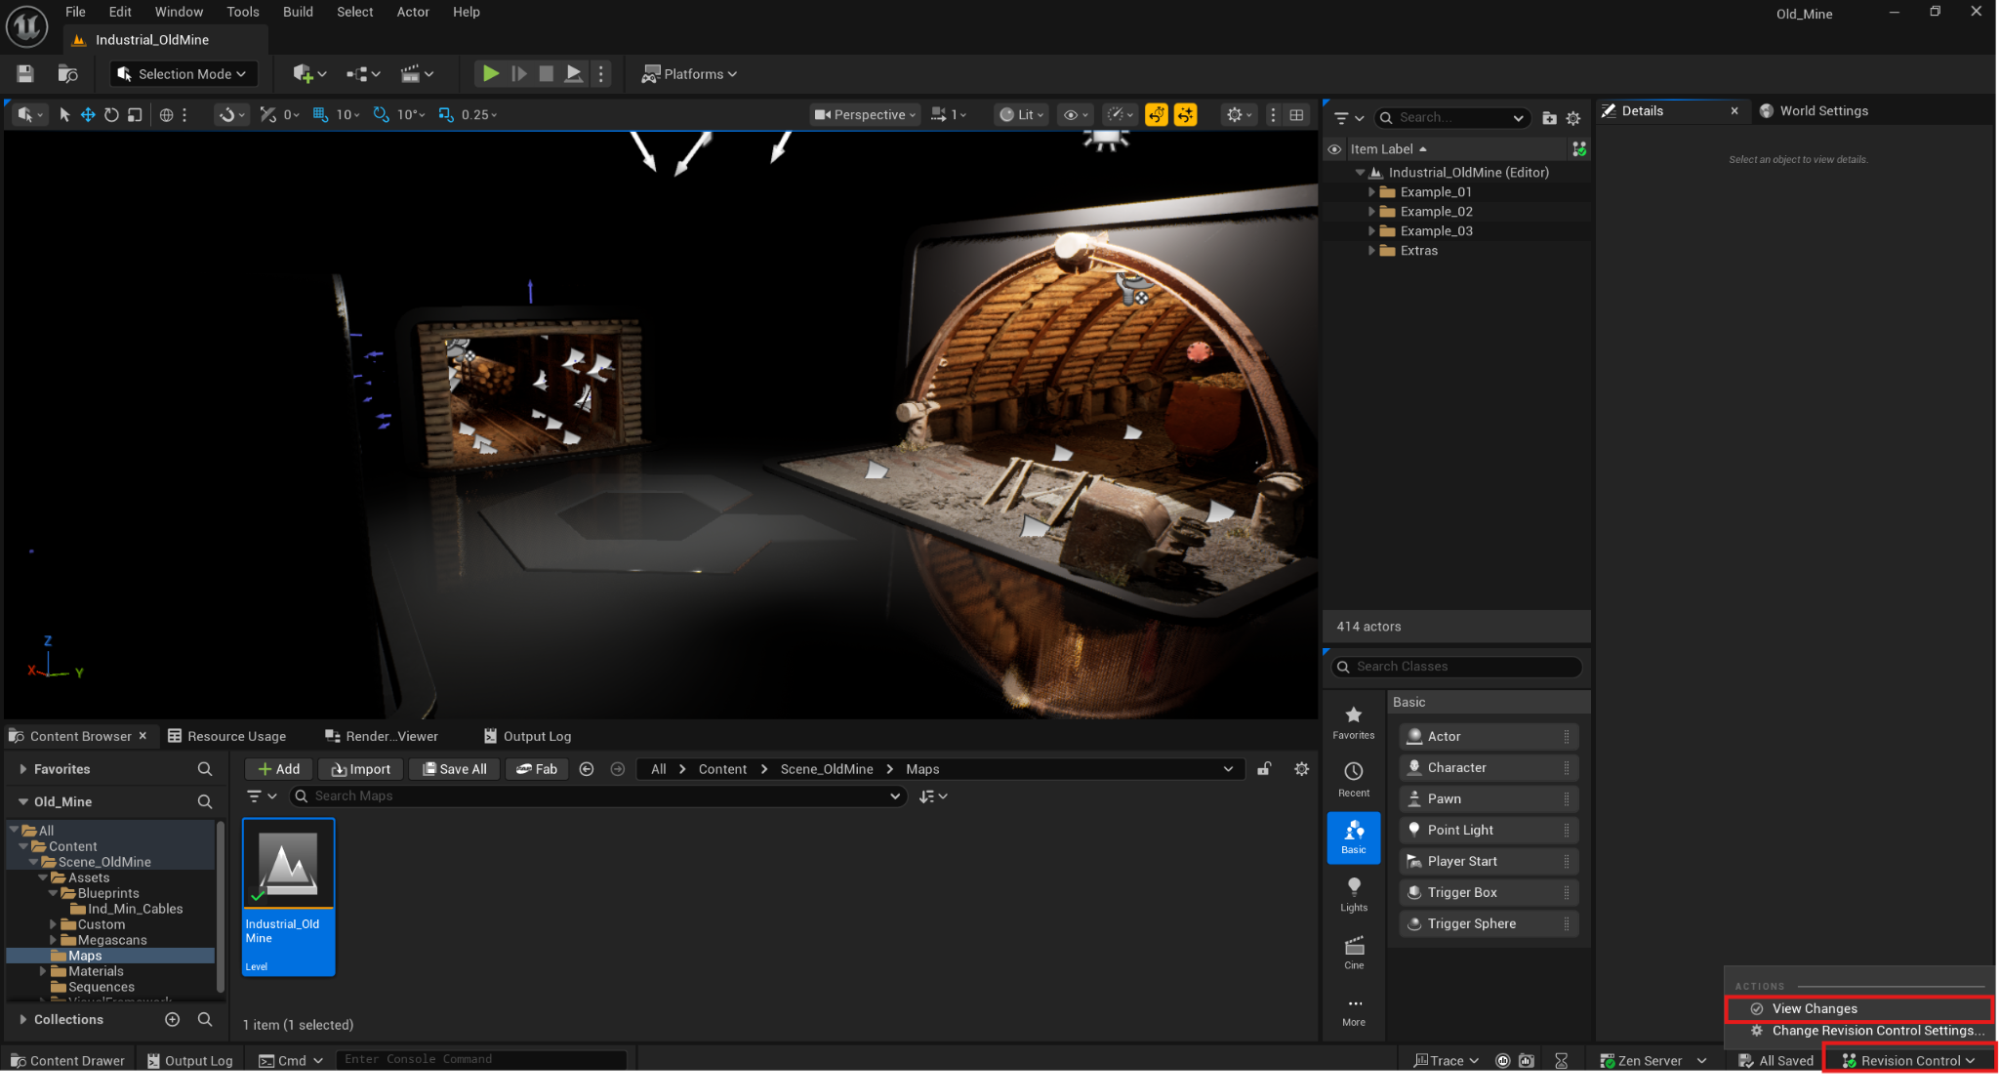
 保留中の変更を確認するには、インターフェース右下の **View Changes** パネルを開くか、Tools メニューから移動します。
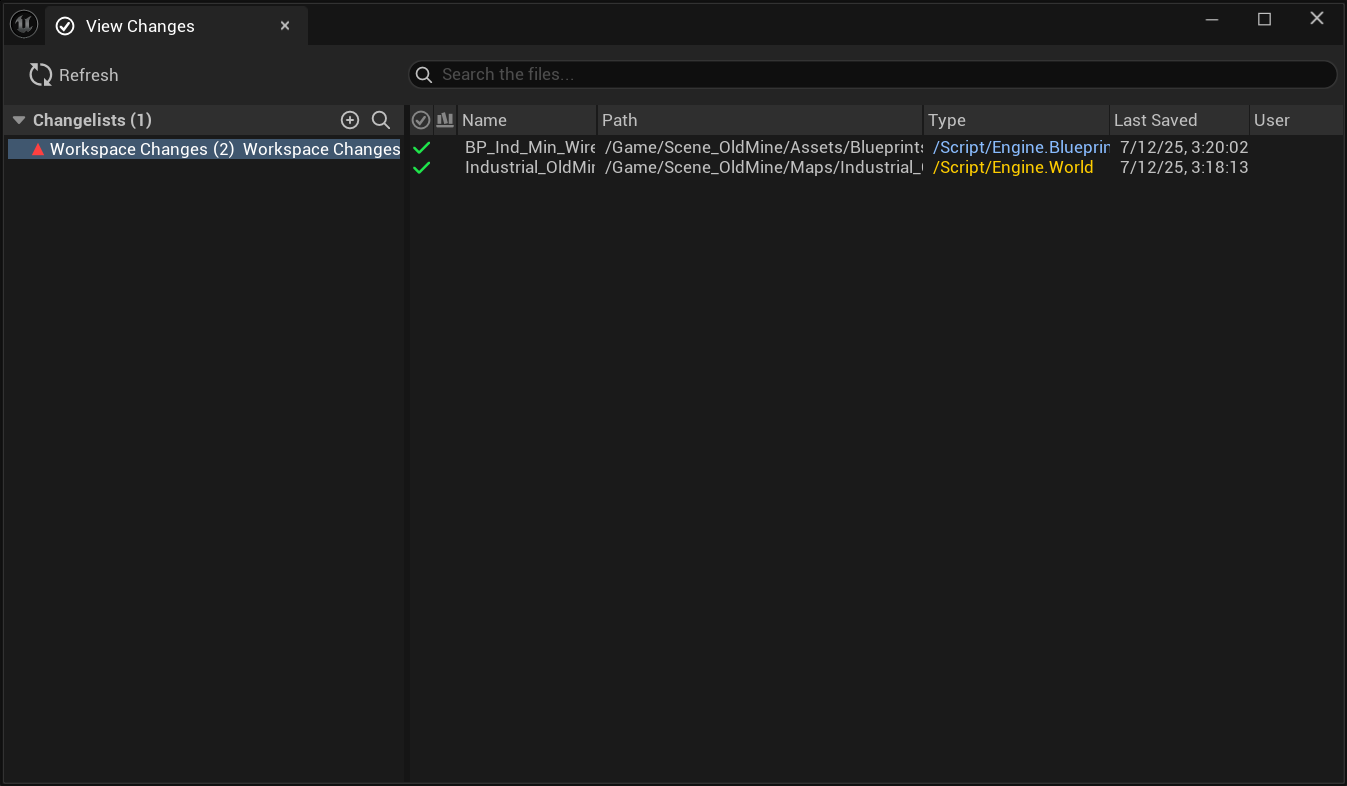
 **View Changes** パネルには、シーン内のすべての変更済みアセットが表示されます。エントリをダブルクリックすると、Content Browser 内で自動的に配置されます。
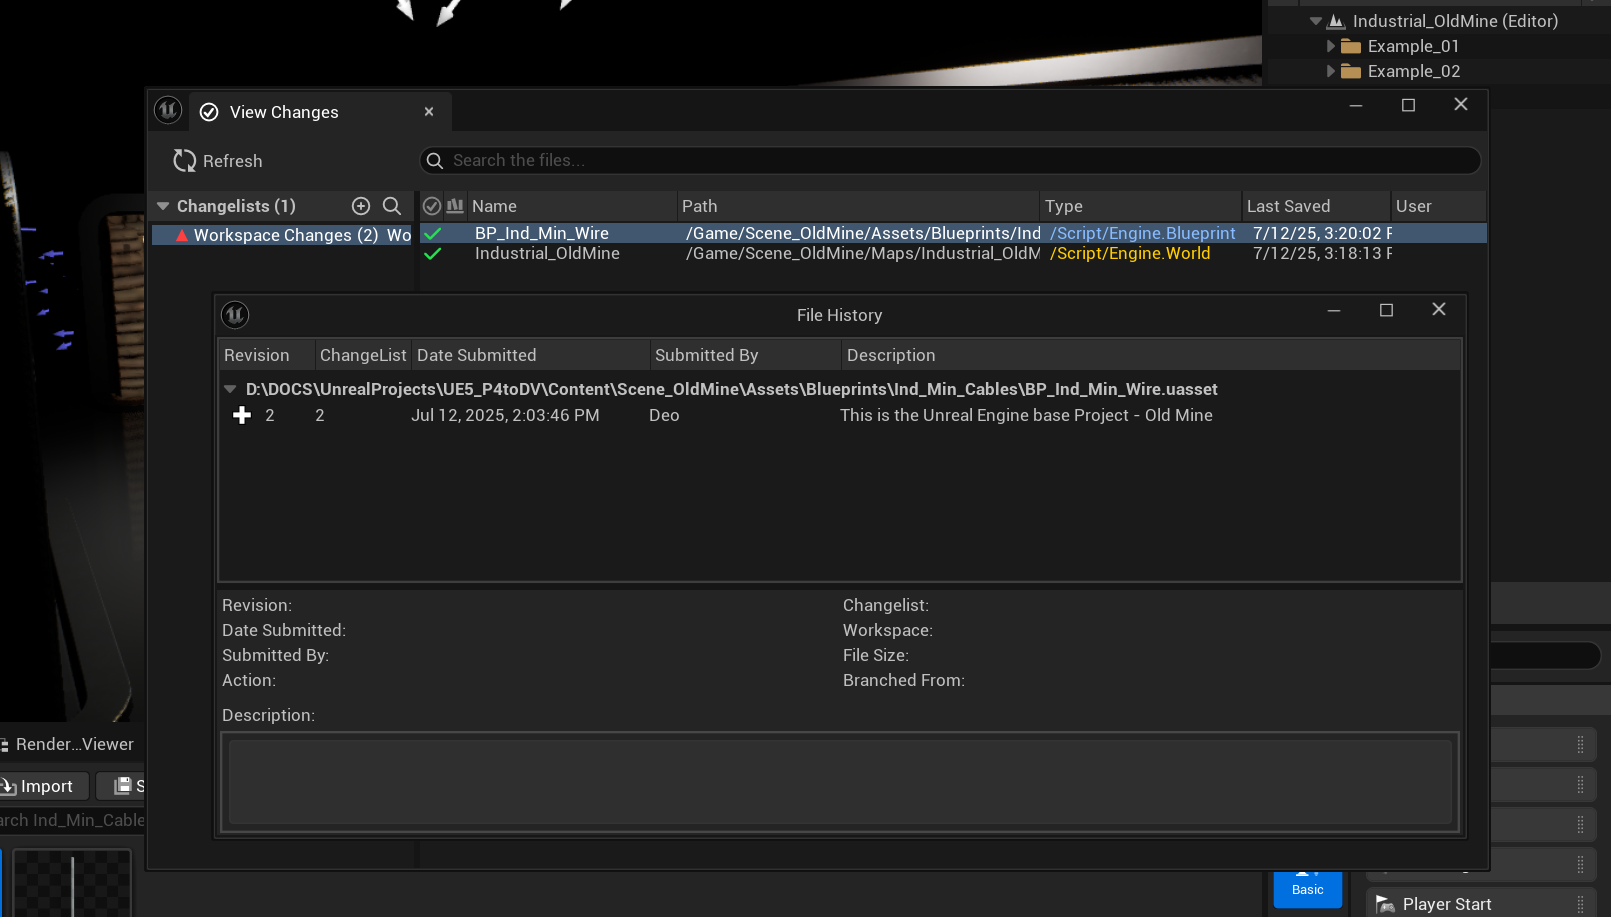
 各ファイルには、ブランチ全体で行われたすべての変更を示す完全なインタラクティブな履歴が含まれます。
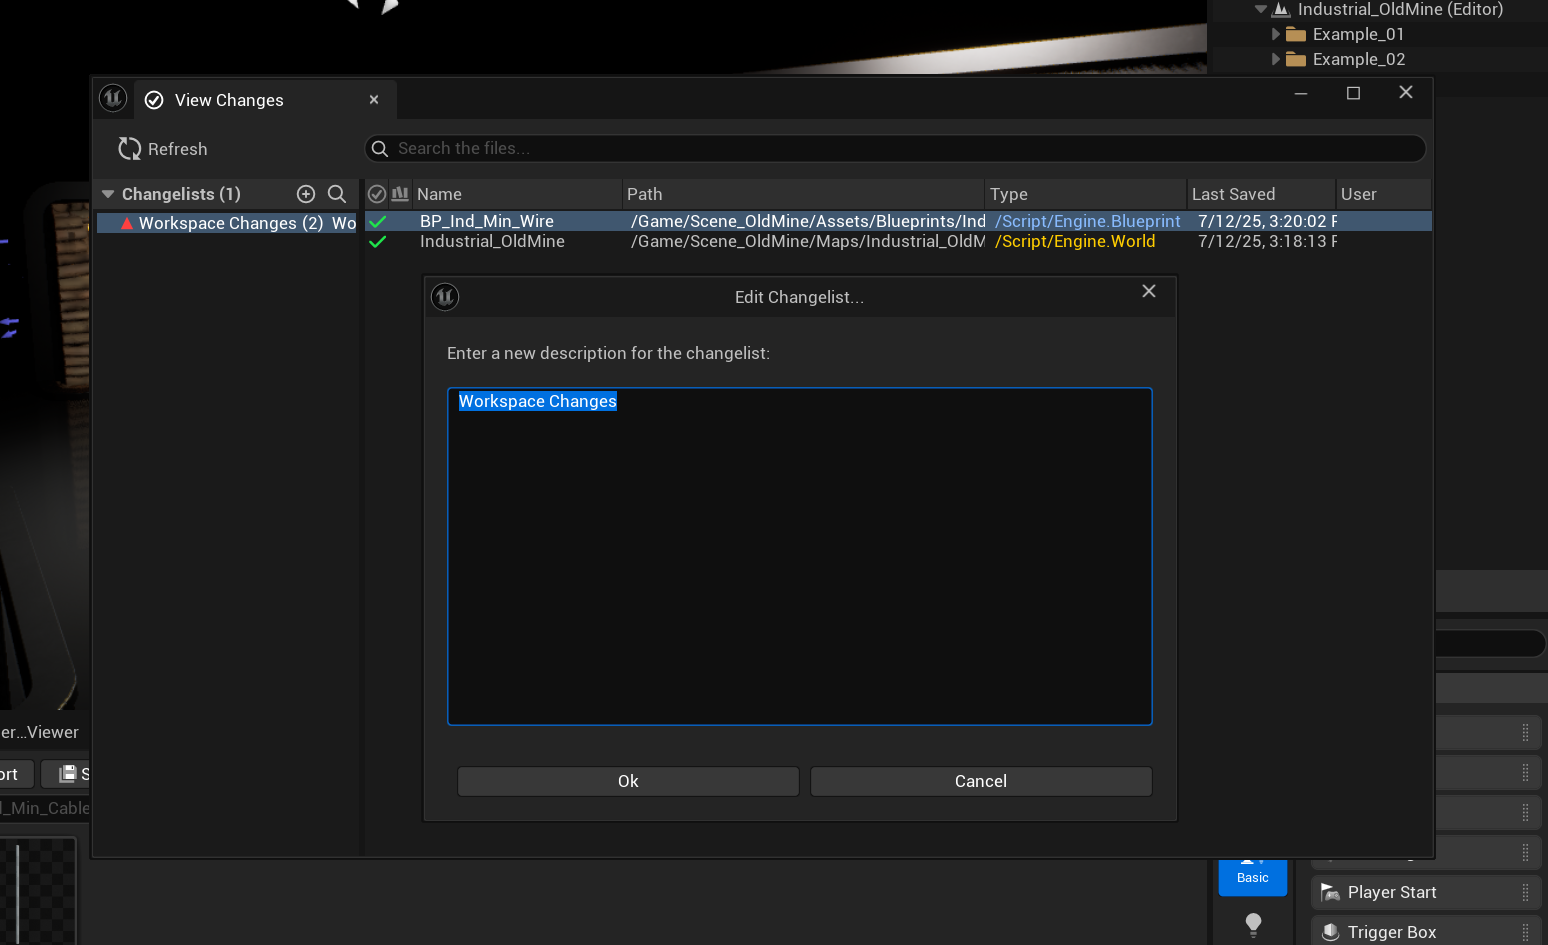
 リポジトリに送信する前に、変更内容を要約するために Changelist の説明を変更できます。
 Unreal Engine インターフェースから直接、Changelist を視覚的に検証したり、ファイルの変更を元に戻すことができます。
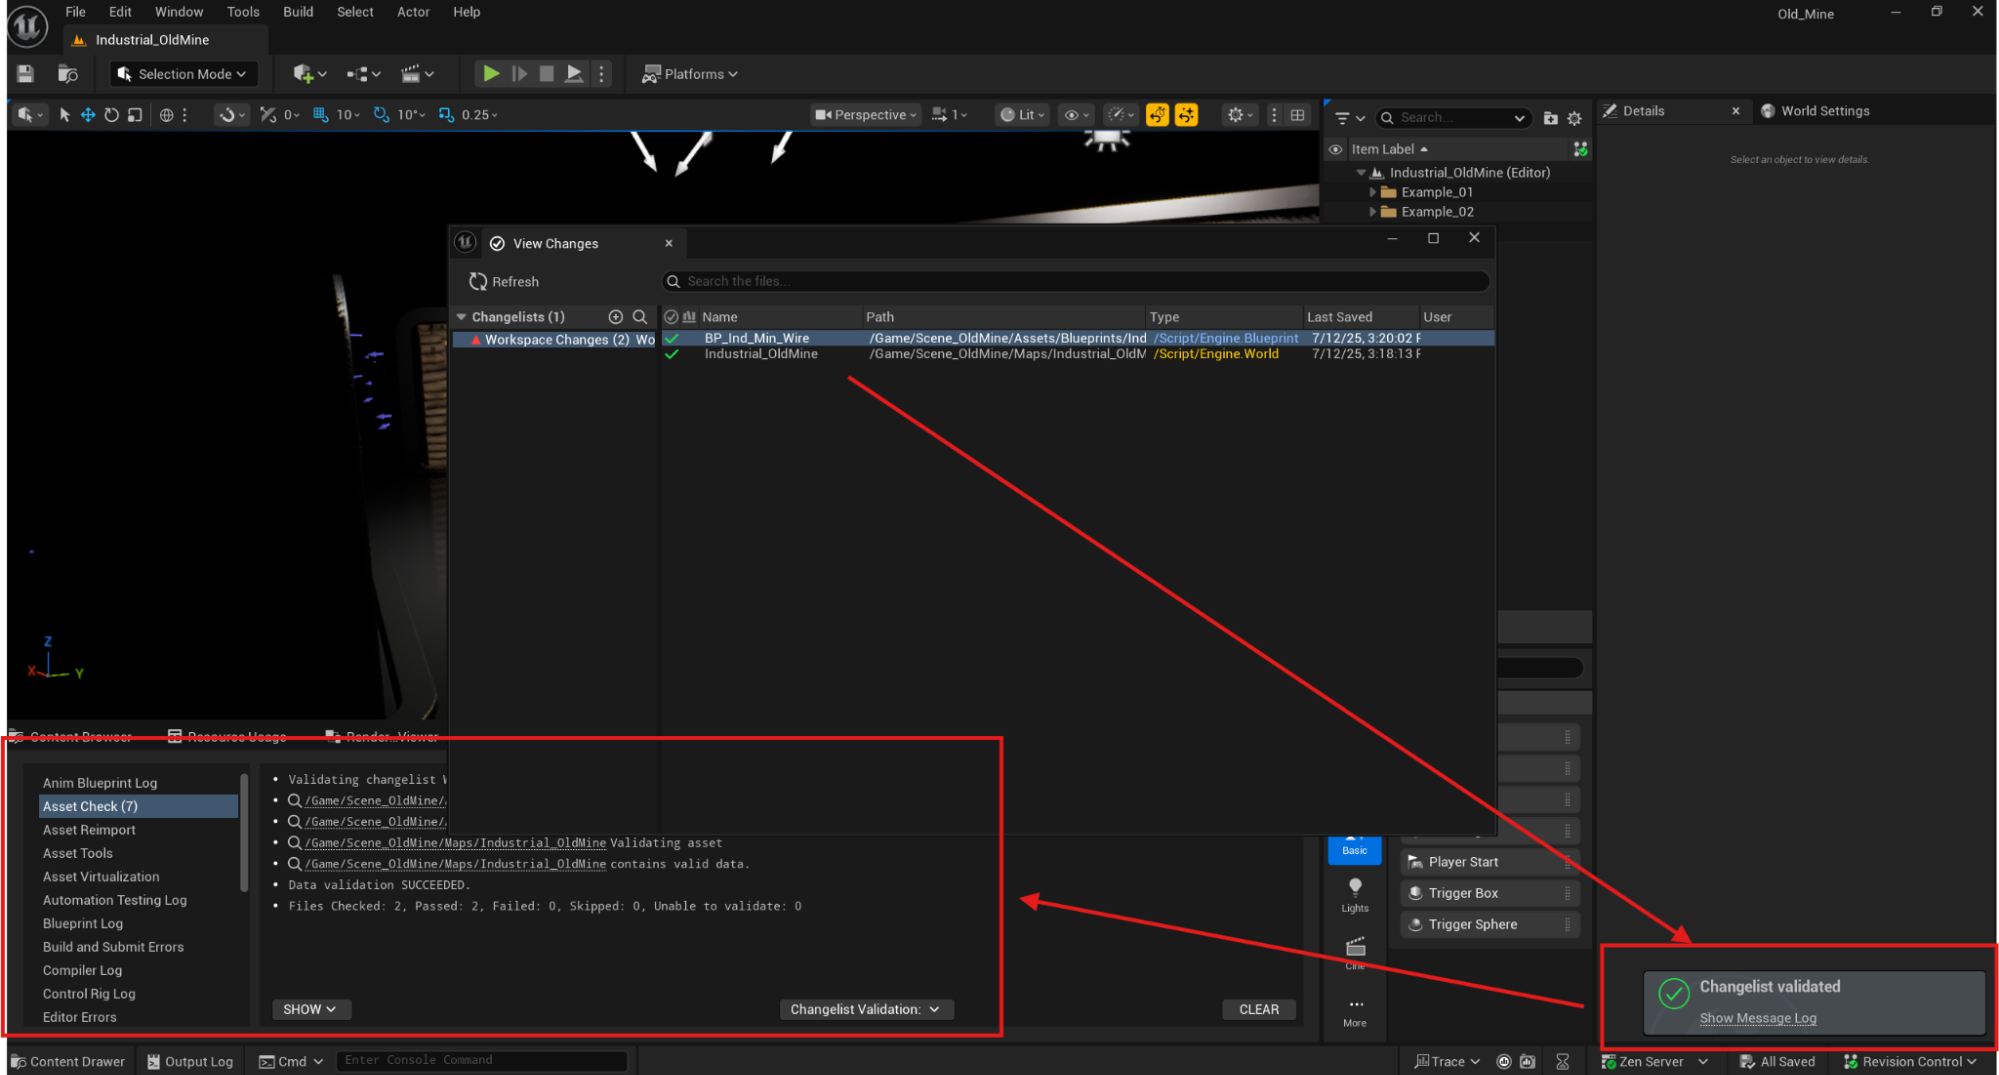 変更をすぐにコミットするか、後で送信するために説明を付けて Changelist を保存できます。