> ## Documentation Index
> Fetch the complete documentation index at: https://docs.diversion.dev/llms.txt
> Use this file to discover all available pages before exploring further.
# Workspace management
> Create, rename, delete, and clone workspaces
Every collaborator on a repository gets their own workspace -- a private space where you can make changes without affecting anyone else. Workspaces keep your uncommitted work separate and synced to the cloud automatically.
If you're not familiar with the concept, check out the [Repositories, Branches, and Workspaces](/concepts/repo-branch-workspace) page first.
We recommend using a separate workspace for each machine. Cloning the same workspace on multiple machines may lead to sync issues and data loss.
## Cloned vs. non-cloned workspaces
A workspace can be either **cloned** (local) or **non-cloned** (cloud-only). Understanding the difference helps you decide how to set up your workflow.
| | Cloned (local) | Non-cloned (cloud-only) |
| ----------------------------- | ----------------------------------------------------------------------------------------------------------- | ---------------------------------------------------------- |
| **Where files live** | On your machine, synced with the cloud | Only on the Diversion cloud |
| **How to edit files** | Use any local editor, IDE, or game engine | Upload files through the web or desktop app |
| **Auto-sync** | Changes sync bidirectionally -- local edits upload automatically, and remote changes download automatically | No local sync needed -- everything is already in the cloud |
| **Show in Explorer / Finder** | Available -- opens the file's location on disk | Not available |
| **Open with default app** | Available -- opens the file with your OS's associated application | Not available |
| **Disk usage** | Uses local disk space for the full working copy | No local disk space used |
**When to use a cloned workspace:** Most of the time. If you're actively developing -- writing code, editing assets in a game engine, or using any local tools -- you need a cloned workspace so those tools can access the files on disk.
**When to use a non-cloned workspace:** When you only need to browse files, review changes, or manage branches without editing locally. This is useful for lightweight access from a machine where you don't want to download the full project, or for managing multiple workspaces without duplicating large repositories on disk.
You can clone a non-cloned workspace at any time -- see [Cloning a workspace locally](#cloning-a-workspace-locally-desktop-only) below.
## Creating a new workspace
In the Desktop App:
Open the workspace selector at the top-right of the repo view.
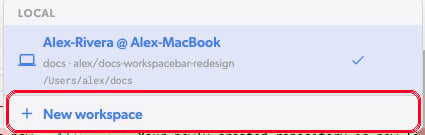 This opens the **Create New Workspace** dialog.
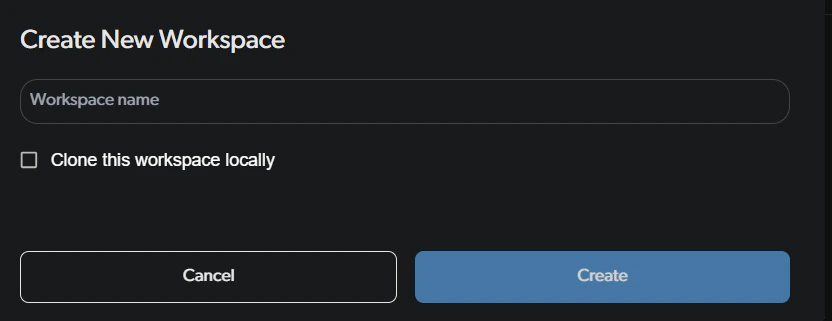 Give your workspace a descriptive name. This is required.
In the desktop app, you can also check the **Clone this workspace locally** option to immediately create a local copy. If you choose to clone, you'll need to pick a folder name and a directory on your machine.
The workspace is created from the repository's default branch. Once it's ready, you'll be navigated to the new workspace automatically.
For CLI usage, see [clone command](/cmd-ref/clone).
## Working from multiple computers
You can work on the same project from several machines -- a desktop and a laptop, for example. Set up a separate workspace on each machine rather than sharing one.
Your machines stay in sync through commits. **Uncommitted local changes stay on the machine where they were saved** -- they are not uploaded to the cloud or visible from any other computer until you commit them. Once committed, every workspace tracking that branch picks them up automatically. To move *uncommitted* work between machines without committing, use [Shelves](/basic/shelves), which are stored in the cloud and available from any workspace on the same repository.
Don't share a single workspace between machines via a cloud-synced folder (Dropbox, OneDrive, iCloud, Google Drive), a network drive, or by copying the `.diversion` directory. Each machine's agent will fight over the workspace's state, which can cause files to be deleted, sync loops, or repeated `dv reset` recoveries.
### Set up a second machine
Sign in with the same account you use on your primary machine.
Follow the [Creating a new workspace](#creating-a-new-workspace) steps and clone it locally. Give it a name that identifies the machine (e.g., `main-laptop`) so you can tell your workspaces apart.
Your new workspace syncs automatically. See [Moving work between your machines](#moving-work-between-your-machines) below for how changes travel from one machine to the other.
### Moving work between your machines
Work travels between your machines through commits:
* **Commit on the machine you're working on.** Only committed changes upload to the cloud, and only while sync is active -- so commit your work (`dv commit -a -m "message"` or the desktop app) and make sure sync isn't paused.
* **Find the changes on the branch they were committed to.** Each commit lands on a branch, and a workspace shows only the commits on the branch it's currently on. To see changes you made on another machine, open the **branch selector** in the desktop app (or run `dv checkout `) and switch to the branch they were committed to.
* **Let the workspace update.** With [auto-update](/concepts/syncing#workspace-automatic-update) on, the workspace pulls new commits automatically -- just like a teammate's workspace would. With it off, the sync status shows **Updates available** -- click it, or run `dv update`.
* **Selective Sync decides what lands on disk.** A folder left unchecked under **Settings -> Selective Sync** won't download locally even when its files are committed. See [Selective Sync](/advanced/selective-sync).
## Workspaces on external storage
You can keep a cloned workspace on a USB drive, external SSD, or other detachable drive that mounts as a regular local disk. This lets you carry a workspace between machines without re-cloning, as long as each machine has Diversion installed and you're signed in with the same account.
When cloning, pick a folder on the external drive as the local location.
With the drive connected and the Diversion agent running, the workspace syncs normally.
If the workspace doesn't appear after you plug the drive back in -- or after you connect it to a different machine -- use [Attach workspace](#attaching-a-workspace-desktop-only) to point Diversion at the workspace folder on the drive.
## Renaming a workspace
Click your avatar and select **Your organizations**, then click **Repositories** in the left sidebar and **Workspaces** in the repository column. Make sure the correct repository is selected in the picker at the top of the column. Find the workspace, click the actions menu at the end of its row, and select **Rename**.
Give your workspace a descriptive name. This is required.
In the desktop app, you can also check the **Clone this workspace locally** option to immediately create a local copy. If you choose to clone, you'll need to pick a folder name and a directory on your machine.
The workspace is created from the repository's default branch. Once it's ready, you'll be navigated to the new workspace automatically.
For CLI usage, see [clone command](/cmd-ref/clone).
## Working from multiple computers
You can work on the same project from several machines -- a desktop and a laptop, for example. Set up a separate workspace on each machine rather than sharing one.
Your machines stay in sync through commits. **Uncommitted local changes stay on the machine where they were saved** -- they are not uploaded to the cloud or visible from any other computer until you commit them. Once committed, every workspace tracking that branch picks them up automatically. To move *uncommitted* work between machines without committing, use [Shelves](/basic/shelves), which are stored in the cloud and available from any workspace on the same repository.
Don't share a single workspace between machines via a cloud-synced folder (Dropbox, OneDrive, iCloud, Google Drive), a network drive, or by copying the `.diversion` directory. Each machine's agent will fight over the workspace's state, which can cause files to be deleted, sync loops, or repeated `dv reset` recoveries.
### Set up a second machine
Sign in with the same account you use on your primary machine.
Follow the [Creating a new workspace](#creating-a-new-workspace) steps and clone it locally. Give it a name that identifies the machine (e.g., `main-laptop`) so you can tell your workspaces apart.
Your new workspace syncs automatically. See [Moving work between your machines](#moving-work-between-your-machines) below for how changes travel from one machine to the other.
### Moving work between your machines
Work travels between your machines through commits:
* **Commit on the machine you're working on.** Only committed changes upload to the cloud, and only while sync is active -- so commit your work (`dv commit -a -m "message"` or the desktop app) and make sure sync isn't paused.
* **Find the changes on the branch they were committed to.** Each commit lands on a branch, and a workspace shows only the commits on the branch it's currently on. To see changes you made on another machine, open the **branch selector** in the desktop app (or run `dv checkout `) and switch to the branch they were committed to.
* **Let the workspace update.** With [auto-update](/concepts/syncing#workspace-automatic-update) on, the workspace pulls new commits automatically -- just like a teammate's workspace would. With it off, the sync status shows **Updates available** -- click it, or run `dv update`.
* **Selective Sync decides what lands on disk.** A folder left unchecked under **Settings -> Selective Sync** won't download locally even when its files are committed. See [Selective Sync](/advanced/selective-sync).
## Workspaces on external storage
You can keep a cloned workspace on a USB drive, external SSD, or other detachable drive that mounts as a regular local disk. This lets you carry a workspace between machines without re-cloning, as long as each machine has Diversion installed and you're signed in with the same account.
When cloning, pick a folder on the external drive as the local location.
With the drive connected and the Diversion agent running, the workspace syncs normally.
If the workspace doesn't appear after you plug the drive back in -- or after you connect it to a different machine -- use [Attach workspace](#attaching-a-workspace-desktop-only) to point Diversion at the workspace folder on the drive.
## Renaming a workspace
Click your avatar and select **Your organizations**, then click **Repositories** in the left sidebar and **Workspaces** in the repository column. Make sure the correct repository is selected in the picker at the top of the column. Find the workspace, click the actions menu at the end of its row, and select **Rename**.
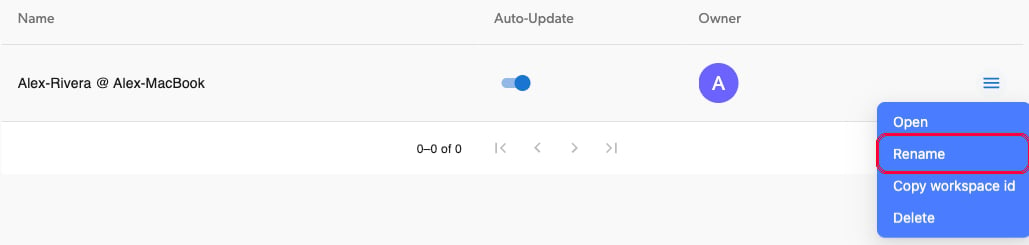 The **Rename Workspace** dialog shows the current name pre-filled. Type in the new name you'd like.
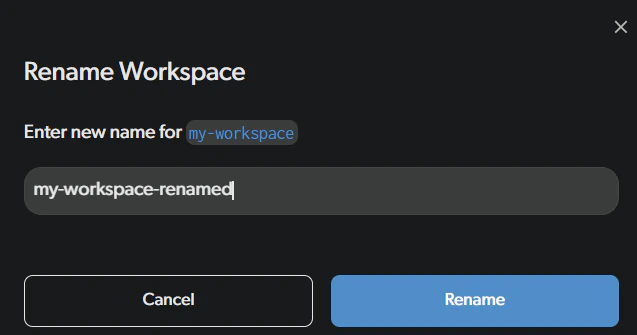 The button is disabled if the name is empty or unchanged, so make sure you've actually typed something different.
You can also rename a workspace from the workspace selector on the repo view: open the selector, click the **...** (more options) menu next to the workspace, and select **Rename**.
For CLI usage, see [workspace command](/cmd-ref/workspace).
## Deleting a workspace
Click your avatar and select **Your organizations**, then click **Repositories** in the left sidebar and **Workspaces** in the repository column. Make sure the correct repository is selected in the picker at the top of the column. Find the workspace, click the actions menu at the end of its row, and select **Delete**.
The button is disabled if the name is empty or unchanged, so make sure you've actually typed something different.
You can also rename a workspace from the workspace selector on the repo view: open the selector, click the **...** (more options) menu next to the workspace, and select **Rename**.
For CLI usage, see [workspace command](/cmd-ref/workspace).
## Deleting a workspace
Click your avatar and select **Your organizations**, then click **Repositories** in the left sidebar and **Workspaces** in the repository column. Make sure the correct repository is selected in the picker at the top of the column. Find the workspace, click the actions menu at the end of its row, and select **Delete**.
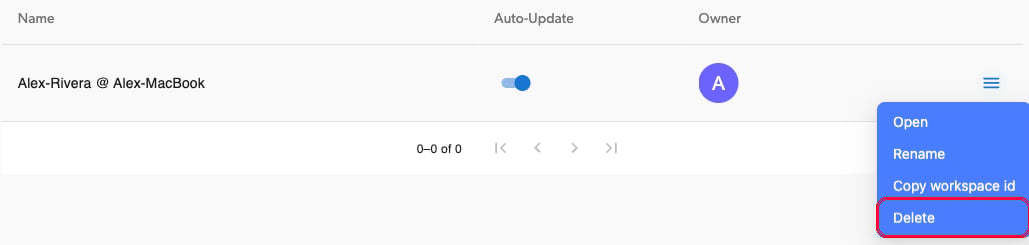 The **Delete Workspace** dialog asks you to confirm. Keep in mind that all uncommitted changes in the workspace will be lost.
If the workspace is cloned locally, you'll see an additional warning that your local files will remain on disk but will no longer sync with Diversion. You'll need to check a confirmation checkbox before proceeding.
The **Delete Workspace** dialog asks you to confirm. Keep in mind that all uncommitted changes in the workspace will be lost.
If the workspace is cloned locally, you'll see an additional warning that your local files will remain on disk but will no longer sync with Diversion. You'll need to check a confirmation checkbox before proceeding.
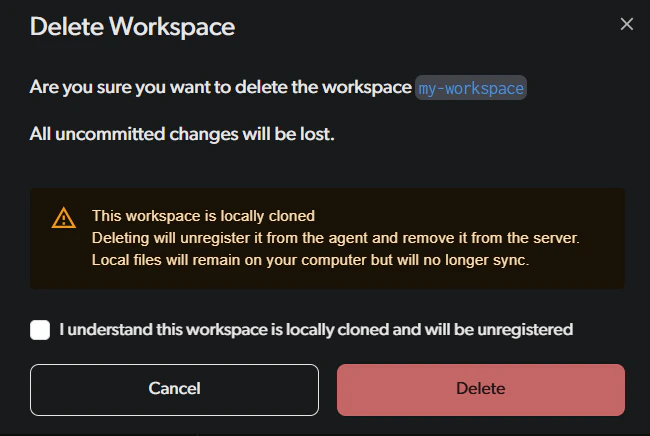 This action is permanent -- the workspace and any uncommitted changes are gone for good.
You can also delete a workspace from the workspace selector on the repo view: open the selector, click the **...** (more options) menu next to the workspace, and select **Delete**.
For CLI usage, see [workspace command](/cmd-ref/workspace).
## Cloning a workspace locally (Desktop only)
If you have a workspace that isn't cloned to your machine yet, you can set up a local synced copy at any time.
Open the workspace selector at the top-right of the repo view. Workspaces that aren't cloned on this machine appear under **Remote**. Select the one you want to clone locally.
This action is permanent -- the workspace and any uncommitted changes are gone for good.
You can also delete a workspace from the workspace selector on the repo view: open the selector, click the **...** (more options) menu next to the workspace, and select **Delete**.
For CLI usage, see [workspace command](/cmd-ref/workspace).
## Cloning a workspace locally (Desktop only)
If you have a workspace that isn't cloned to your machine yet, you can set up a local synced copy at any time.
Open the workspace selector at the top-right of the repo view. Workspaces that aren't cloned on this machine appear under **Remote**. Select the one you want to clone locally.
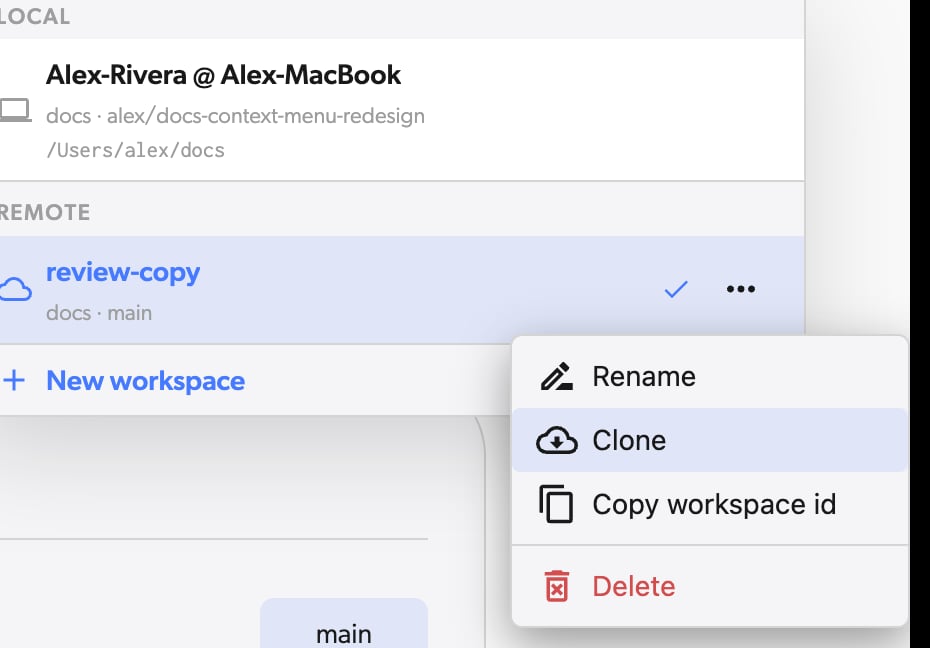 A directory picker opens -- choose where you want the local copy to live on your machine.
Diversion creates a local copy and keeps it synced automatically. Any changes you make locally will be reflected in the cloud workspace, and vice versa.
For CLI usage, see [clone command](/cmd-ref/clone).
## Attaching a workspace (Desktop only)
If you moved a repository to a different path on your machine, or if a workspace is not showing up after detaching a portable drive, you can re-attach it to Diversion.
On the dashboard, click the **Attach workspace** button in the toolbar.
A directory picker opens -- choose where you want the local copy to live on your machine.
Diversion creates a local copy and keeps it synced automatically. Any changes you make locally will be reflected in the cloud workspace, and vice versa.
For CLI usage, see [clone command](/cmd-ref/clone).
## Attaching a workspace (Desktop only)
If you moved a repository to a different path on your machine, or if a workspace is not showing up after detaching a portable drive, you can re-attach it to Diversion.
On the dashboard, click the **Attach workspace** button in the toolbar.
 A directory picker opens. Navigate to the folder containing your workspace (the folder with a `.diversion` directory inside it).
Diversion will look up the workspace on the server and reconnect it. You'll see a confirmation message once the workspace is successfully re-attached.
The workspace folder contains a hidden `.diversion` directory that Diversion uses to track workspace state. This folder must remain in place and should not be modified or deleted. To verify it exists, enable hidden files in your file explorer (on Windows: View > Show > Hidden items; on macOS: press Cmd+Shift+.). If it is missing, or if the workspace was deleted from the server or you don't have permission to access it, you'll see an error message.
## Change the folder name without re-cloning
You can change the folder name without re-cloning by following these steps:
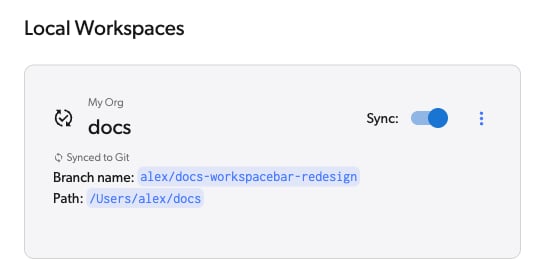
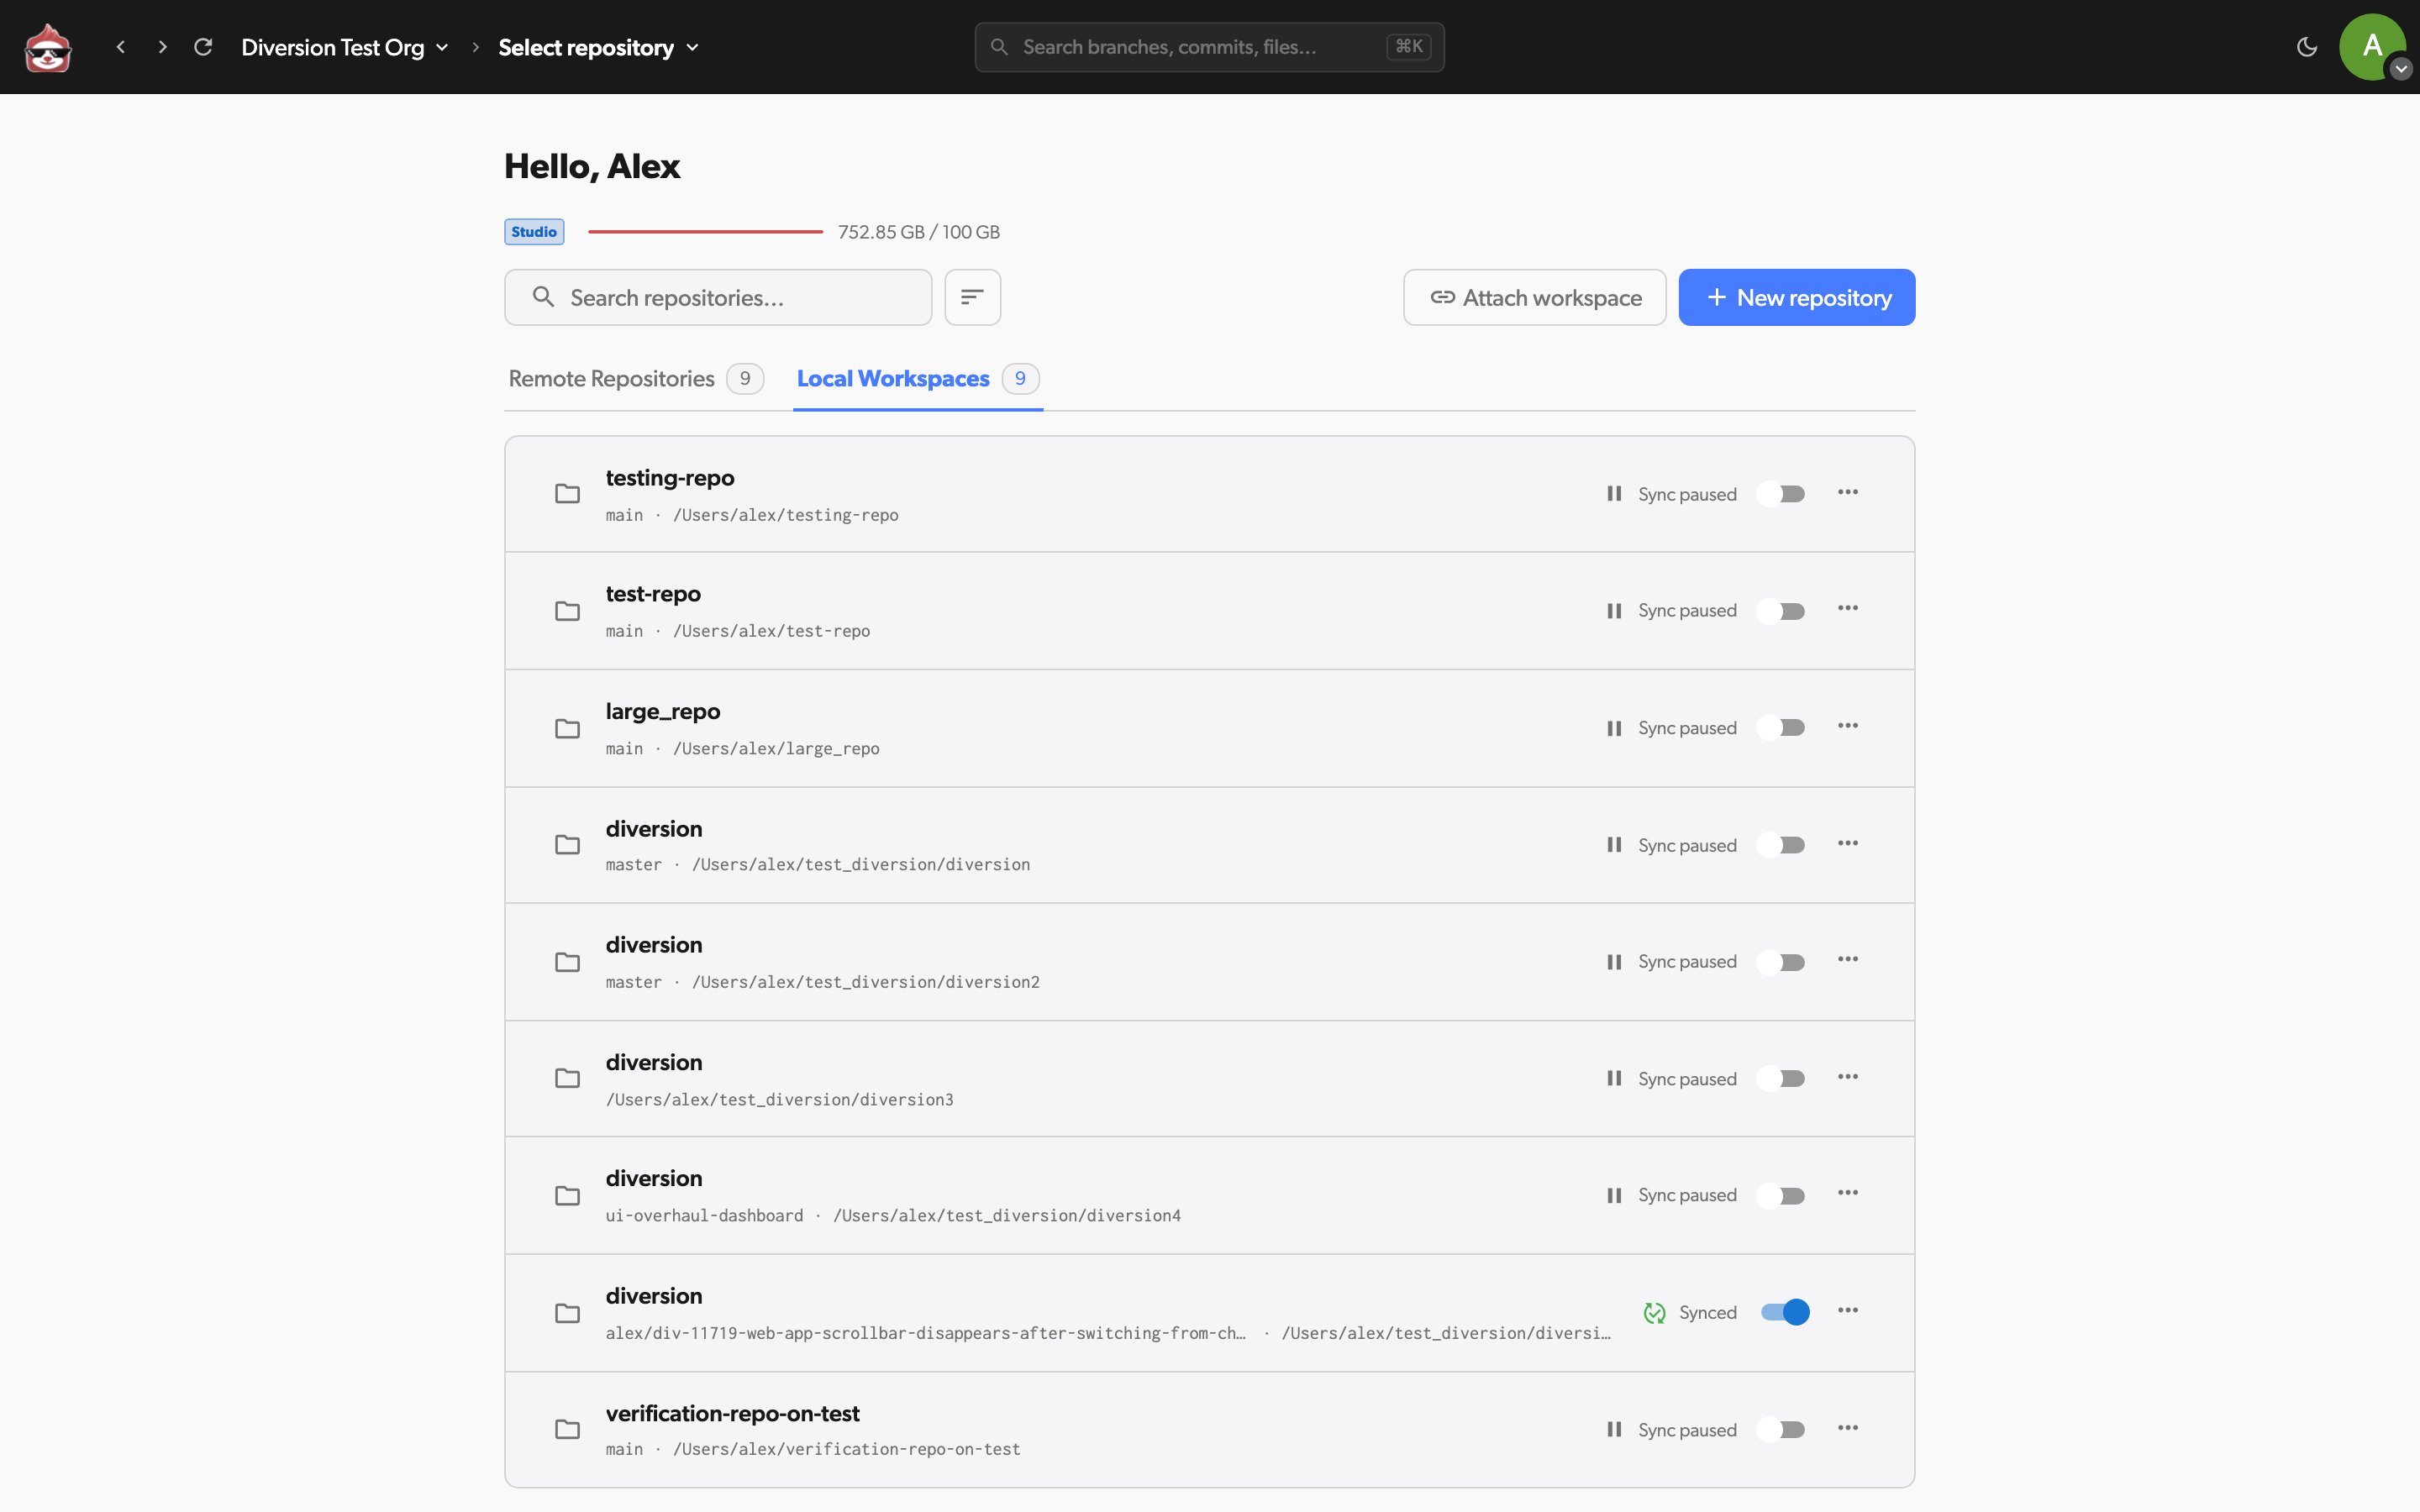
This is the workspace we will use for the example:
A directory picker opens. Navigate to the folder containing your workspace (the folder with a `.diversion` directory inside it).
Diversion will look up the workspace on the server and reconnect it. You'll see a confirmation message once the workspace is successfully re-attached.
The workspace folder contains a hidden `.diversion` directory that Diversion uses to track workspace state. This folder must remain in place and should not be modified or deleted. To verify it exists, enable hidden files in your file explorer (on Windows: View > Show > Hidden items; on macOS: press Cmd+Shift+.). If it is missing, or if the workspace was deleted from the server or you don't have permission to access it, you'll see an error message.
## Change the folder name without re-cloning
You can change the folder name without re-cloning by following these steps:
This is the workspace we will use for the example:
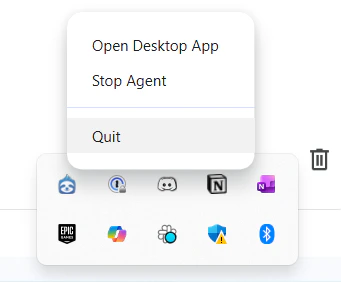
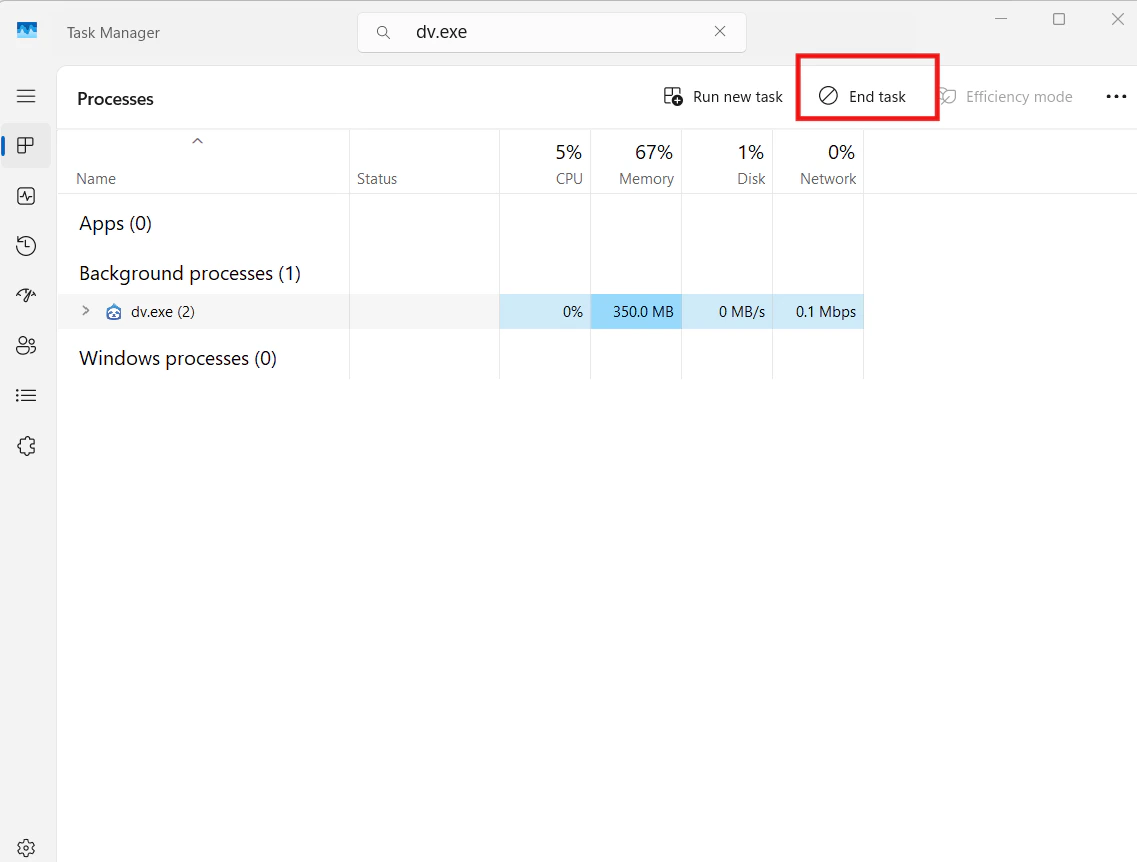
 Right-click the Diversion icon in your system tray and select *Quit*, or end the dv.exe task in the Task Manager.
Option a:
Right-click the Diversion icon in your system tray and select *Quit*, or end the dv.exe task in the Task Manager.
Option a:
 Option b:
 Change the folder name directly in your file explorer.
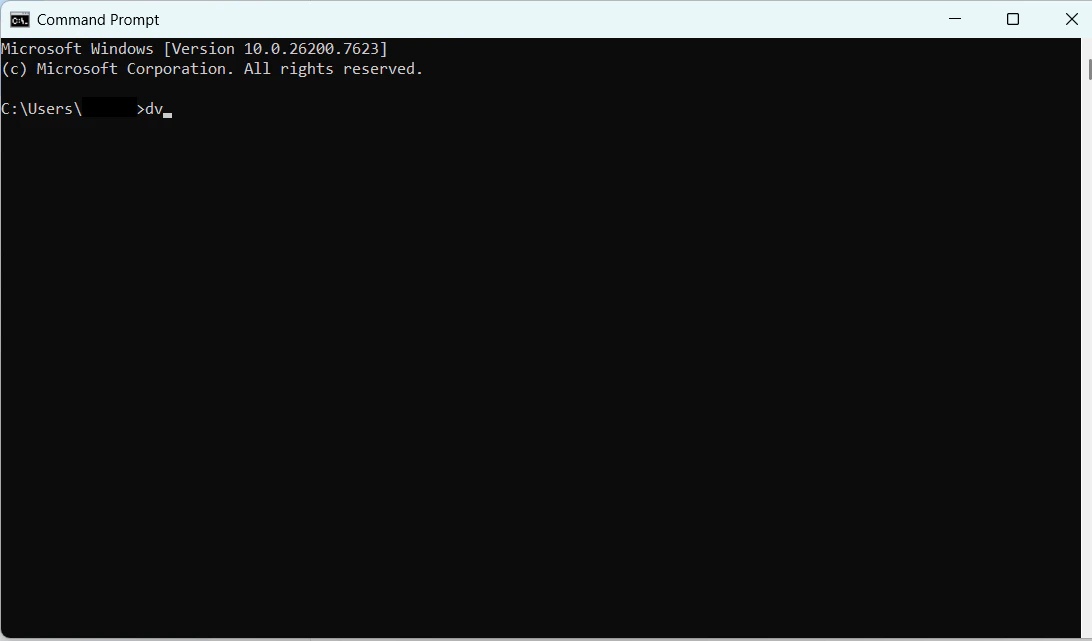
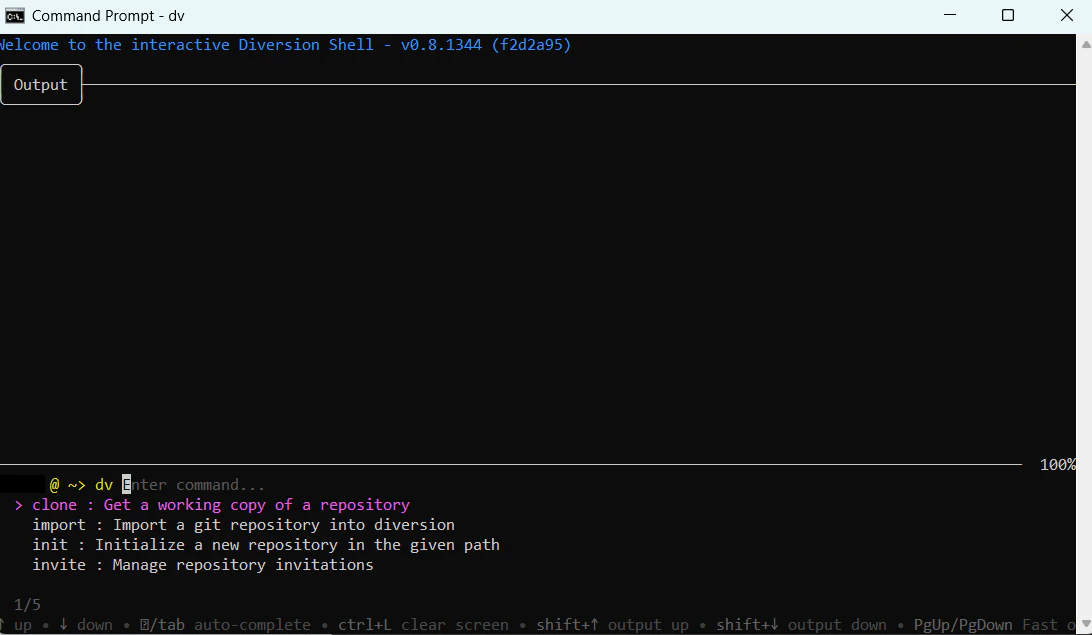
 Run the command dv in your command line and verify it starts successfully. Alternatively, open the desktop app and click "start agent" when prompted.
Option a:
Run the command dv in your command line and verify it starts successfully. Alternatively, open the desktop app and click "start agent" when prompted.
Option a:
 Verify:
 Option b:
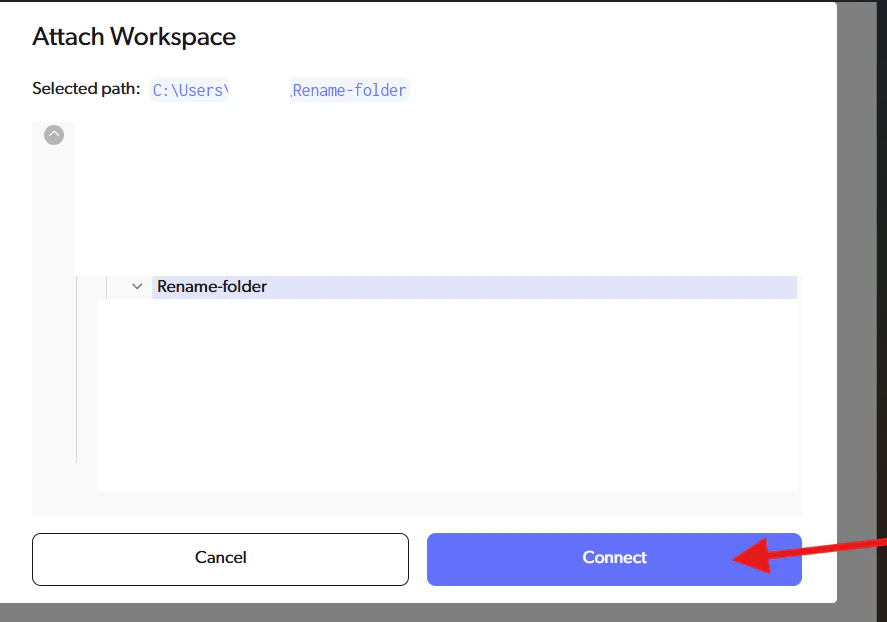
 Since the folder was renamed, the workspace will not be displayed. Click *Attach workspace*.
 Navigate to the path with the new folder name and click *Connect*.
 You should now be able to see your workspace: