> ## Documentation Index
> Fetch the complete documentation index at: https://docs.diversion.dev/llms.txt
> Use this file to discover all available pages before exploring further.
# Get an existing project
> Clone a repo and manage files in your workspace
A team member has [set up Diversion](/basic/start-using-diversion) for your project and [invited you to join](/basic/manage-project-access),
or maybe you want to get your own project that you created on another computer. Let's get you set up:
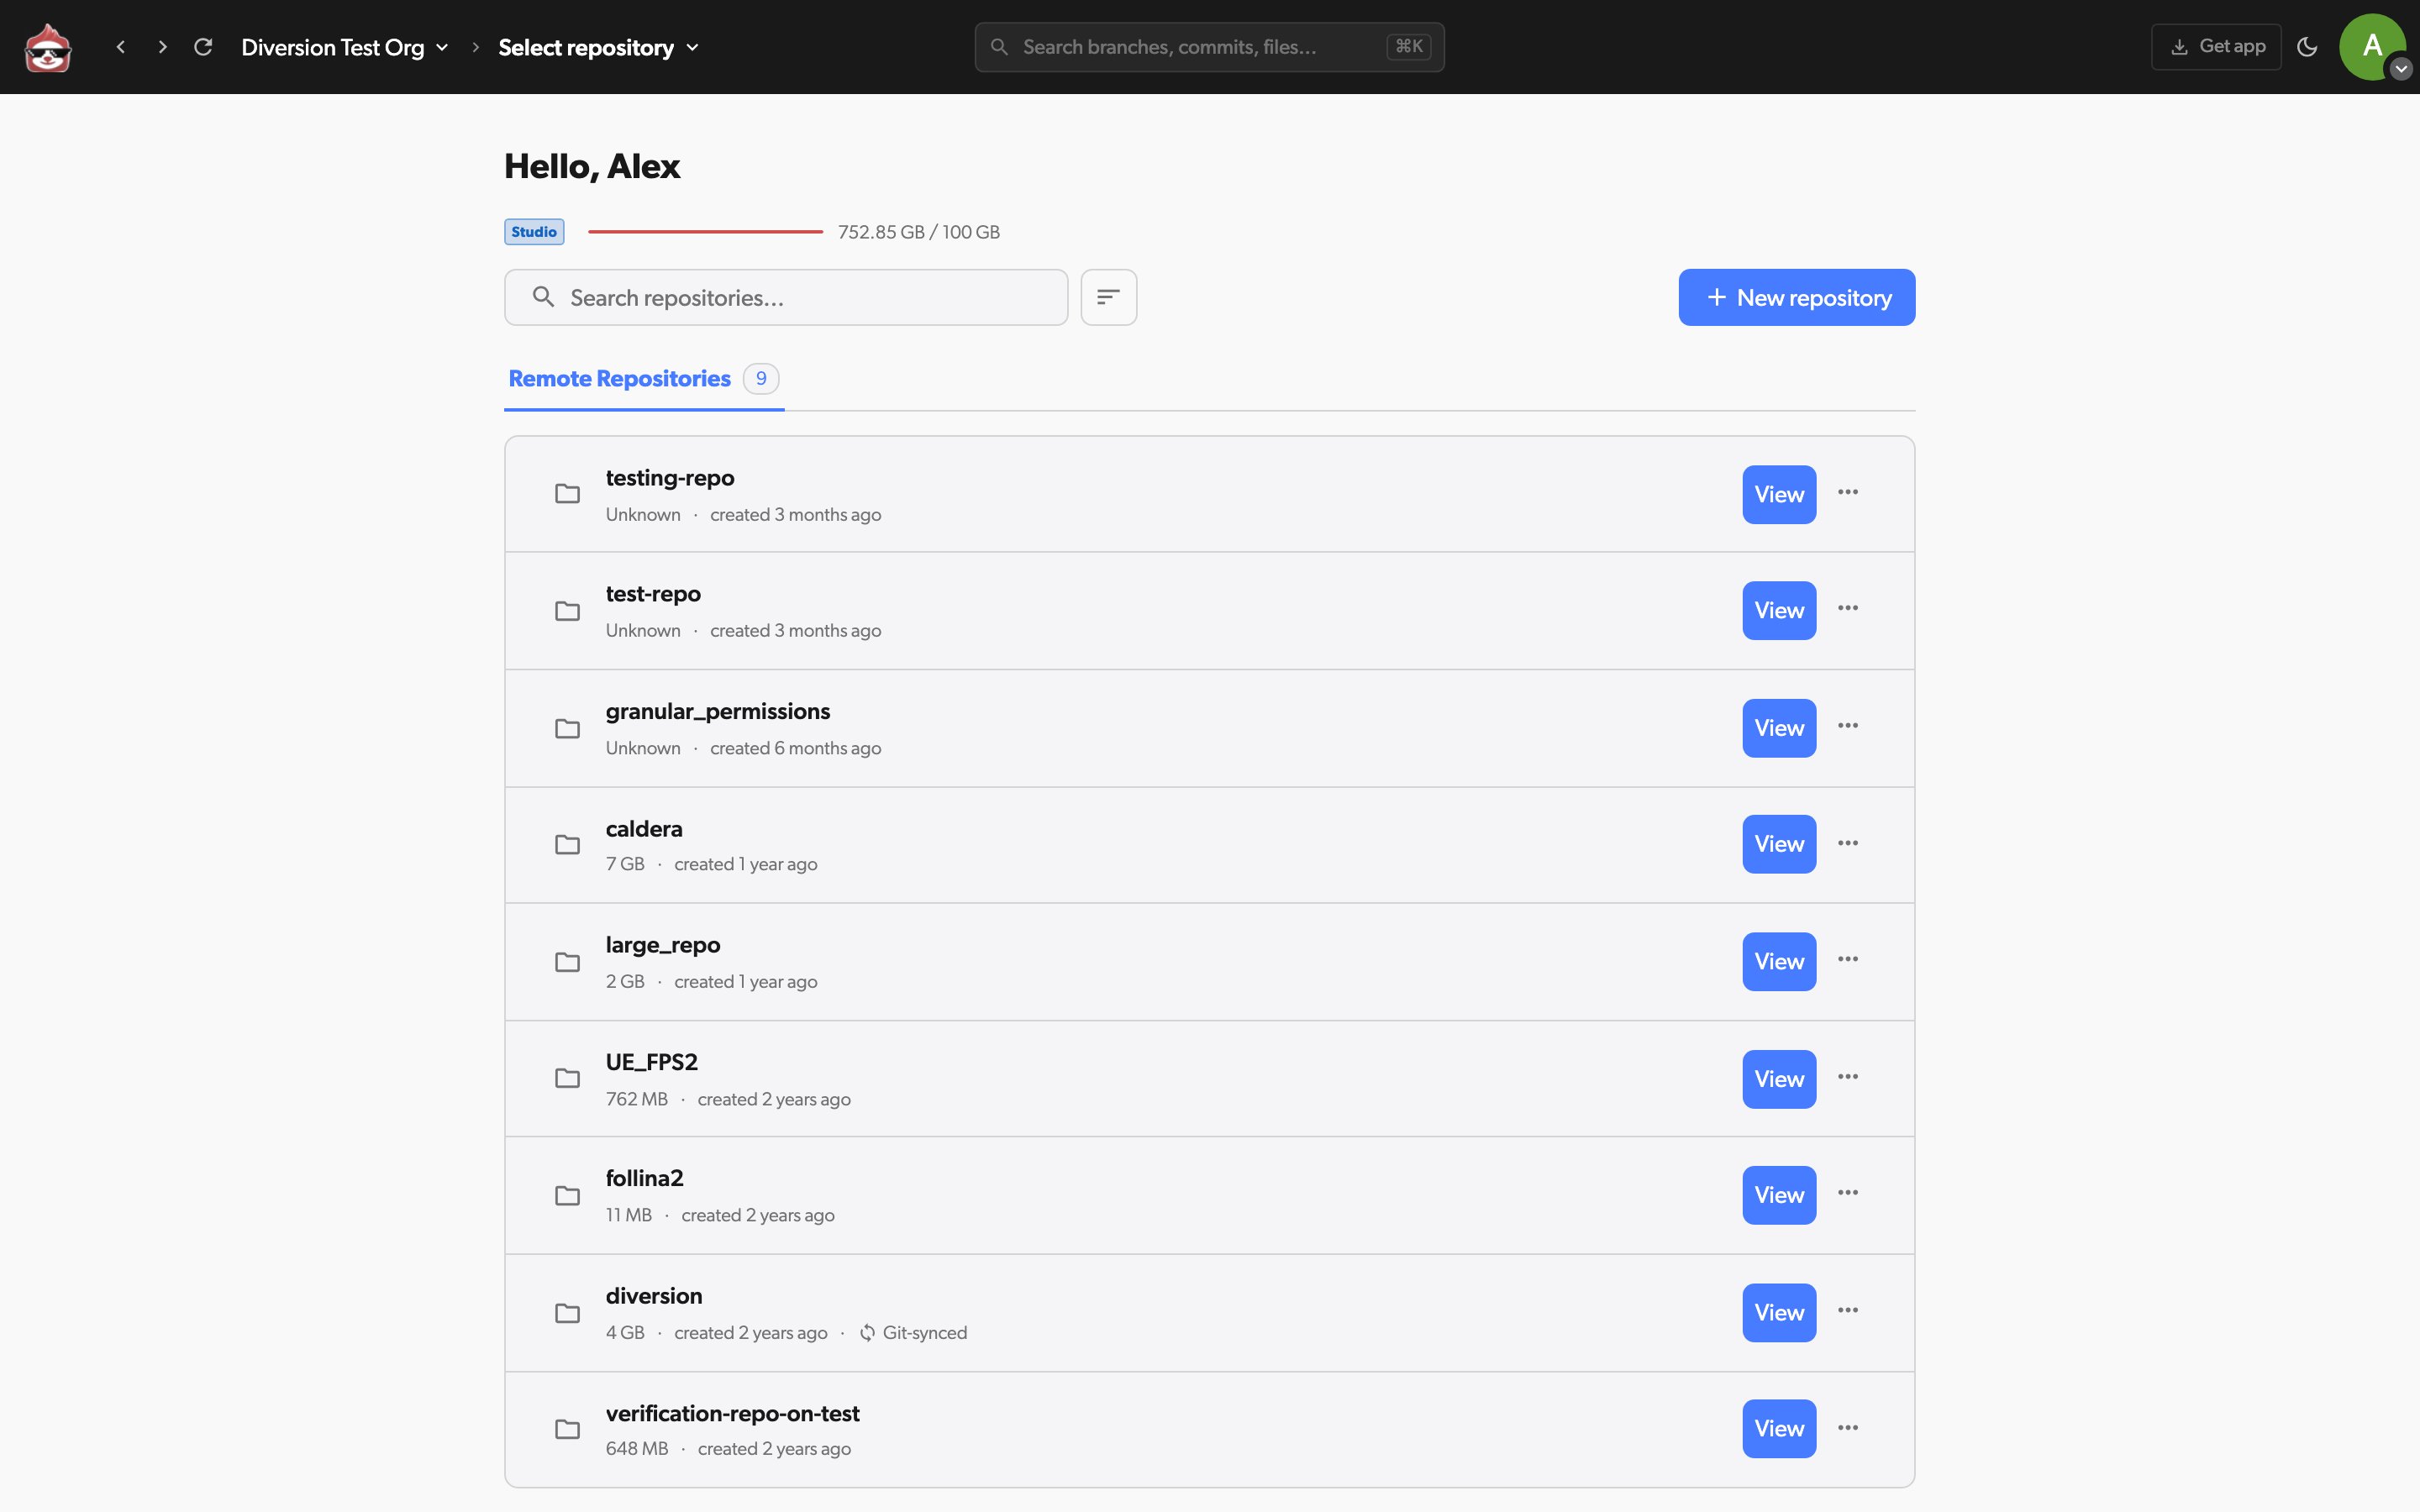 Open the repo's `...` menu and select `Clone repo`.
A new folder with the repo's name will be created in it (here - `DiversionExample`).
Open the repo's `...` menu and select `Clone repo`.
A new folder with the repo's name will be created in it (here - `DiversionExample`).
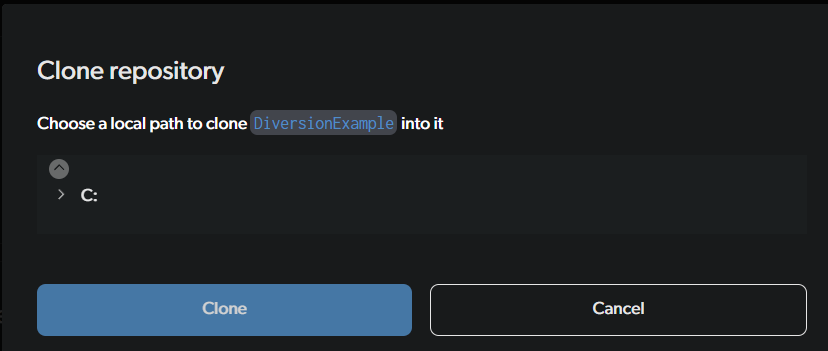 Click `Clone`.
The project should start downloading right away. When it's done, you can open it and start working!
## File operations
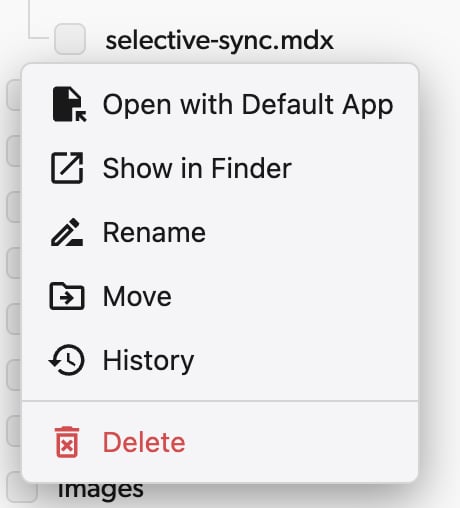
Diversion gives you quick access to common file operations right from the Files view. Right-click any file to see the available actions, or use the file title bar when viewing a file.
Click `Clone`.
The project should start downloading right away. When it's done, you can open it and start working!
## File operations
Diversion gives you quick access to common file operations right from the Files view. Right-click any file to see the available actions, or use the file title bar when viewing a file.
 ### Delete a file
In the Files view, right-click on the file you want to delete and select **Delete**.
You'll see a confirmation dialog asking "Are you sure you want to delete the file '\[file-path]'?" Click the red **Delete** button to confirm, or cancel if you changed your mind.
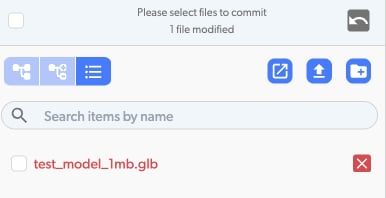
The deleted file will appear in your pending changes in **red** with an **x** icon, indicating it has been deleted.
### Delete a file
In the Files view, right-click on the file you want to delete and select **Delete**.
You'll see a confirmation dialog asking "Are you sure you want to delete the file '\[file-path]'?" Click the red **Delete** button to confirm, or cancel if you changed your mind.
The deleted file will appear in your pending changes in **red** with an **x** icon, indicating it has been deleted.
 For CLI usage, see the [rm command](/cmd-ref/rm).
### Rename a file
In the Files view, right-click on the file you want to rename and select **Rename**.
A dialog appears with the current file name pre-filled. Type the new name for your file.
Click **Rename** to apply the new name.
Don't forget to include the file extension in the new name (e.g. `.txt`, `.cpp`, `.uasset`). Omitting it may cause the file to become unrecognized by your OS or game engine.
File names cannot contain any of these characters: `< > : " / \ | ? *`
The renamed file will appear in your pending changes in **green** with a **double arrow (>>)** icon, indicating a move/rename operation.
For CLI usage, see the [rm command](/cmd-ref/rm).
### Rename a file
In the Files view, right-click on the file you want to rename and select **Rename**.
A dialog appears with the current file name pre-filled. Type the new name for your file.
Click **Rename** to apply the new name.
Don't forget to include the file extension in the new name (e.g. `.txt`, `.cpp`, `.uasset`). Omitting it may cause the file to become unrecognized by your OS or game engine.
File names cannot contain any of these characters: `< > : " / \ | ? *`
The renamed file will appear in your pending changes in **green** with a **double arrow (>>)** icon, indicating a move/rename operation.
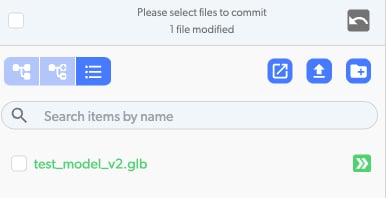 For CLI usage, see the [mv command](/cmd-ref/mv).
### Move a file
In the Files view, right-click on the file you want to move and select **Move**.
A directory picker dialog opens. Browse to the folder where you want to move the file.
Click **Move** to move the file to the selected folder. The file keeps its original name.
The moved file will appear in your pending changes in **green** with a **double arrow (>>)** icon, indicating a move/rename operation.
For CLI usage, see the [mv command](/cmd-ref/mv).
### Move a file
In the Files view, right-click on the file you want to move and select **Move**.
A directory picker dialog opens. Browse to the folder where you want to move the file.
Click **Move** to move the file to the selected folder. The file keeps its original name.
The moved file will appear in your pending changes in **green** with a **double arrow (>>)** icon, indicating a move/rename operation.
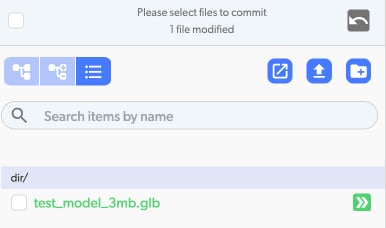 For CLI usage, see the [mv command](/cmd-ref/mv).
### View file history
In the Files view, right-click on the file and select **History**.
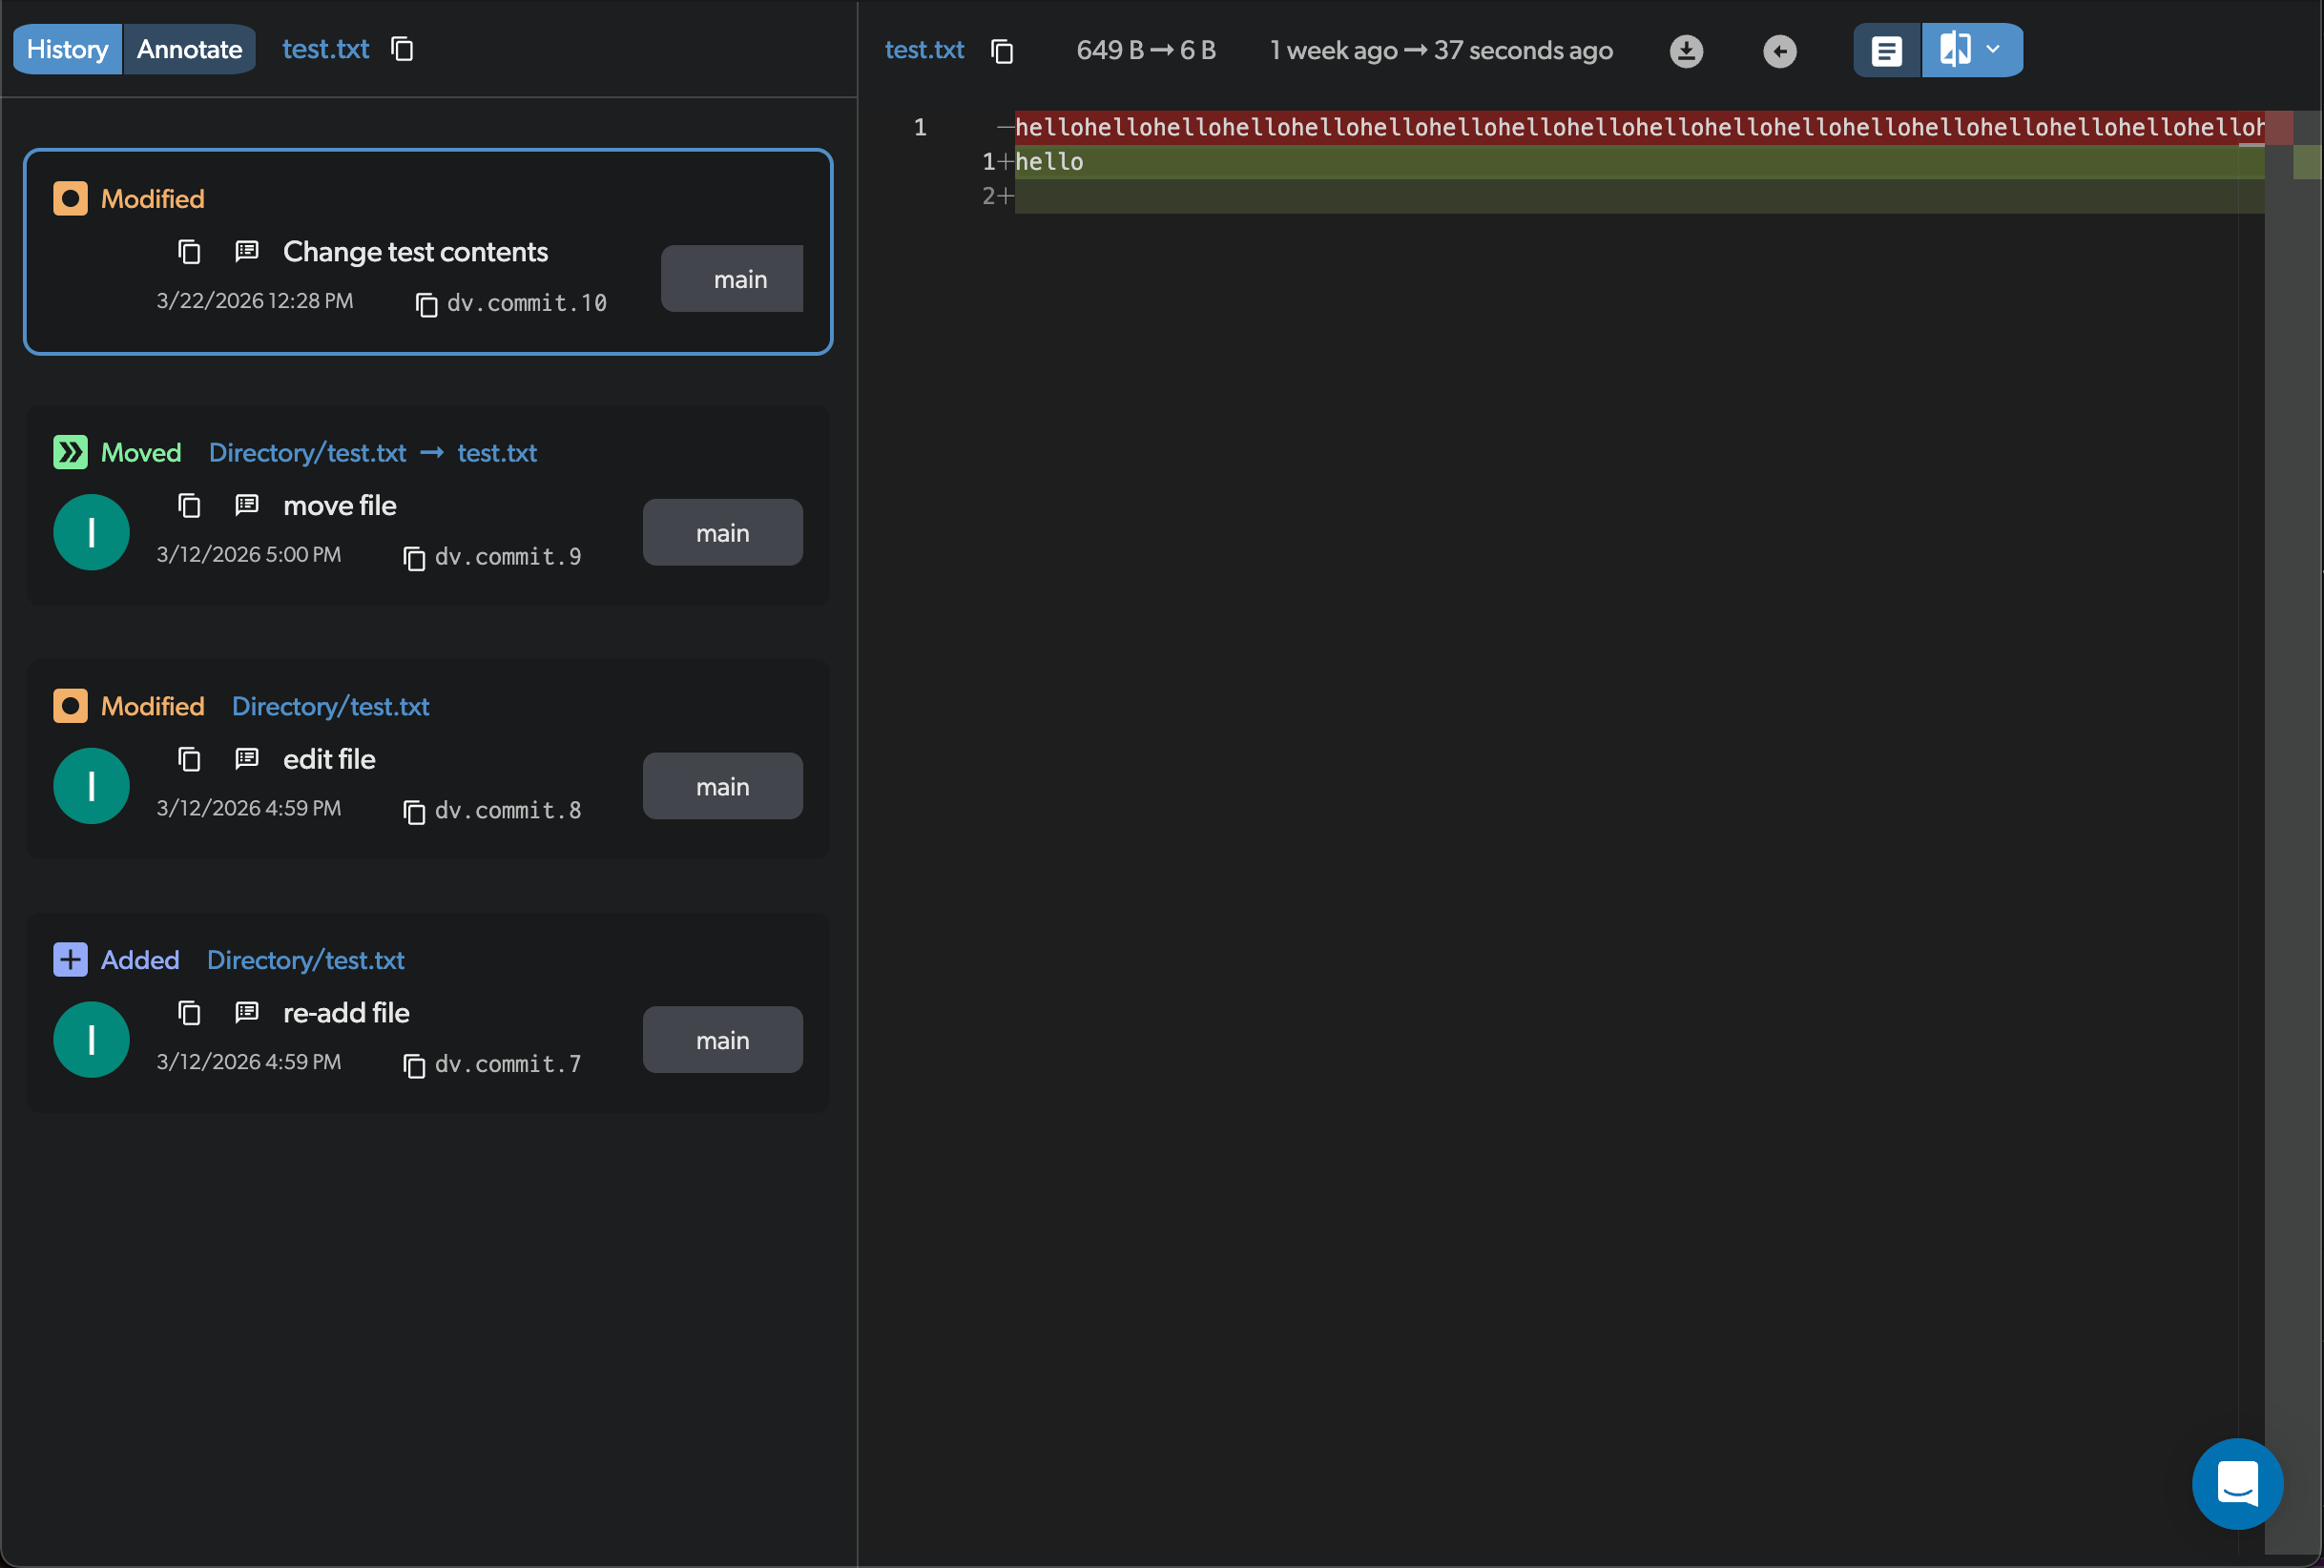
The file history page shows all commits that changed this file, including the operation type (added, modified, moved), commit message, author, and date for each change. Click on any commit to see the diff for that version.
For CLI usage, see the [mv command](/cmd-ref/mv).
### View file history
In the Files view, right-click on the file and select **History**.
The file history page shows all commits that changed this file, including the operation type (added, modified, moved), commit message, author, and date for each change. Click on any commit to see the diff for that version.
 ### Restore a previous version
When viewing a file at a specific commit, you can send that version to your workspace. This replaces the current file contents with the selected version, and the change appears in your pending changes.
You can get there in two ways:
* From the **file history**: right-click a file, select **History**, then click on the commit you want.
* From the **branch history**: open a commit, then click on the file you want to restore.
In the file title bar, click the **Send this version to workspace** button (arrow icon).
### Restore a previous version
When viewing a file at a specific commit, you can send that version to your workspace. This replaces the current file contents with the selected version, and the change appears in your pending changes.
You can get there in two ways:
* From the **file history**: right-click a file, select **History**, then click on the commit you want.
* From the **branch history**: open a commit, then click on the file you want to restore.
In the file title bar, click the **Send this version to workspace** button (arrow icon).
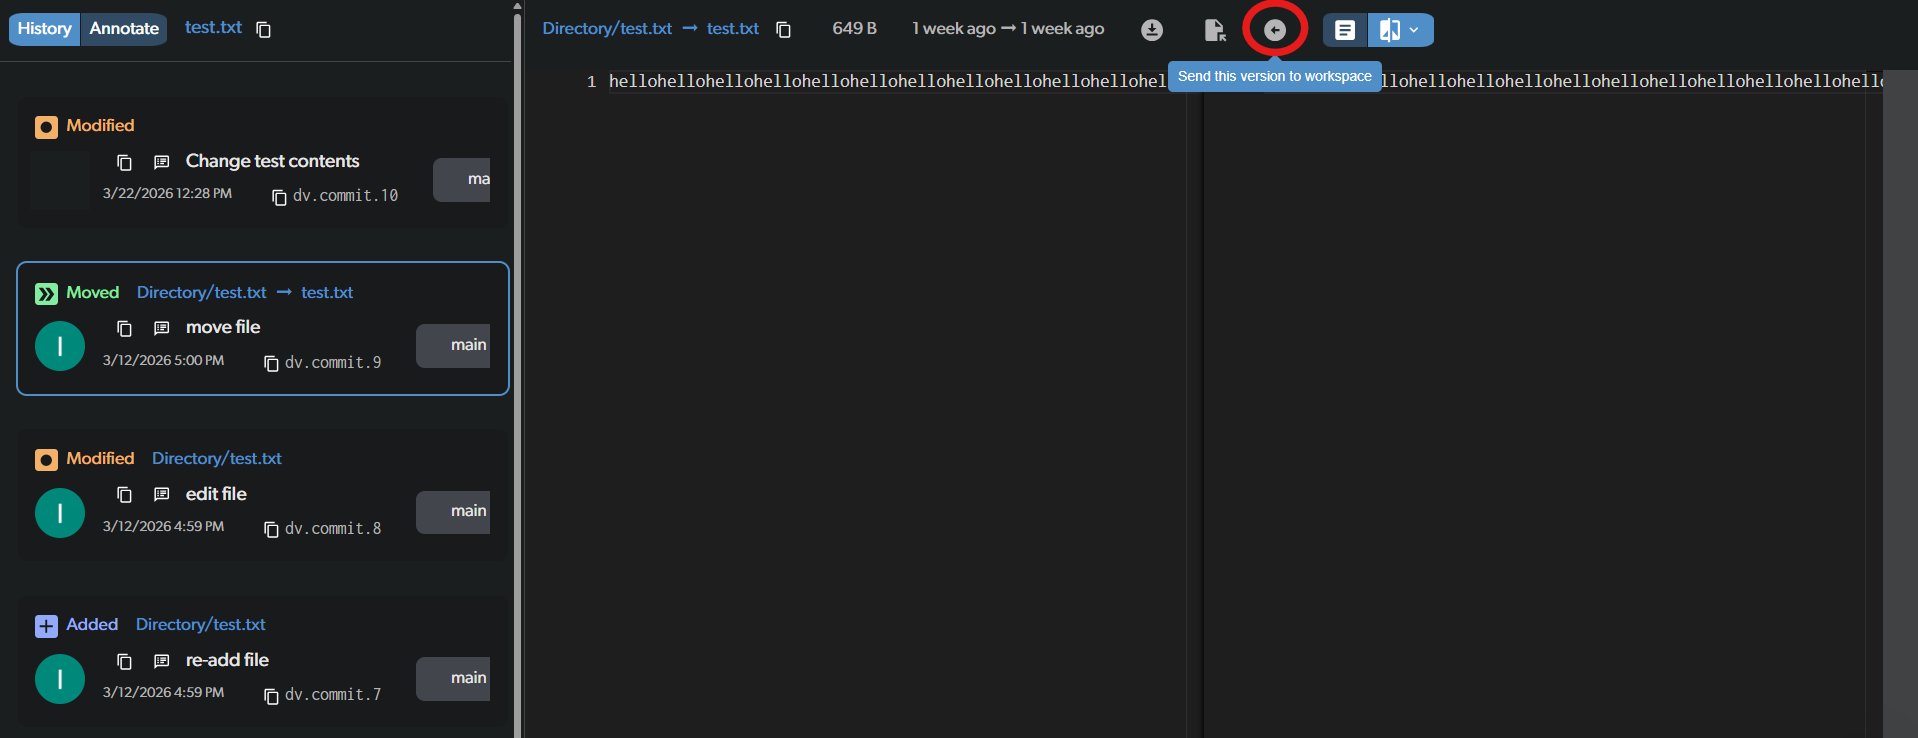 The restored file will appear in your pending changes as a modification. You can review the changes and commit when ready.
For CLI usage, see the [restore command](/cmd-ref/restore).
### Annotate (blame)
The **Annotate** view shows who last modified each line of a file, along with the commit message and date. This is useful for understanding how a file evolved and who is responsible for specific changes.
Annotate is only available for text files. Binary files are not supported.
Right-click a file in the Files view and select **History**.
Click the **Annotate** tab at the top of the file history view.
The restored file will appear in your pending changes as a modification. You can review the changes and commit when ready.
For CLI usage, see the [restore command](/cmd-ref/restore).
### Annotate (blame)
The **Annotate** view shows who last modified each line of a file, along with the commit message and date. This is useful for understanding how a file evolved and who is responsible for specific changes.
Annotate is only available for text files. Binary files are not supported.
Right-click a file in the Files view and select **History**.
Click the **Annotate** tab at the top of the file history view.
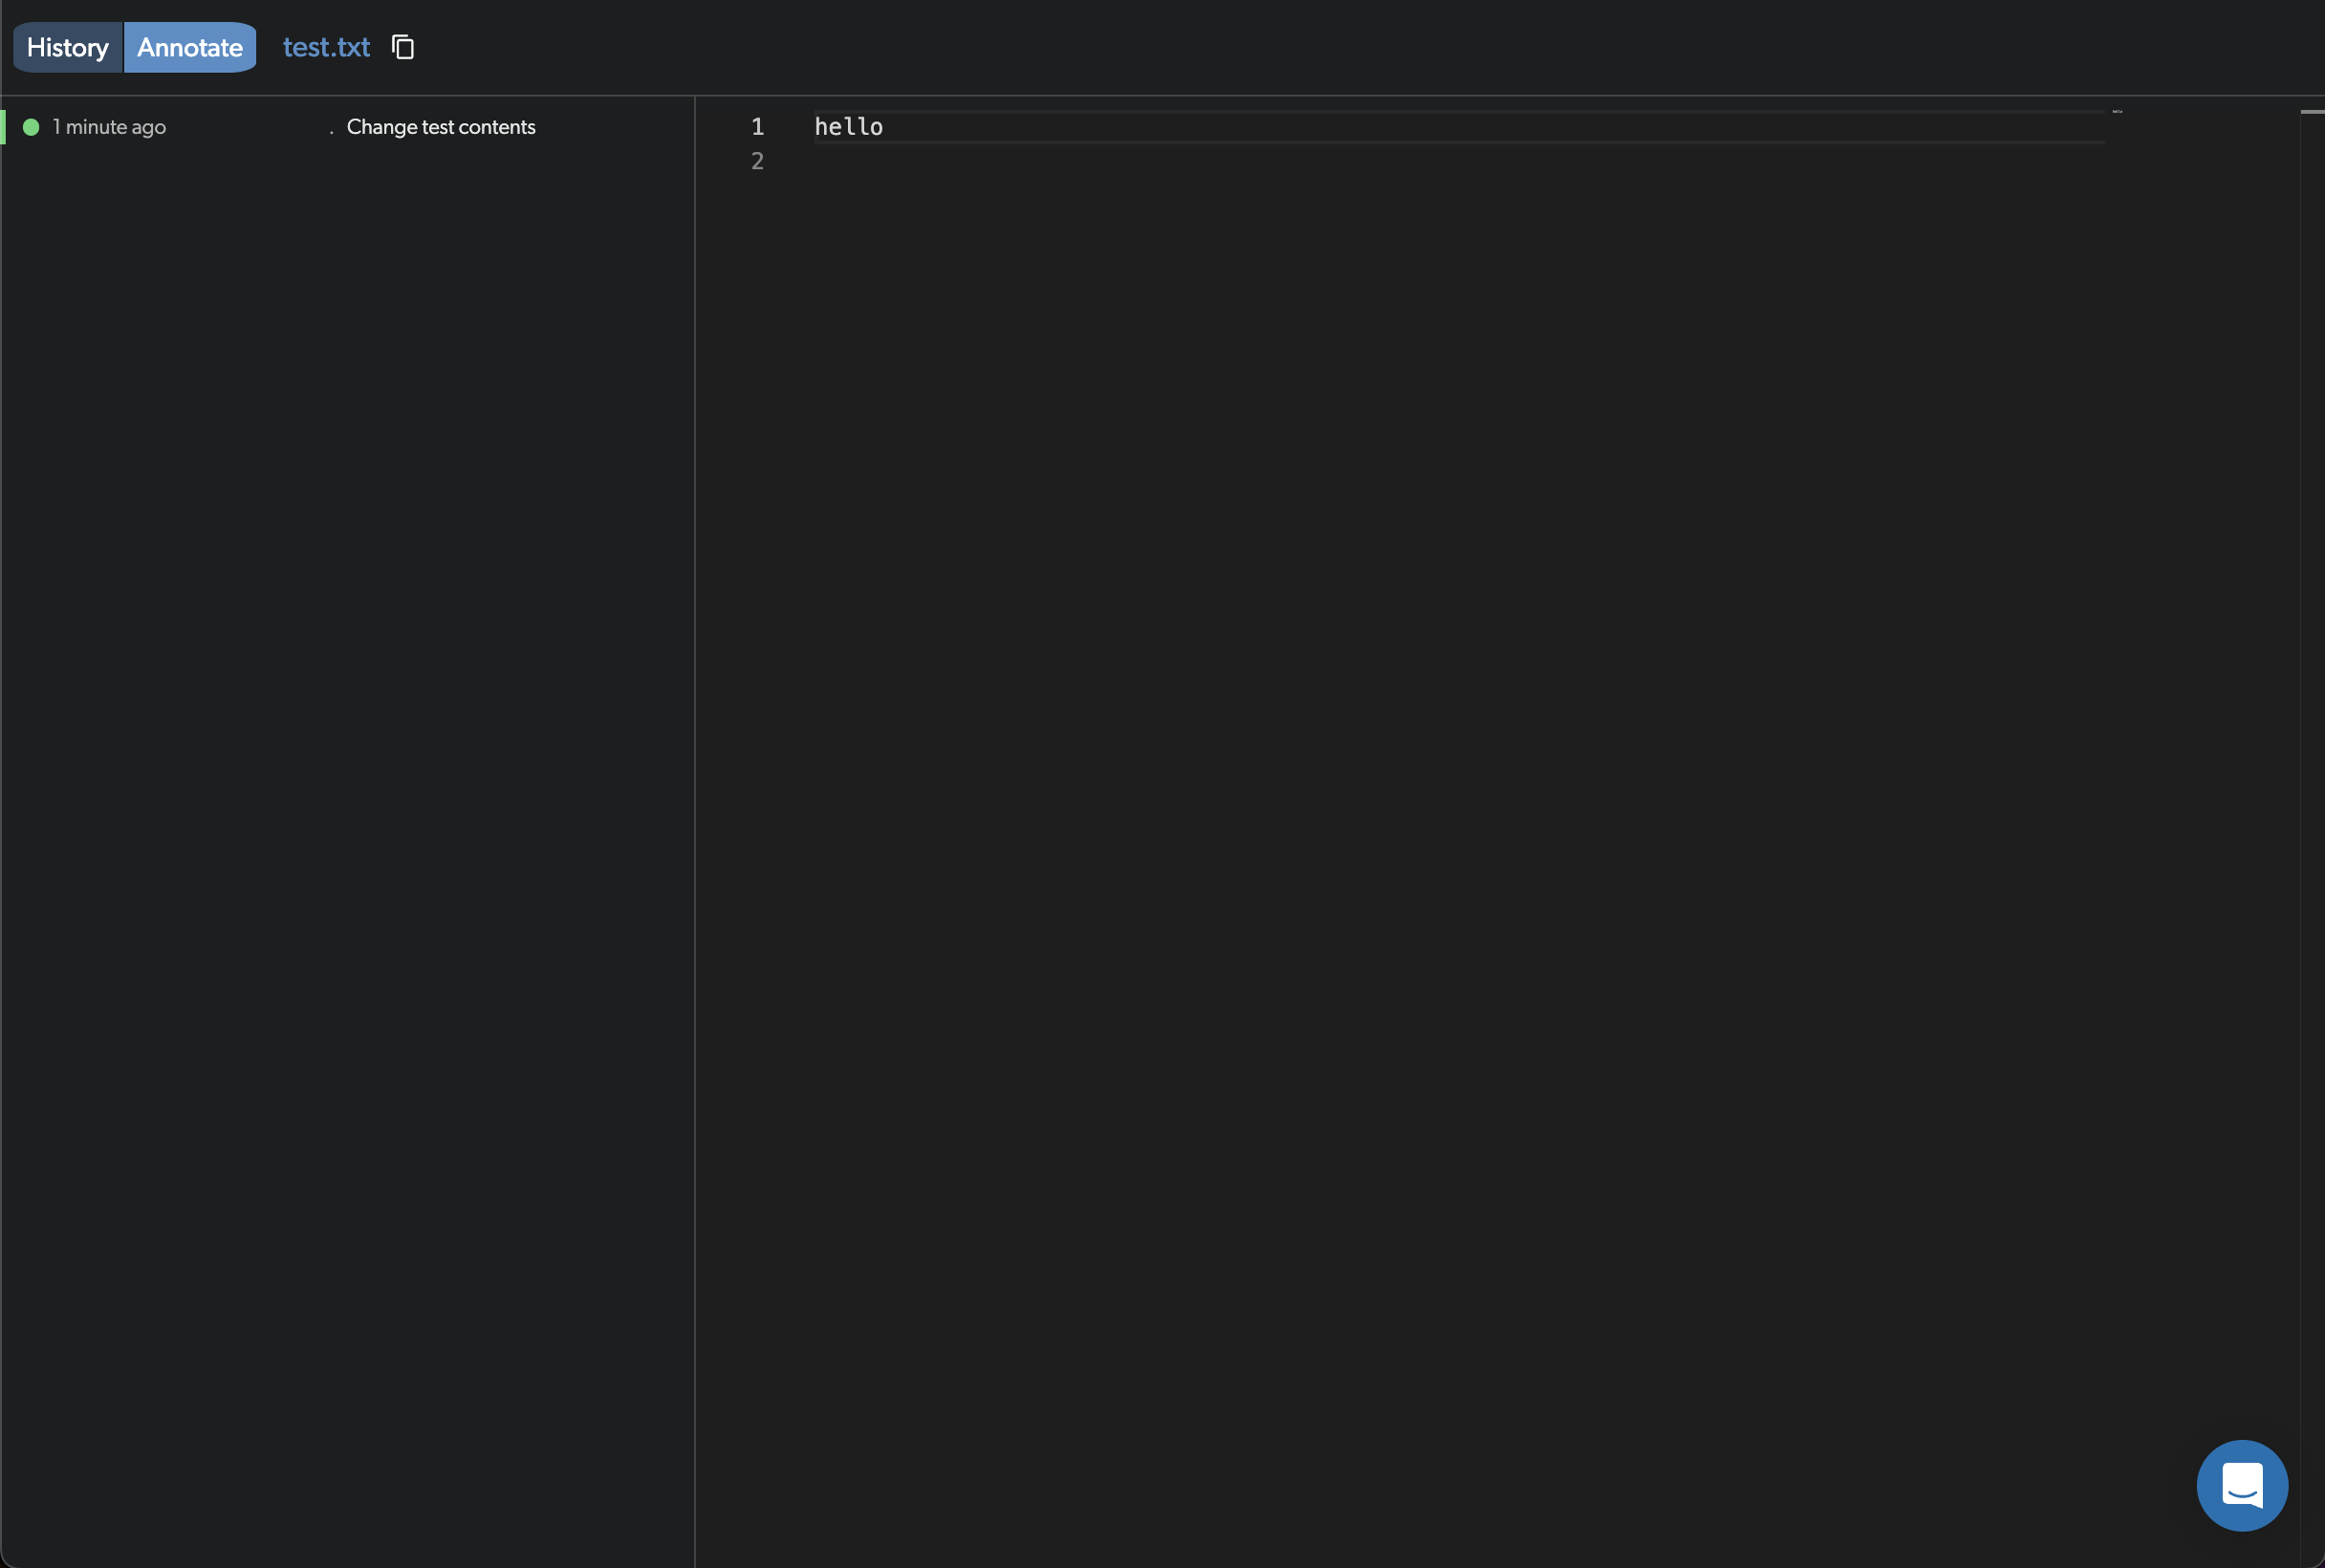 The left panel shows a color-coded dot, how long ago the change was made, the author name, and the commit message for each line range. The right panel shows the file contents with line numbers.
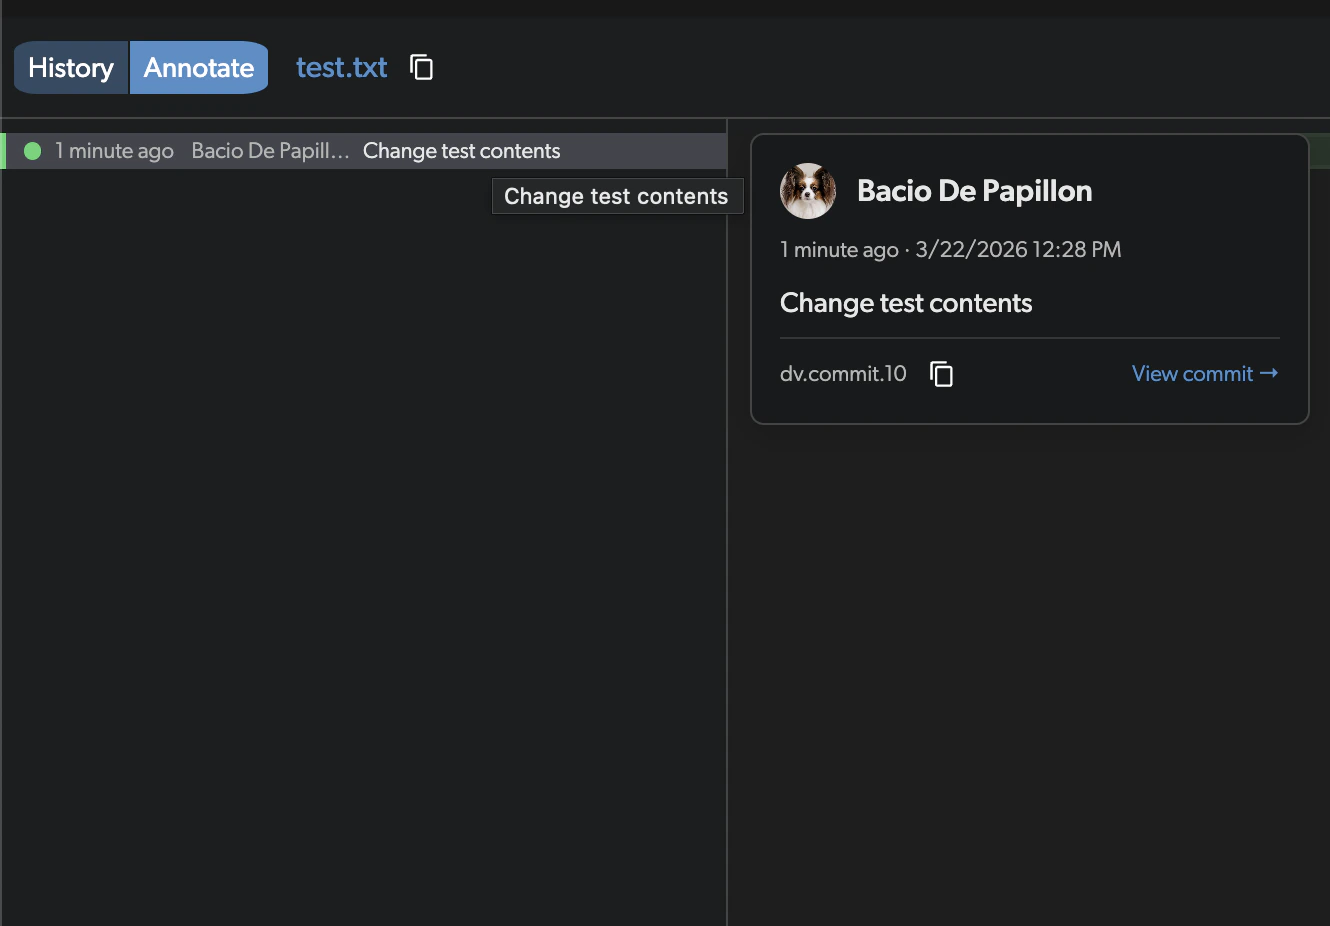
Hover over any entry in the left panel to see full commit details: author avatar and name, date, full commit message, and commit ID. Click **View commit** to navigate to that commit.
The left panel shows a color-coded dot, how long ago the change was made, the author name, and the commit message for each line range. The right panel shows the file contents with line numbers.
Hover over any entry in the left panel to see full commit details: author avatar and name, date, full commit message, and commit ID. Click **View commit** to navigate to that commit.
 For CLI usage, see the [annotate command](/cmd-ref/annotate).
### Download a file
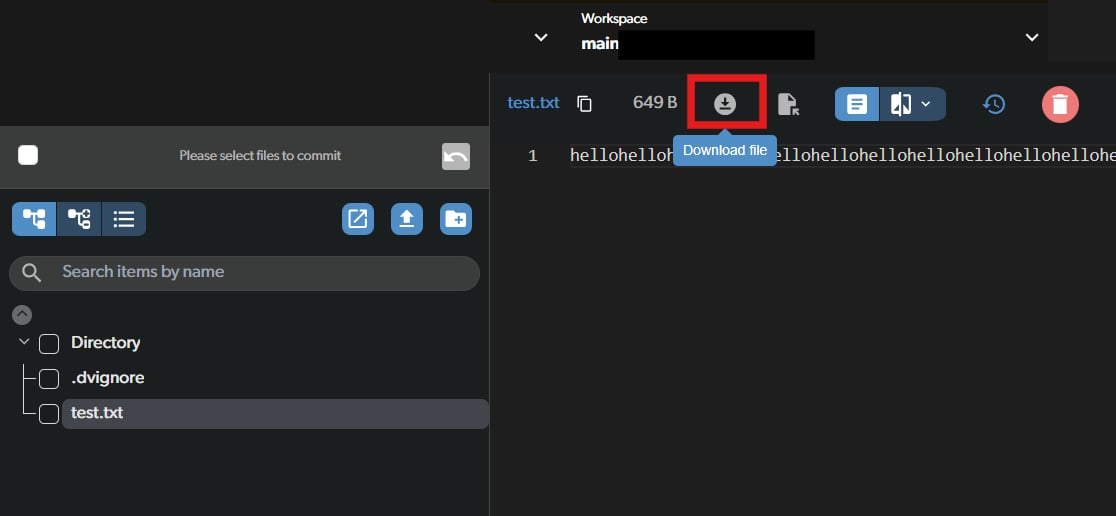
When you click on a file in the workspace or commit view, a download icon button appears in the file title bar. Click it to download the file to your computer.
For CLI usage, see the [annotate command](/cmd-ref/annotate).
### Download a file
When you click on a file in the workspace or commit view, a download icon button appears in the file title bar. Click it to download the file to your computer.
 ### Open in Explorer (Desktop only)
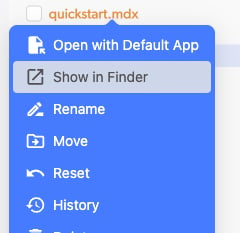
Right-click a file in the Files view and select **Show in Explorer** (Windows) or **Reveal in Finder** (macOS) to open the containing folder in your system file explorer.
### Open in Explorer (Desktop only)
Right-click a file in the Files view and select **Show in Explorer** (Windows) or **Reveal in Finder** (macOS) to open the containing folder in your system file explorer.
 This option is only available for locally cloned workspaces. Make sure the Diversion agent is running.
This is also useful for opening project files directly. For example, you can use **Show in Explorer** to navigate to your Unreal Engine `.uproject` file and open it from there.
### Open with default app (Desktop only)
When viewing a file, click the **Open with default app** icon in the file title bar to open the file with whatever application your OS associates with that file type.
This option is only available for locally cloned workspaces. Make sure the Diversion agent is running.
This is also useful for opening project files directly. For example, you can use **Show in Explorer** to navigate to your Unreal Engine `.uproject` file and open it from there.
### Open with default app (Desktop only)
When viewing a file, click the **Open with default app** icon in the file title bar to open the file with whatever application your OS associates with that file type.
 This option is only available for locally cloned workspaces. Make sure the Diversion agent is running.
You can also use this to open project files directly -- for example, opening a `.uproject` file will launch it in Unreal Engine. Keep in mind that you may need to have previously opened the project with the correct engine version for this to work as expected.
This option is only available for locally cloned workspaces. Make sure the Diversion agent is running.
You can also use this to open project files directly -- for example, opening a `.uproject` file will launch it in Unreal Engine. Keep in mind that you may need to have previously opened the project with the correct engine version for this to work as expected.